
Mid/side (M/S) processing is a mixing and mastering technique that allows you to process the mid and side signals separately. When used correctly, it can make your mix crisper, wider, deeper, and more expansive.
Most of us can grasp the concept of panning signals left and right when mixing and mastering. However, mid-side processing is a whole other story. It still remains a mystery to a lot of people and is underused by others. While you can achieve wideness and stereo depth by using the stereo field to your advantage, mid/side is a handy technique for achieving depth.
Whether you don’t understand this concept, or you’re looking for ways to improve your mix, you might want to read on. Let’s explore what mid-side processing is, why you should use it, and how you can use it.

What is Mid/Side?
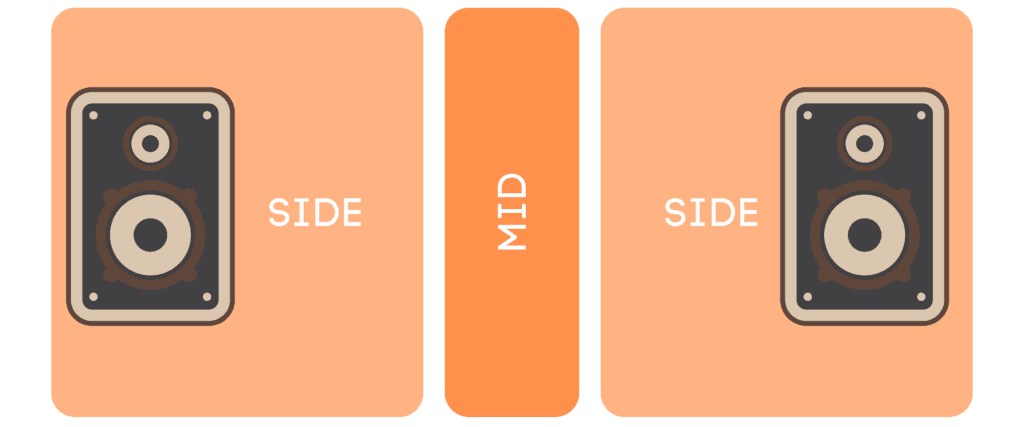
Before diving into mid/side processing, let’s talk a bit about mid and side signals. Stereo sound is typically represented as standard left and right channels. However, there is an alternative way to using two channels of audio to represent stereo information: mid-side (or sum/difference). Whilst both forms involve dividing up your channels, they are not the same.
Mid is the sum of the Left and Right channels. Side, on the contrary, is the difference between the Left and Right channels. So, the mid-channel is the center of a stereo image, whilst the side channel represents the edges of a stereo image.

What is Mid/Side Processing?
Now that you understand mid-side, let’s dive into the concept of mid/side processing. Mid/side processing is a mixing and mastering technique that allows you to process the center and side signals of a stereo track individually. In essence, you are applying processing, e.g. EQ and compression, to the mid and side channels separately. This allows you to further enhance their dissimilarities for a more dynamic sound. Any other process can also be applied to an M/S signal but it is less common.
Mid/side processing enables you to separately modify the center and sides of a stereo channel in contrast to L/R or conventional mono processing, which modifies the entire signal. This doesn’t mean, however, that shouldn’t try mixing in mono or taking advantage of stereo processing.
It might surprise you to hear that this is not a new concept. It was actually first utilized by EMI engineer Alan Blumlein in 1933, who used two microphones to capture wide stereo imagery with a focused center signal. In fact, at the time, the mid-side processing technique was used often for recording live broadcasts for its strong center and stereo compatibility. Nowadays, we often use mid-side processing plugins which convert the stereo track into two signals.
Why Should You Use Mid/Side Processing?
As we’ve already discussed, mid-processing gives you more control of your mix and allows you to create a rich, wide, “fuller” sound. But let’s get into the specifics of its benefits.
By manipulating these two signals, it is possible to create a wider or narrower stereo image. You may also reduce noises or boost certain elements in mastering with M/S equalization, depending on which part of the stereo they are in the mix. Additionally, you can correct imbalances in the stereo field or achieve a particular effect with this technique. There’s a wide variety of different results not possible with normal L/S processing. M/S gives you a lot more flexibility, making it a versatile tool for audio engineers and producers.

Applying mid-side processing with L/S in mind can also be incredibly useful in mastering. By knowing where elements lie in the mix, you can impact certain elements without affecting others. For instance, you can target the side channels to add color and body to your swinging hi-hats. Equally, you could boost the low end to the center-panned bass, and not affect the wide stereo chord pads.
Mid-Side Processing Techniques
Now that you know what mid-side processing is, how it works, and why we use it, let’s move on to some techniques you can try to enhance your mix. These M/S processing techniques aren’t the only way you can achieve greater depth in your mix, but they’re certainly effective.
You can use various plugins to apply mid-side processing. They can either be stock plugins, such as Ableton EQ8, third-party free plugins, such as Voxengo MSED, as well as paid plugins, such as Fab-Filter Pro Q-3.
Level Adjusting
If you’re new to mid-side processing, you may want to keep it simple with basic level adjusting. That is, play around with the relative levels of the mid and side channels. This can bring the focus towards the center or create excitement on the sides. Whether you’re boosting or reducing the separate channels is entirely down to your track and what you’re trying to achieve. You can apply this in entire mixes or single-instrument stereo tracks. There’re many stereo imager plugins that use M/S to achieve this in a simple way.
Mid/Side EQ
Being able to properly EQ a mix is potentially the most important mixing skill. It’s no different when it comes to mid-side processing, with EQ being the most popular technique. This allows you to isolate certain frequency ranges in your mid or side signals, which can be referred to as frequency-based width manipulation. One way you can use mid-side EQ is by cutting out muddiness in the center, which frees up space in your mix. Additionally, by boosting the high-end on the sides, you can achieve a wider mix by luring the listener to the edge of the mix.
Mid/Side EQ can be used in both mixing and mastering. For example, in mixing you can EQ a stereo recording of an acoustic guitar using M/S techniques to reduce the low and mid frequencies on the center of the stereo, to create a wider guitar and allow some space in the center for the voice, snare and bass guitar, without affecting too much the overall sound and feel of the guitar.
In mastering, you can use Mid/Side EQ to adjust levels that you otherwise would not be able to isolate. If you want to raise the main vocal, you can increase the gain on the Mid signal from around 300hz to 1Khz and then reduce the Side signal on those frequencies, to make sure the overall feel of the song is not affected. This is not an ideal solution for big changes — revise your mix! — but it can do the trick for subtle changes.

Mid/Side Reverbs
Applying mid-side reverb will give you greater control over your reverb. By splitting your mid and side signals into separate channels you’ll have greater flexibility when it comes to getting the reverb ambiance you’re after. To achieve this, you can apply different types of reverb, and amounts, on the mid and sides. Usually, it’s better to add more reverb to the sides than the center, to increase the sense of space and width.
Mid/Side Compression
Isolating the mid and side channels for selective compression is another clever technique to improve your mix. It’s also the second most common after EQ. You can use Mid/Side compression in both mixing and mastering. For example, when processing drums, you can apply stronger and faster compression in the sides than the centre, creating a sonic interest in the drums without being too distracting. You can use it together with parallel compression or as an alternative effect to get more punch in your tracks. If you’d like to learn more about compression, read about other ways you can use compression in your mix.
In mastering, you can also apply the same principle. You can also play around with different compression levels using multiband compression to create interesting effects. Most of the time it is used as a creative tool, more than a solution to fix an issue.

Conclusion
Hopefully, you now have a better understanding of mid/side processing, why, and how you should apply it using various techniques. It’s worth noting that you could be ruining your track if you use it excessively or don’t fully understand how it’s impacting your stereo image.
We advise you to take it slow while you start getting a grasp of the principles behind mid-side imaging. This will ensure you’re leveling up your mixing and mastering, rather than negatively impacting it. Mid/side processing won’t magically fix your mix — see it more as the icing on the cake.
Now you know how much of a powerful tool it can be, get out there and start using m/s! For more mixing tips, check out 5 tips for a better mix.
About the Author

Joe Curtis
Digital Marketer and Content WriterJoe Curtis is a passioned Digital Marketer from the UK. In his time on MasteringBOX he has created amazing content about Audio and Music Production.
Leave a comment
Log in to comment