Dolby Atmos and other spatial audio formats allow music creators to position sounds around and above the listener in three-dimensional space. Unlike traditional stereo, which restricts audio to left and right channels, Atmos offers an immersive environment that surrounds the audience with a lifelike sonic experience. This new approach changes how we think about arranging, panning, and delivering music. While the technology has roots in cinema, it has become increasingly popular for music releases on streaming services, allowing fans to hear songs in a way that feels more detailed, spacious, and interactive.
Mixing in Dolby Atmos can seem intimidating at first, especially if you imagine you need a massive 7.1.4 speaker system or a dedicated studio. Fortunately, there are various workflows and configurations to accommodate many different budgets and levels of expertise. In this article, we’ll explore the essentials of Atmos and spatial audio mixing, highlighting setup requirements, 3D object panning techniques, best practices for translation to other formats, budget-friendly solutions, and mastering considerations for platforms like Apple Music and Tidal. We will begin with an overview of the hardware and software you need, then dive into creative strategies for producing immersive mixes. Whether you are a newcomer to spatial audio or a more advanced user looking to refine your skills, this comprehensive summary aims to provide both clarity and depth.
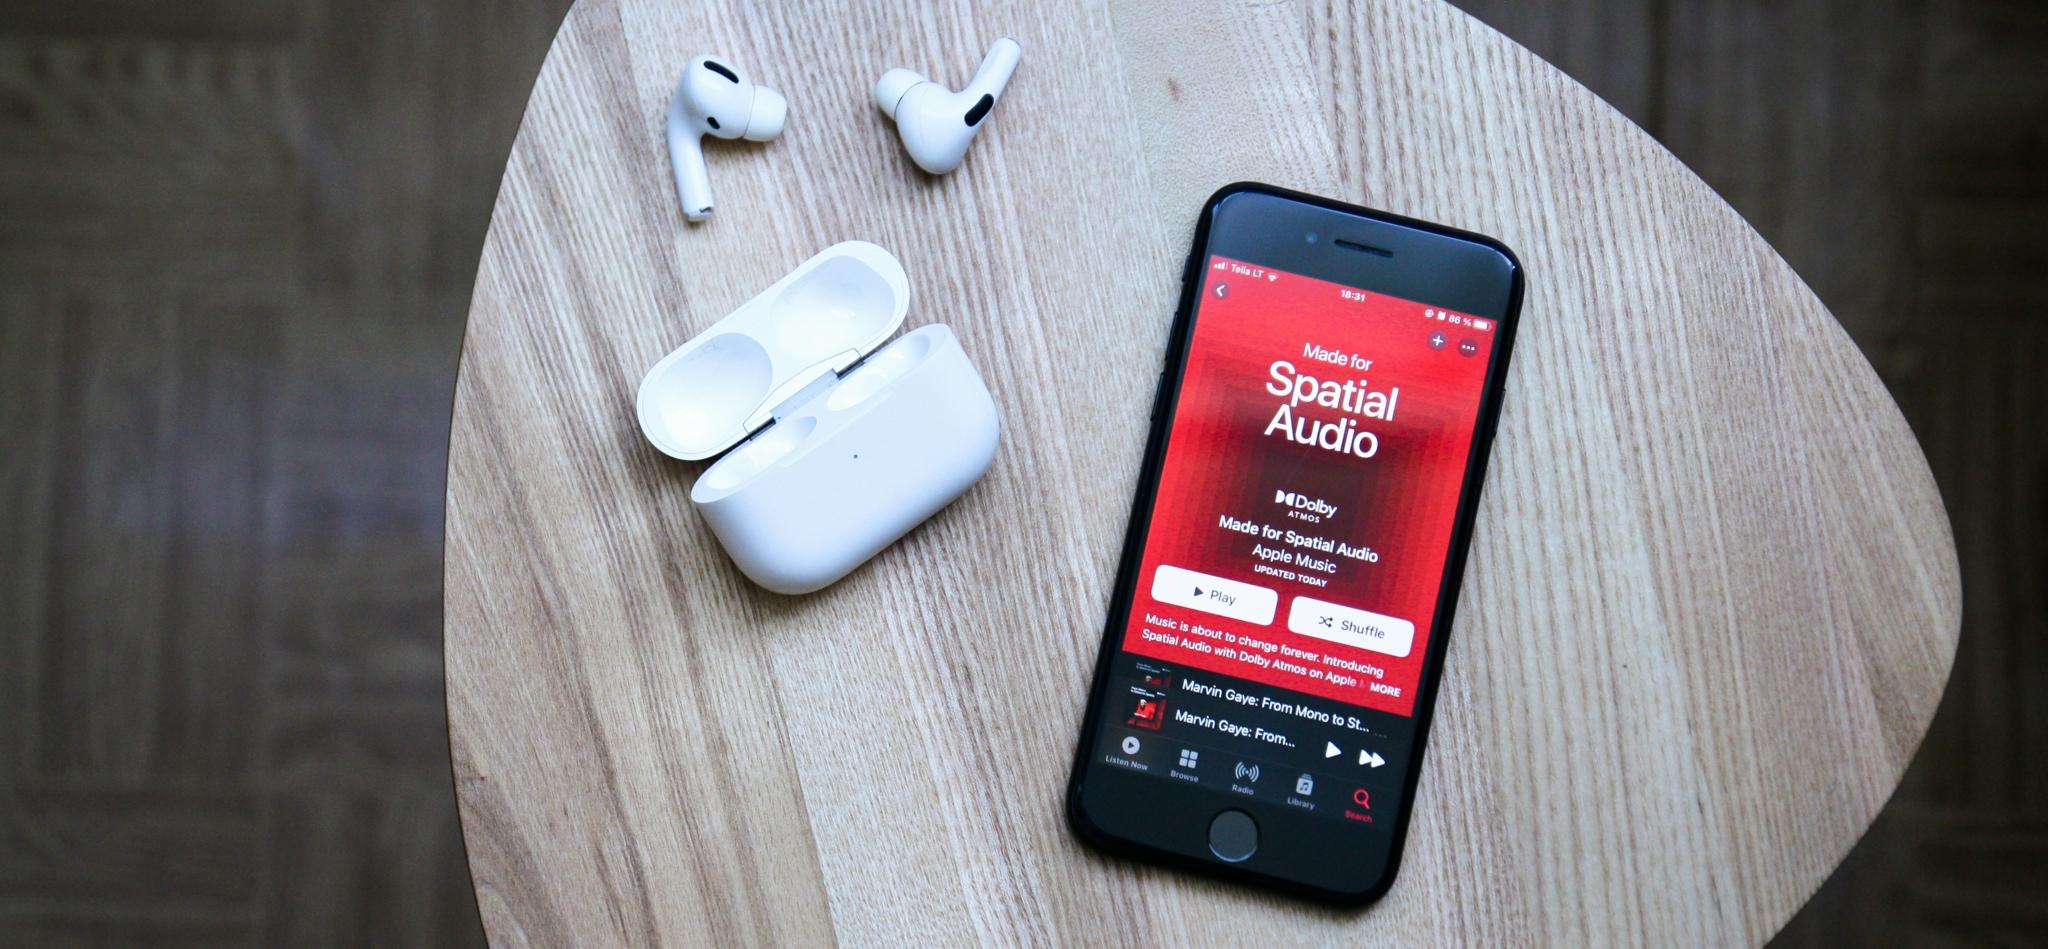
Table of Contents
- Understanding Spatial Audio and Dolby Atmos
- Setup Requirements
- 3D Object Panning Techniques
- Ensuring Translation to Stereo and Surround
- Budget-Friendly Ways to Get Started
- Mastering for Streaming Platforms
- Practical Example: An Atmospheric Pop Track
- Common Pitfalls and Best Practices
- Bringing It All Together
- Conclusion
Understanding Spatial Audio and Dolby Atmos
Spatial audio refers to a broad category of technologies that expand audio beyond a simple left-right format. Dolby Atmos, as a specific version, uses an object-based approach, meaning each audio element can exist as an individual object placed in a three-dimensional soundfield. This differs from older channel-based surround systems, where each track is fed into a fixed channel (like front-left, front-right, rear-left, and so on). By using object metadata, an Atmos mix can adapt to different playback setups, from full 7.1.4 speaker arrays to headphone-based binaural.
Why Atmos Matters for Music
Atmos is no longer limited to blockbuster movie sound. Music producers are harnessing its potential to create enveloping mixes that can position vocals, instruments, and effects with far more nuance. For listeners, this can heighten emotional impact, generating an almost live-performance feeling and revealing details that can be masked in simple stereo. With major labels and streaming platforms encouraging artists to release in Atmos, understanding how to craft these immersive mixes is increasingly valuable for professional and independent producers alike.
Key Concepts in Object-Based Mixing
An object in an Atmos mix is typically a track or group of tracks that you can position in three dimensions using specialized panning tools. The location of each object is stored as metadata, which the playback system interprets to place the sound in the correct position for the listener’s speaker or headphone arrangement. This means an Atmos mix is more flexible than a standard stereo or 5.1 project, as it can scale up or down based on the playback environment. You might have, for example, up to 128 individual objects (in certain configurations), though many music mixes use fewer.
Setup Requirements
Getting started with Atmos mixing requires some specific tools and configurations. While the classic image of a Dolby Atmos studio might show a large control room bristling with speakers, beginners and even mid-level producers can adapt the basic requirements to match their space and budget.
Recommended DAWs for Dolby Atmos
Several popular Digital Audio Workstations now support Dolby Atmos mixing either natively or through add-ons. The core requirement is the ability to route audio to the Dolby Atmos Renderer or to a built-in equivalent. Here are some of the more common DAWs for Atmos:
Pro Tools Ultimate: Offers an industry-standard workflow for immersive audio, but the license cost can be high. It often pairs with the Dolby Atmos Production Suite, which includes specialized software for mastering Atmos mixes.
Apple Logic Pro: Beginning with specific versions, Logic Pro provides built-in Atmos tools. You can create an Atmos project directly and export an ADM BWF file (the standard format for Atmos music), all within Logic’s native environment. This is a popular choice for anyone on macOS due to its affordability and streamlined setup.

Steinberg Nuendo: Renowned for post-production and game audio, Nuendo has comprehensive 3D audio features, including Dolby Atmos integration. Cubase (Pro version) also offers some Atmos functionality, though it is more limited than Nuendo.
Reaper: While not as user-friendly out of the box for Atmos, Reaper’s flexible routing makes it possible to connect to the Atmos Renderer. Its low cost and customizable workflows attract many advanced users who don’t mind a bit of manual setup.
Monitoring Setup and Speaker Requirements
For a full-blown Atmos music session, the standard recommended monitoring layout is 7.1.4, meaning seven speakers positioned around ear level, one subwoofer (for LFE), and four height speakers (often in or near the ceiling). This setup provides a spacious canvas to position audio objects. Each speaker should be carefully matched in timbre if possible, ensuring consistent response as objects pan around the room. You also need an audio interface with enough outputs to feed each channel independently, ideally at least twelve outputs (for 7.1.4) plus any extra lines you might need for alternate monitoring.
The key to making such a multi-speaker environment work is proper room calibration and time alignment. Every speaker should be at a consistent distance from the listening position, or at least adjusted in the system’s calibration so that sound arrives at the right time. Placing the overhead speakers in symmetrical positions ensures stable imaging when panning objects above the listener. If your room is not large enough for 7.1.4, it’s still possible to configure smaller arrays, such as 5.1.4 or 5.1.2. While they won’t provide the same height detail, you can still produce a workable Atmos mix, and the renderer will upmix to more sophisticated arrays if the playback system supports them.

Binaural and Headphone Mixing
Not every engineer or producer has the space or budget for a dedicated Atmos speaker system. Fortunately, Dolby Atmos can be mixed and monitored with headphones, thanks to binaural rendering. In this approach, the software simulates the 7.1.4 environment through two-channel headphones, relying on specialized algorithms to replicate overhead and surround cues. This is a cost-effective entry point, though it comes with some trade-offs:
Accuracy
Binaural mixes can differ from the “true” multi-speaker sound. Frequencies might interact differently in headphones than in a real room, and low-end can be particularly tricky to judge.
Head Tracking
Certain playback systems, like Apple’s Spatial Audio with AirPods, offer dynamic head tracking, which adjusts the soundfield based on head movements. This can slightly alter how a mix feels compared to a static headphone experience.
Checking Real Speakers
If you eventually plan to release a professional Atmos mix, it’s wise to test your final product on a proper multi-speaker setup, even if you do the bulk of the creative work on headphones.
Despite these limitations, using headphones for Atmos mixing is a major advantage for artists who lack a dedicated studio. By enabling the binaural output in your DAW or in the Atmos Renderer, you can start exploring immersive panning techniques immediately.
3D Object Panning Techniques
One of the most exciting features of Dolby Atmos is the ability to move sounds anywhere in a three-dimensional field, transforming how we approach music production. Instead of thinking only in terms of left vs. right, you can place elements in front, behind, overhead, or anywhere in between. Each sound source (or “object”) has its own metadata describing its position and movement.
Approaches to Panning in Three Dimensions
The general workflow for panning an object in Atmos is straightforward:
- Assign the Track as an Object: In the DAW, you can route a track or group of tracks to the Atmos bus that supports object-based mixing. The software or external Renderer will then see these channels as discrete objects.
- Set the Position: Using a 3D panner interface, you determine where the object sits: in front, behind, above, or any combination of x, y, and z coordinates. The interface often looks like a cube or sphere, with a draggable marker.
- Automate for Movement: Many producers automate an object’s path over time, creating effects like swirling, flying overhead, or gliding from front to back. While tempting to move everything constantly, subtle movement or carefully chosen moments can be more impactful.
Creative Strategies for Immersive Effects
Because music in Atmos can become extremely immersive, the possibilities are endless. Some choose to anchor the lead vocal in the front center while letting background vocals wrap around the listener. Others place drums in a more surrounding arrangement, perhaps with certain fills that move to the rear or overhead channels to emphasize transitions. Soft pad textures might reside above the listener’s head, creating a dreamy, enveloping atmosphere.
A popular tactic is to let the main melodic or rhythmic elements remain relatively stable, ensuring the song’s structure remains clear, while accent sounds or special effects might roam more freely. This approach prevents confusion for listeners who want a consistent groove or vocal presence but enjoy occasional surprises emerging from different directions.
Avoiding Overuse of Movement
Because it’s so exciting to move sounds in every direction, it can be easy to push the effect too far. Using constant motion for multiple elements at once can distract from the musical content. In some cases, it can even cause listener fatigue or create phase issues that degrade quality in downmix scenarios. Always remember that spatial effects should serve the song’s aesthetic. Typically, you’ll want to highlight just one or two moving elements at any given time and allow the rest of the mix to remain stable or only subtly positioned, preserving clarity and focus.
Ensuring Translation to Stereo and Surround
A vital part of Atmos mixing is making sure your creation still sounds good on more common playback systems. Not everyone will hear your mix in a 7.1.4 room or even with binaural headphones. Many listeners might receive a downmixed version in stereo. Others could hear it in older 5.1 or 7.1 layouts. Well-executed Atmos mixes fold down gracefully, maintaining musical balance and impact.
Downmix Fundamentals
When the Atmos renderer folds your immersive mix into stereo or 5.1, it processes the object metadata to blend overhead sounds into the remaining channels. Surround elements merge with front channels in a way that attempts to preserve relative levels and spatial cues. However, you might find that certain elements become quieter or more prominent in the downmix if they were exclusively in a rear or overhead channel. This discrepancy is why many engineers regularly check the downmix (or have the software automatically apply a specific downmix profile) to confirm that essential parts of the song remain audible and properly balanced.

Preserving Key Musical Elements
If you place something crucial, like the lead vocal, only in overheads, it might vanish in stereo. A good practice is to ensure that vital elements appear in the main bed channels or are set to object positions that will survive the fold-down process. If you need an instrument or effect to remain fully in the overheads, consider duplicating it softly in the bed, or verifying that the downmix settings are not reducing it too much.
Binaural Considerations
When checking for headphone listening, ensure your DAW or renderer’s binaural settings match the intended listener experience. Many software setups allow each Atmos object to have a specific binaural rendering mode (near, mid, far, or off). A reverb tail set to “far,” for example, might sound more diffuse and atmospheric in headphones, while direct voices set to “near” can remain more forward. The mixing engineer can fine-tune these per-object settings to achieve a coherent, enveloping sound without losing clarity.
Budget-Friendly Ways to Get Started
Although the concept of Atmos might conjure images of large-format studios, you do not have to spend a fortune to create a viable setup. Below are some ways to explore spatial audio on a smaller scale, removing the usual bullet points in favor of short paragraphs:
Using headphones and a software-based binaural renderer is by far the easiest entry point. If you own a Mac, Apple Logic Pro is a cost-effective DAW with built-in Dolby Atmos tools. You can produce an immersive mix entirely in-the-box and hear it via headphones. The software simulates the 7.1.4 environment, giving you a sense of how elements might move overhead or behind you. This approach lets you learn the fundamentals of object panning, 3D automation, and balancing for immersive mixes without room calibration or extensive gear.
Another solution is to use an Atmos-capable AV receiver and feed it from your DAW. While this might not be the purest professional monitoring chain, it can let you hear your mix through a consumer device similar to how many people experience Atmos at home. You can usually connect via HDMI and set your DAW or Atmos Renderer to output the correct channel mapping. Just remember that consumer receivers may perform their own room correction or EQ that differs from a calibrated studio approach.
Mastering for Streaming Platforms
Once you’ve created a compelling Atmos mix, the next step is mastering it for streaming services such as Apple Music, Tidal, and Amazon Music. Each platform may have specific requirements, but there are some general guidelines you should keep in mind.
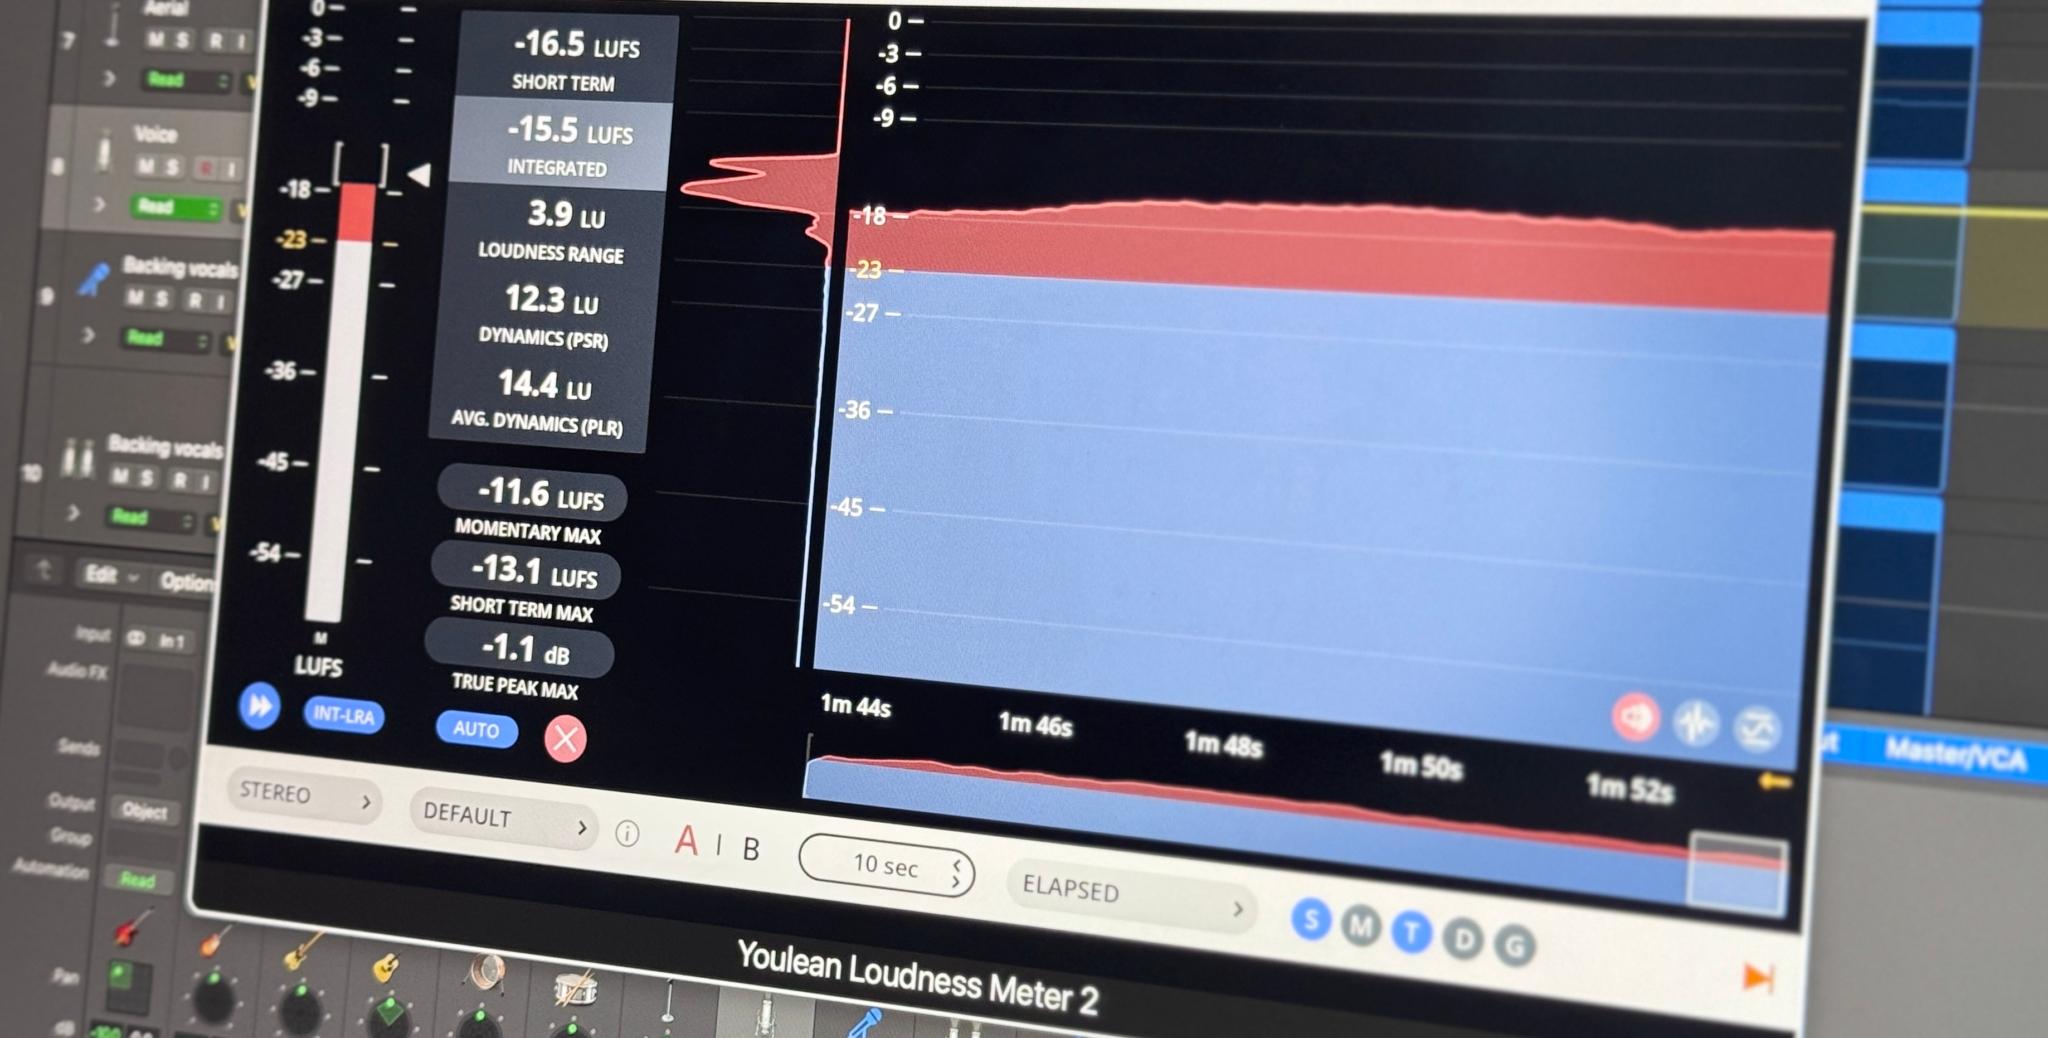
Loudness Targets and Dynamics
Dolby Atmos tracks typically conform to a standard loudness target around -18 LUFS for music releases. Streaming platforms often reject or adjust mixes that exceed or fall outside their acceptable range. Unlike stereo’s “loudness war,” there is no benefit to pushing an Atmos mix beyond recommended limits because the platform will simply turn it down. This approach encourages more dynamic range and detail. When mastering, aim for that moderate loudness level so your mix remains within the specification for easy distribution.
Exporting the Atmos Master
Most DAWs that support Atmos (Logic Pro, Nuendo, Pro Tools with Atmos tools) let you export an ADM BWF file containing all your audio and positional metadata. This file is the standard deliverable for distributors. Make sure you clearly label each track or object and that your start and end times match the stereo version if you are delivering separate masters. Occasionally, streaming services ask for both the ADM BWF and a stereo master. The Atmos version is flagged for compatible devices, while non-Atmos setups default to the stereo mix.
Metadata and Binaural Settings
Within the Atmos workflow, you can set how each object behaves when converted to binaural. These metadata tags tell the renderer how aggressively to apply 3D cues. You might want some instruments to appear as if they are close to the listener (the “near” setting), while others feel more distant (the “far” setting). Properly configuring these tags in your master ensures that when users listen on headphones through Apple Music or Tidal, they experience the song as you intended. Neglecting these settings can lead to a subpar binaural rendering with inconsistent or hollow-sounding elements.
Practical Example: An Atmospheric Pop Track
To illustrate how Atmos might transform a pop track, imagine a typical arrangement: a lead vocal, layered backing vocals, drums, bass, guitars, synth pads, and special effects. In a stereo mix, you might keep the vocal center, guitars panned left and right, and synthesizers spread out. In an Atmos approach, you could place the lead vocal firmly in front and slightly elevated, letting each harmony vocal wrap around or hover overhead at lower volumes. The drums might remain anchored near the front channels, but certain fills, tom hits, or cymbal crashes could fan out to the rear or overhead to emphasize dramatic transitions. Synth pads can be gently spread across the height channels, creating a floating ambiance that envelops the listener. Meanwhile, a subtle effect (like a delayed sound or whispered vocal line) might circle around to highlight a key moment.
When downmixed to stereo, those overhead elements or circling effects might fold back into the main channels, so it’s essential that they reinforce the mix rather than overshadow the fundamental groove or melody. Binaural settings would specify how each element is rendered for headphone listening, ensuring the lead vocal remains crisp and central while reverb tails feel spacious.
Common Pitfalls and Best Practices
Creating a successful Atmos mix involves more than just assigning objects to 3D locations. With more channels and the possibility of overhead speakers, new challenges arise, such as ensuring the mix remains cohesive in smaller or downmixed formats. Below are some frequent stumbling blocks, explained in short paragraphs rather than bullet points.
One common pitfall is over-panning. It’s easy to get carried away, sending elements whirling overhead or behind the listener. This can be impressive for a few seconds, but too much motion can be distracting. Keep the focus on the core identity of the song, letting movement accent certain moments rather than dominate the entire mix.

Another challenge is phase coherence. If you place the same audio in multiple speakers with slight timing offsets, you risk phase cancellation. This can lead to hollow or inconsistent sounds, especially when folding down to stereo or 5.1. Always check your mix through different renders (the Atmos Renderer often allows you to monitor the real-time downmix) to ensure nothing crucial disappears or becomes muddy.
Finally, watch out for excessive reverb and low-frequency overlap. A multi-speaker environment can quickly build up reverberant energy, especially if each object has its own reverb tail. This might sound cluttered rather than immersive. Similarly, be conscious of how much bass is allocated to the LFE channel and whether your overhead channels carry any excessive low end. Balancing frequencies across all speakers helps maintain clarity and avoids overwhelming the mix.
Bringing It All Together
Dolby Atmos and spatial audio formats have opened a new frontier for music creators, empowering them to design immersive soundscapes that transport listeners beyond the boundaries of stereo. At its core, Atmos is about adding depth, height, and motion to your mix, allowing each element to occupy a distinct location in a three-dimensional soundstage. This can amplify the emotional and artistic impact of your music, as listeners experience nuances that traditional two-channel mixes sometimes mask.
While the initial setup may appear complicated, practical options exist for all budgets. Beginners can jump in with headphone-based mixing, leveraging the power of binaural rendering. More advanced users can assemble multi-speaker rigs or even build a full-fledged 7.1.4 studio. Regardless of your approach, the fundamental principles remain the same: keep the mix musical, use movement judiciously, and check how everything folds down to common playback formats. The aim is not to show off every possible panning trick, but to harness immersion as a creative tool, drawing listeners deeper into the artistic vision of each track.
Conclusion
Mixing music in Dolby Atmos represents both an evolution and a revolution. From creating subtle, enveloping environments to showcasing dramatic overhead sweeps, Atmos brings a new dimension of storytelling to each song. Producers and engineers now have the freedom to treat sounds as discrete objects in 3D space, a departure from the constraints of stereo mixing. This flexibility, however, comes with its own learning curve. Calibrating your room, mastering the Atmos-enabled DAW workflow, and ensuring that your immersive mix translates effectively to headphones and simpler systems all require patience and practice.
Nevertheless, the barriers to entry have never been lower. With the proliferation of tools like Apple Logic Pro, low-cost or even free DAW solutions, and the rapid adoption of Atmos by streaming platforms, the potential audience for an immersive mix is vast. Even if you only experiment with a few songs, the experience of placing sounds overhead or behind the listener can profoundly influence your broader mixing approach. You might discover new creative possibilities you never considered in a stereo context, such as layering reverb differently, sculpting instrument placement for maximum clarity, or playing with movement to emphasize a song’s climax.
As more music fans gain access to spatial audio through affordable headphones or home theater sound systems, learning to mix in Dolby Atmos becomes not just a curiosity, but a valuable skill. Whether you are a hobbyist, an indie producer, or a professional engineer, exploring the world of Atmos can open fresh artistic horizons. By keeping your mixes focused, checking downmixes carefully, and embracing the freedom of object-based panning, you can craft immersive works of art that resonate powerfully with listeners. The future of music is not confined to two speakers—it spans all around us, promising a truly enveloping sonic journey.
About the Author

Néstor Rausell
Singer, Musician and Content Marketing SpecialistNéstor Rausell is the Lead Singer of the Rock band "Néstor Rausell y Los Impostores". Working at MasteringBOX as a Marketing Specialist
Leave a comment
Log in to comment