


A vocoder is one of those music production tools that sounds complicated until you hear what it does. Feed it a voice, combine that voice with a synthesizer, and the synth appears to speak or sing. That familiar robotic vocal can sound futuristic, nostalgic, aggressive, dreamy, or surprisingly human depending on the setup.
However, a vocoder is more than a robot-voice preset. It is a flexible sound-design system that can reshape drums, pads, guitars, field recordings, and backing vocals. In this guide, we will start with the basic idea, build a working setup, and then move into the controls that determine clarity, tone, rhythm, and character.
Table of Contents
- What Is a Vocoder?
- A Brief History of the Vocoder
- How Does a Vocoder Work?
- How to Set Up a Vocoder in Your DAW
- Choosing the Best Modulator and Carrier
- Essential Vocoder Controls
- How to Make Vocoder Vocals Clearer
- Creative Vocoder Techniques
- Common Vocoder Mistakes
- Vocoder vs Talk Box, Pitch Correction, and Harmonizers
- Vocoder Plugins and Hardware
- Mixing a Vocoder in a Full Production
- Final Vocoder Workflow for Beginners
- Conclusion
What Is a Vocoder?
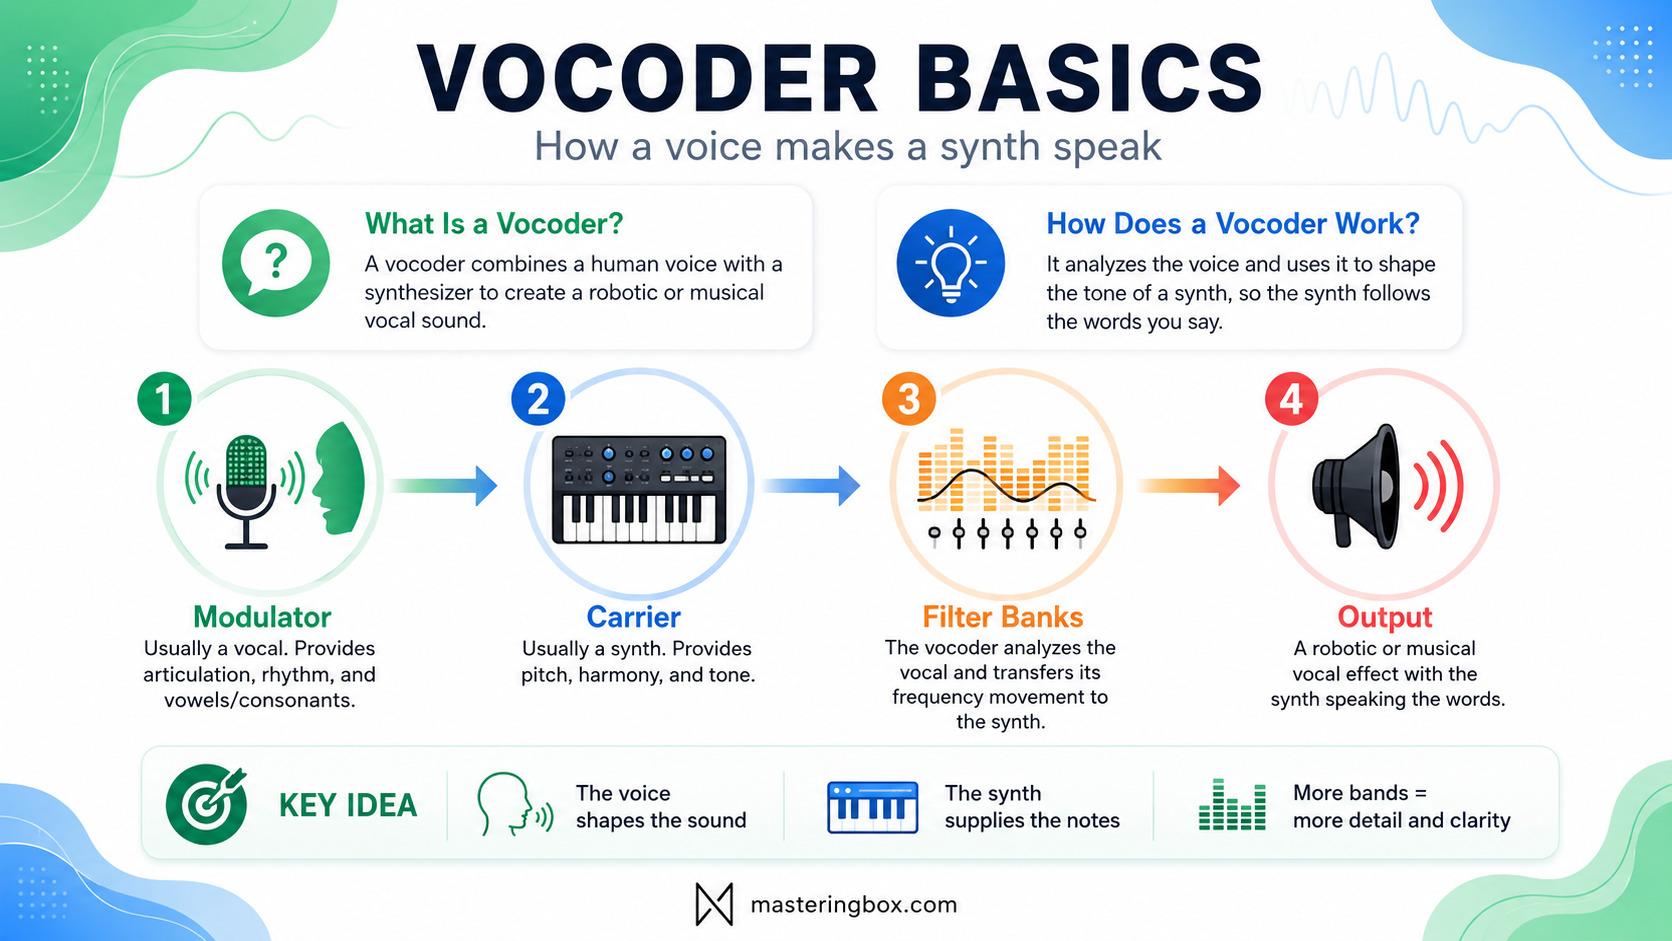
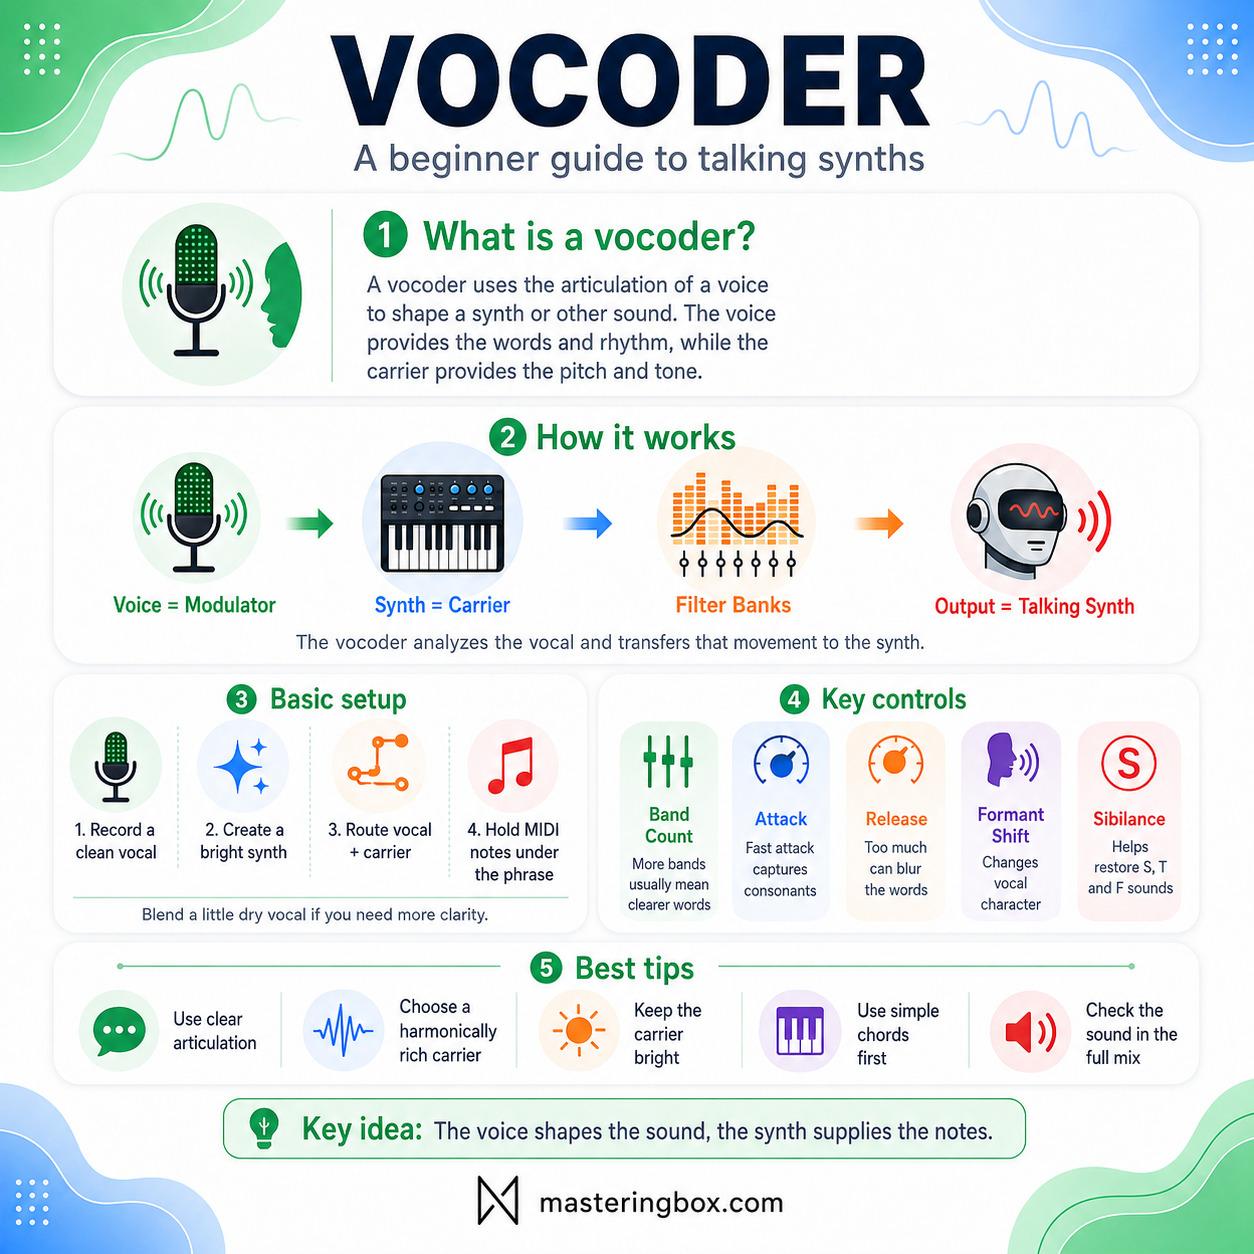
A vocoder, short for voice encoder, analyzes the changing frequency balance of one sound and applies that movement to another. The analyzed signal is called the modulator, while the sound being reshaped is called the carrier. In the classic setup, a vocal acts as the modulator and a synthesizer acts as the carrier.
The vocal does not simply pass through a robotic effect. Instead, the vocoder studies how energy moves through the vocal spectrum as the performer forms vowels and consonants. It then uses that movement to control matching frequency areas in the synth. The synth keeps its musical pitch and harmonic character while adopting the articulation of the voice.
The carrier provides the musical material, while the modulator teaches that material how to pronounce the words.
This separation explains why a vocoded phrase can follow chords that the vocalist never sang. The performer may speak on one note or whisper without a stable pitch. Meanwhile, the MIDI notes or audio used as the carrier determine the harmony that comes out.
A Brief History of the Vocoder
The vocoder was not invented for musicians. Bell Labs engineer Homer Dudley developed speech-analysis and synthesis systems during the late 1920s and 1930s. The original aim was to represent speech more efficiently for communication. The Computer History Museum’s account of early speech synthesis explains how Dudley’s work led to the Voder demonstration at the 1939 New York World’s Fair.
Its artificial quality was not ideal when natural communication was the goal, but that same quality attracted experimental musicians. By the 1970s and early 1980s, artists were treating vocoders as expressive instruments rather than communication devices.
Hardware such as the Roland VP-330 helped establish the sound in electronic music and film scoring. Kraftwerk, Wendy Carlos, Laurie Anderson, Vangelis, and later generations of electronic artists showed that a synthetic voice could carry melody, rhythm, personality, and emotion. Modern software makes the effect easier to access, but the core concept remains close to those early filter-bank designs.
How Does a Vocoder Work?
A vocoder divides sound into frequency bands, measures the level of each band in the modulator, and transfers those level movements to corresponding bands in the carrier. The process becomes straightforward when divided into a few stages.
The Modulator Provides the Articulation
The modulator is the signal the vocoder analyzes. A recorded or live vocal is the usual choice because speech contains changing patterns of vowels, consonants, breaths, and pauses. Those patterns carry the information that lets us understand words.
The modulator does not need to be melodic because the carrier supplies the final pitch. What matters more is pronunciation, timing, dynamics, and the amount of useful midrange and high-frequency detail entering the processor.
The Carrier Provides Pitch and Tone
The carrier is the sound that the modulator reshapes. A bright synthesizer with sawtooth waves is a common starting point because it contains many harmonics across the frequency spectrum. Those harmonics give the vocoder enough material to carve into recognizable speech.
A pure sine wave usually produces poor intelligibility because it has almost no upper harmonics. A dense pad, string-like synth, or layered oscillator gives the filter bank more information. The carrier also determines whether the result feels warm, metallic, wide, thin, vintage, or aggressive.
The Filter Banks Transfer the Spectral Movement
The modulator passes through a group of band-pass filters. Each filter listens to a limited section of the spectrum, and an envelope follower measures how the level inside that band changes over time. An “oo” vowel emphasizes a different pattern from an “ee” vowel, while consonants such as s, t, and f create short bursts of high-frequency energy.
The carrier passes through a matching filter bank. Each envelope from the modulator controls the level of the corresponding carrier band. Finally, the processed bands are added together. The result follows the rhythm and spectral movement of the modulator, but its pitch and basic tone still come from the carrier.
Apple’s overview of vocoder signal flow provides a useful technical explanation of this analysis-and-synthesis process.
Why the Number of Bands Matters
The number of bands controls how accurately the vocoder can reproduce detailed changes. A low band count groups large areas of the spectrum together, producing a rough and obviously synthetic character. A higher band count follows smaller changes and normally makes speech easier to understand.
More is not automatically better. A coarse 8- or 10-band sound can feel bold and musical, while a high-resolution setting may become smooth but less distinctive. The right choice depends on whether you want intelligibility, texture, or an intentionally vintage result.
Voiced and Unvoiced Sounds
Vowels and many consonants contain pitched energy, but sounds such as s, sh, f, and t behave more like noise. A carrier made entirely from pitched oscillators may reproduce vowels clearly while swallowing these consonants.
Many vocoders include an unvoiced detector, noise generator, sibilance control, or high-frequency enhancement stage. These features add noise-like material when the processor detects unpitched speech. Used carefully, they improve clarity. Pushed too far, they make the output hissy and sharp.
How to Set Up a Vocoder in Your DAW
The exact routing changes between DAWs and plugins, but every standard vocoder needs the same two ingredients: a modulator and a carrier. Once you understand which signal plays each role, most setup problems become easy to diagnose.
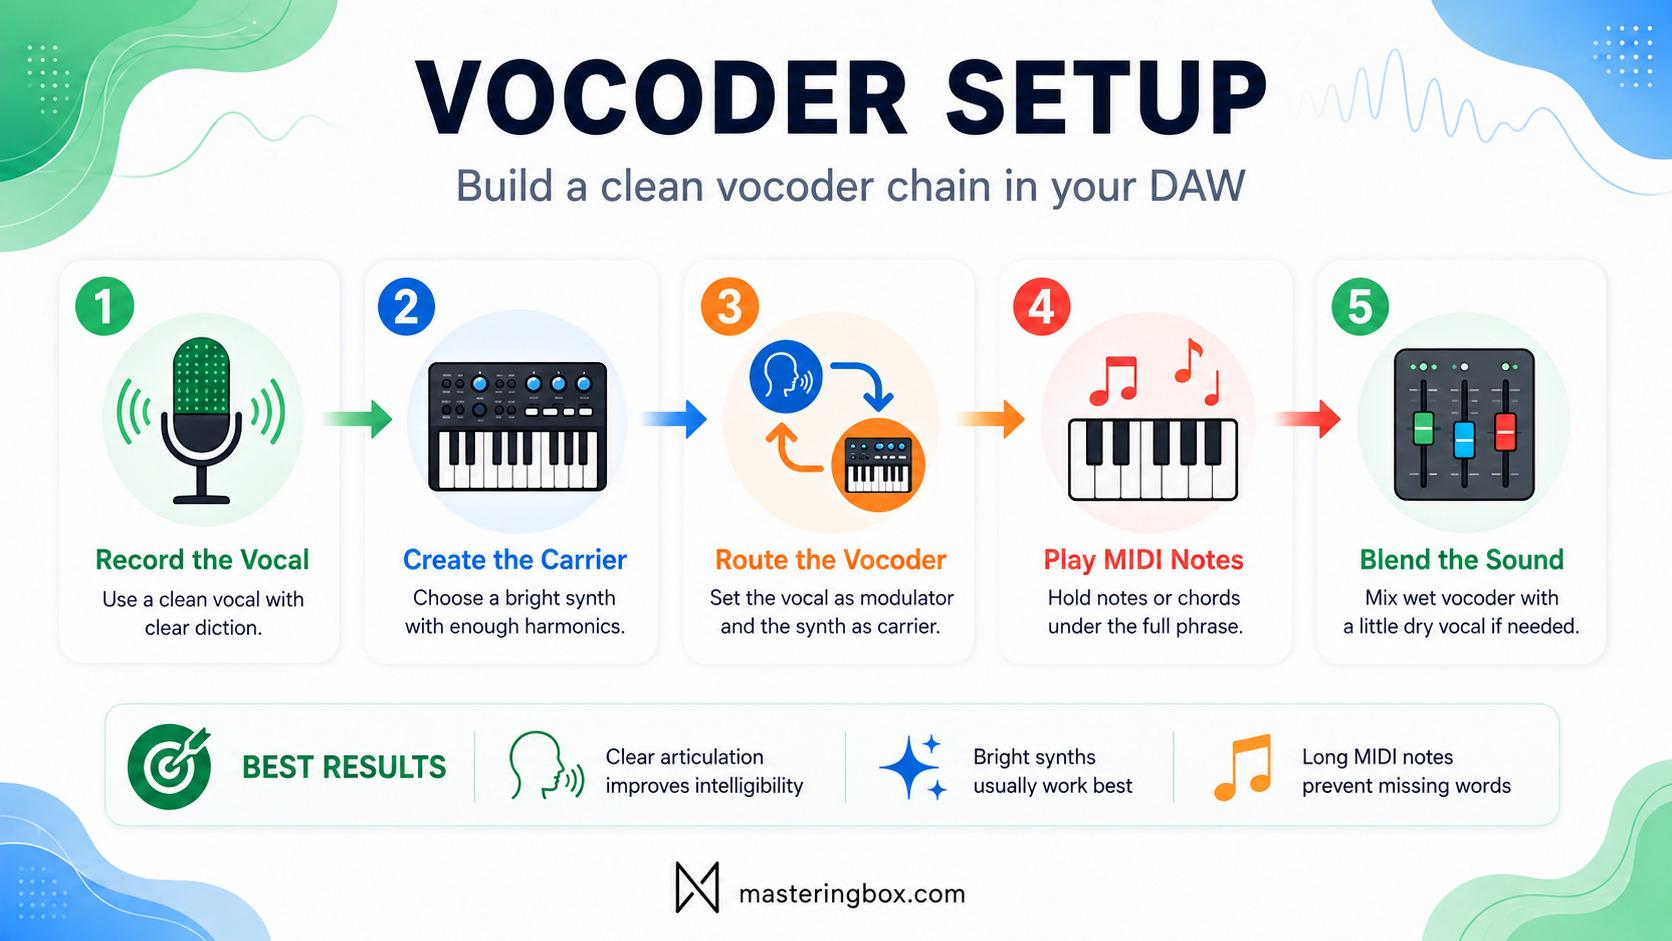
1. Record or Import the Modulator
Start with a clean vocal recording. You do not need an expensive microphone, but you do need controlled room noise, clear diction, and a sensible input level. Use a pop filter and perform with slightly exaggerated articulation so consonants remain clear.
Before the vocoder, remove unnecessary sub-bass with a gentle high-pass filter. Light compression can help if the performer moves between loud and quiet words. Avoid flattening the vocal completely because natural envelope movement makes the result expressive.
2. Create a Harmonically Rich Carrier
Load a synth patch with enough harmonic content to cover the vocal range. One or two sawtooth oscillators are an excellent beginner choice. Keep the patch stable at first and reduce excessive modulation, long effects, and extreme detuning until the basic sound works.
Program sustained MIDI notes or chords that last for the complete vocal phrase. If the carrier stops, the output stops, even when the vocal continues. This is one of the most common reasons beginners hear missing words.
Try simple chord voicings before complex harmony. Open fifths, octaves, triads, or three-note voicings often remain clearer than dense clusters.
3. Insert and Route the Vocoder
Some vocoders sit on the carrier track and receive the vocal through a sidechain input. Others sit on the vocal track and use an internal synth or external carrier input. Read the labels rather than assuming every plugin follows the same layout.
Set the vocal as the modulator or analysis input and the synth as the carrier or synthesis input. Begin with a fully wet output so you can confirm the effect is working. If you hear nothing, check that both inputs are active, the MIDI notes continue for the complete phrase, and the plugin is using the correct input mode.
4. Play It Like an Instrument
Change the MIDI notes while the same vocal phrase repeats. You will hear that the keyboard controls the pitch and harmony, while the voice controls the phrasing.
This separation lets you speak a rhythmically precise phrase and audition different chord progressions without recording the vocal again. Hold one note for a narrow robotic lead or play wider chords for a choir-like hook.
5. Blend the Processed and Original Signals
A completely wet vocoder produces the strongest synthetic identity, but it is not always the clearest choice in a busy mix. Blend a small amount of the original vocal underneath when the lyrics need to remain understandable.
You can also keep the dry lead vocal in the center and place a wide vocoder layer behind it. This adds electronic color without forcing the effect to carry every word on its own.
Choosing the Best Modulator and Carrier
The voice-and-synth combination is only the beginning. Any signal with useful dynamic or spectral movement can act as a modulator, while almost any harmonically rich sound can act as a carrier. Try these combinations:
- Spoken vocal into a sawtooth synth: the classic robotic sound.
- Sung vocal into a soft pad: smoother and more emotional.
- Drum loop into a sustained chord: turns a static pad into a rhythmic texture.
- Percussion into noise or a bright synth: creates sharp mechanical movement.
- Guitar into a synth layer: transfers picking and strumming patterns.
- Field recording into a pad: produces unpredictable ambient motion.
- One synth into another: useful for evolving non-vocal textures.
The strongest combinations usually contain contrast. A detailed, rhythmic modulator can animate a stable carrier. A sustained modulator can smooth a busy carrier. When both signals are chaotic, the output often becomes difficult to control.
Choose the modulator for movement and the carrier for musical identity.
Essential Vocoder Controls
Plugin interfaces vary, but the most important controls affect the same underlying stages. Learning these parameters is more useful than memorizing presets.
Band Count
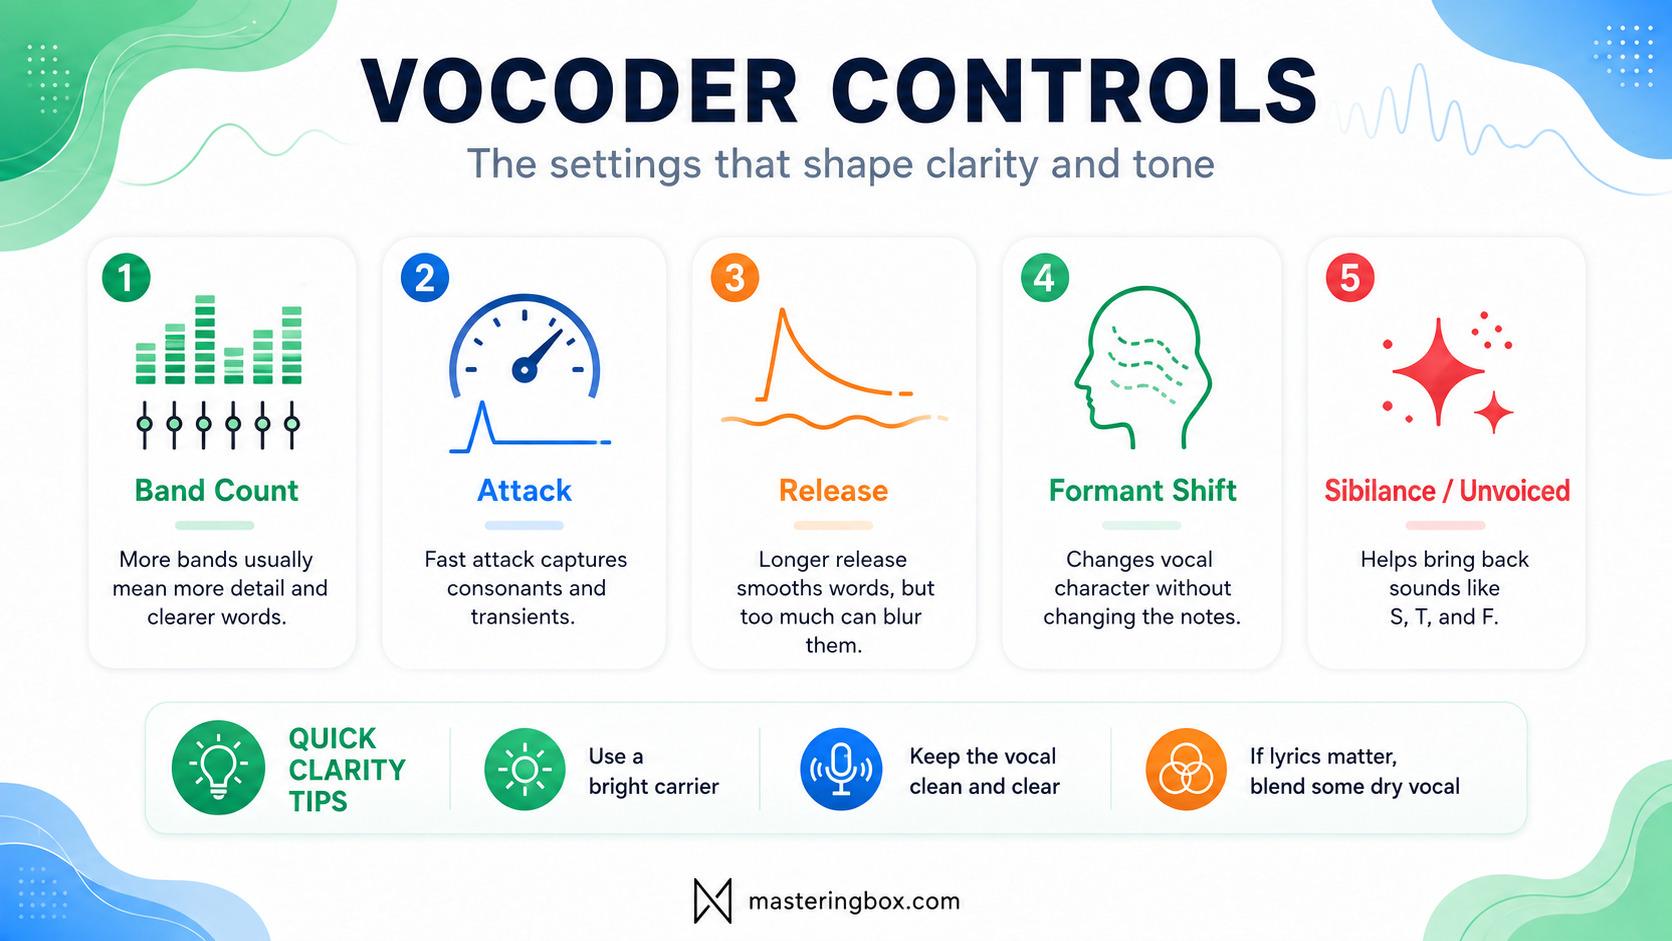
Band count determines the resolution of the spectral transfer. Increase it when words sound blurred. Reduce it when the effect is clear but lacks character.
For a beginner vocal, start around 16 to 24 bands when that range is available. Compare a lower and higher setting at the same output level, because louder presets can appear clearer even when they are not better.
Attack and Release
Attack controls how quickly the envelopes react when energy appears in a band. Faster settings capture consonants and transients more accurately, while slower settings soften them.
Release controls how long each band remains active after the modulator energy falls. A short release gives tight articulation. A longer release connects syllables and creates a fluid texture. Too much release causes words to smear together.
Start with a fast attack and a medium-short release. Lengthen the release if the output chatters or drops between sounds. Shorten it if every word leaves a cloudy tail.
Frequency Range and Formant Shift
Some vocoders let you choose the lowest and highest frequencies covered by the filter banks. Low-frequency energy adds weight but can create mud, while high-frequency energy improves consonants but can become brittle. Concentrating the bands around the useful vocal range may improve clarity.
Formant shift changes the resonant character of vowels without simply transposing the carrier. Shift downward for a larger, darker voice or upward for a smaller, brighter character. Extreme settings quickly become artificial, so use smaller movements when lyrics matter.
Unvoiced and Sibilance Controls
These controls help reproduce consonants that do not have a stable pitch. Add enough noise or high-frequency enhancement to reveal missing s and t sounds, but listen for harshness between roughly 5 and 10 kHz.
Improve the modulator and carrier before pushing the sibilance control to its maximum. Otherwise, the processor may create constant hiss rather than useful articulation.
Dry/Wet and Output Balance
Dry/wet controls the balance between the original and processed signal when the plugin supports both internally. In a parallel setup, use the track faders instead.
Always level-match settings before choosing between them. Reduce the output after adding resonance, noise, or extra bands so you judge tone rather than volume.
How to Make Vocoder Vocals Clearer
A vocoder becomes intelligible through the complete signal chain, not through one magic setting. The performance, carrier, filter resolution, dynamics, and mix all contribute.
First, improve the source. Ask the performer to pronounce the ends of words and keep the phrase rhythmically consistent. Spoken or lightly sung delivery often works better than an airy vocal with indistinct consonants.
Next, simplify the carrier. Open the synth filter enough to provide upper harmonics, but reduce chorus, reverb, and heavy unison while troubleshooting. These effects can sound impressive in solo while hiding the words in the arrangement.
Then, shape the modulator before it reaches the vocoder. Remove rumble and control large level jumps, but do not over-de-ess because the processor needs those consonants. After the vocoder, use a small low-mid cut for boxiness or a controlled presence boost for definition. A quiet dry-vocal layer can provide more clarity than extreme EQ.
Creative Vocoder Techniques
Once the basic vocal effect works, treat the vocoder as a general modulation system. These techniques move beyond the obvious robot voice while remaining practical.
Build Vocoder Harmonies
Create separate carrier voicings for the left and right channels. Use different oscillator shapes, formant shifts, or band counts on each side. The shared vocal keeps the rhythm unified while the carriers create width.
Spread the notes across registers instead of stacking everything in one octave. High-pass the wide layers and keep a simpler central layer for intelligibility.
Use Rhythm as the Modulator
Send a drum loop, shaker, or percussion pattern into the analysis input and use a sustained pad as the carrier. The pad will pulse according to the rhythm and frequency balance of the drums.
This creates movement without a standard gate or sidechain compressor. Kicks, snares, and hats activate different spectral bands, so the result can be more detailed than simple volume ducking.
Resample the Output
Record the result to audio, then chop syllables, reverse consonants, stretch vowels, or rearrange the rhythm. Resampling turns a performance-dependent effect into flexible production material.
It also lets you change pitch, add granular processing, or build fills that would be difficult to perform live.
Layer Different Resolutions
Use one low-band-count layer for attitude and one high-band-count layer for clarity. Blend them so the rough layer supplies character while the detailed layer carries the words.
The same idea works with contrasting carriers. A focused mono saw can provide definition, while a soft stereo pad supplies width.
Add Human Detail Back In
A vocoder can feel emotionally distant. A breath, whispered double, dry consonant layer, or untreated phrase can restore human detail at important moments.
Bring the natural voice forward at the end of a line, then return to the vocoder. The contrast often feels stronger than leaving the effect at full intensity throughout the song.
Common Vocoder Mistakes
Most disappointing results come from a few repeatable problems. Fix the source and routing before looking for a different plugin.
- The carrier is too dark: open its filter or choose a waveform with more harmonics.
- The MIDI notes are too short: extend them under every word.
- The vocal is badly articulated: record a clearer performance instead of using extreme EQ.
- The release is wrong: shorten it when words blur and lengthen it when the sound chatters.
- The carrier is too wide and detuned: reduce unison when the lyrics lose focus.
- There are too few bands: increase resolution when intelligibility matters.
- There are too many effects before the vocoder: disable them and rebuild gradually.
- The output is judged only in solo: check it with the full arrangement.
- The effect appears everywhere: save the strongest treatment for sections that benefit from it.
A good patch often sounds less dramatic in solo than an overloaded preset. In the mix, controlled midrange and clean articulation usually matter more than maximum width.
Vocoder vs Talk Box, Pitch Correction, and Harmonizers
These tools can all create processed vocals, but they work in different ways. Understanding the distinction helps you choose the right effect.
Vocoder vs Talk Box
A vocoder analyzes one signal electronically and transfers its spectral movement to another. A talk box sends an amplified instrument through a tube into the performer’s mouth. The mouth physically filters the sound, and a microphone records it.
A talk box often feels more organic and closely tied to the performer. A vocoder offers more control over resolution, envelopes, formants, stereo processing, and routing. The talk box overview on Wikipedia explains the physical method in more detail.
Vocoder vs Pitch Correction
Pitch correction changes the tuning of a vocal while keeping the original voice as the main sound source. A vocoder can ignore the original vocal pitch almost completely because the carrier supplies the notes.
Therefore, a spoken phrase can become a chord or bass melody through a vocoder. That makes it closer to synthesis and spectral processing than conventional tuning correction.
Vocoder vs Harmonizer
A harmonizer creates extra pitched copies of the input, usually retaining much of the singer’s tone. A vocoder creates harmony by playing multiple notes in the carrier.
The resulting chord shares the modulator’s articulation but takes its tone from the synth. It often sounds more unified and synthetic than several pitch-shifted vocal copies.

Vocoder Plugins and Hardware
You do not need specialist hardware to begin. Many DAWs include a vocoder, and the stock processor is usually enough to learn routing, carrier design, band count, and envelope timing.
Logic Pro includes the EVOC family, Ableton Live includes a Vocoder audio effect, and FL Studio includes Vocodex. Other DAWs may use a sidechain-based plugin or a synth with an integrated analysis input. The interface changes, but the modulator-and-carrier principle stays the same.
Hardware remains attractive for live performance because the microphone, keyboard, carrier synth, and controls can be combined in one instrument. The classic VP-330 is a major part of vocoder history, and Roland’s overview of the instrument and its musical use shows why relatively low-resolution hardware can still have a distinctive sound.
When choosing a plugin, prioritize understandable routing, adjustable band count, attack and release, frequency-range settings, and a useful unvoiced section. A large preset library is convenient, but control over the signal path will teach you more.
Mixing a Vocoder in a Full Production
A vocoder occupies many of the same frequencies as vocals, guitars, synths, snares, and other lead elements. A patch that sounds enormous alone can quickly crowd the arrangement.
Start by deciding its role. A lead vocoder needs enough midrange to communicate words. A background layer can be filtered more aggressively and pushed wider. A rhythmic texture may only need selected frequency bands.
Use EQ after the effect to create space rather than automatically boosting brightness. Cutting competing instruments around the important vocal frequencies may sound more natural. Compression can stabilize large jumps between vowels, while gentle saturation can add density to a thin carrier.
Choose reverb and delay that preserve the rhythm. Long reverb can hide consonants, so try a short plate, gated ambience, or tempo-synced delay before a huge hall. You can also send only the vocoder layer to the effects bus while keeping a dry vocal clear in the center.
Final Vocoder Workflow for Beginners
A repeatable workflow teaches you more than browsing presets at random. Use this order when building your first complete sound:
- Record a clear spoken or sung phrase.
- Remove rumble and apply light dynamic control.
- Create a bright, sustained carrier with a simple waveform.
- Route the modulator and carrier into the correct inputs.
- Start with a medium band count and a fully wet output.
- Adjust attack and release for clean syllable movement.
- Improve consonants with carrier brightness or unvoiced controls.
- Play simple MIDI notes, then develop the harmony.
- Blend dry vocal or parallel layers when more clarity is needed.
- Add EQ, compression, delay, and reverb after the core sound works.
The order matters. If the source, carrier, or routing is wrong, post-processing will only make the problem louder. Build a clean result first, then make it strange.
Conclusion
The vocoder is much more than a shortcut to a robotic voice. It separates articulation from pitch, allowing one sound to control the spectral movement of another. A voice can shape a synthesizer, drums can animate a pad, and one synth can restructure another.
For a strong beginner result, use a clearly performed modulator and a harmonically rich carrier. Keep the routing simple, sustain the MIDI notes, and adjust band count, attack, and release before adding extra effects. When the sound lacks clarity, improve the performance and carrier before reaching for extreme processing.
Once the basic setup becomes familiar, the vocoder turns into a deep creative tool. Layer different resolutions, resample phrases, automate the carrier, and experiment with non-vocal modulators. The technology may have started as a communication system, but in music production it becomes an instrument whose personality depends entirely on what you feed into it.
Sobre o Autor

Dídac
CEO & Fundador do MasteringBOXO Dídac é engenheiro de áudio, produtor musical e engenheiro de software profissional. É o fundador do MasteringBOX e autor de muitos dos artigos do blog.
Deixa um comentário
Entra para comentar

 English
 Español
 Français
 Italiano
 Deutsch
 Português
 Nederlands
 Svenska
 Polski
 Čeština