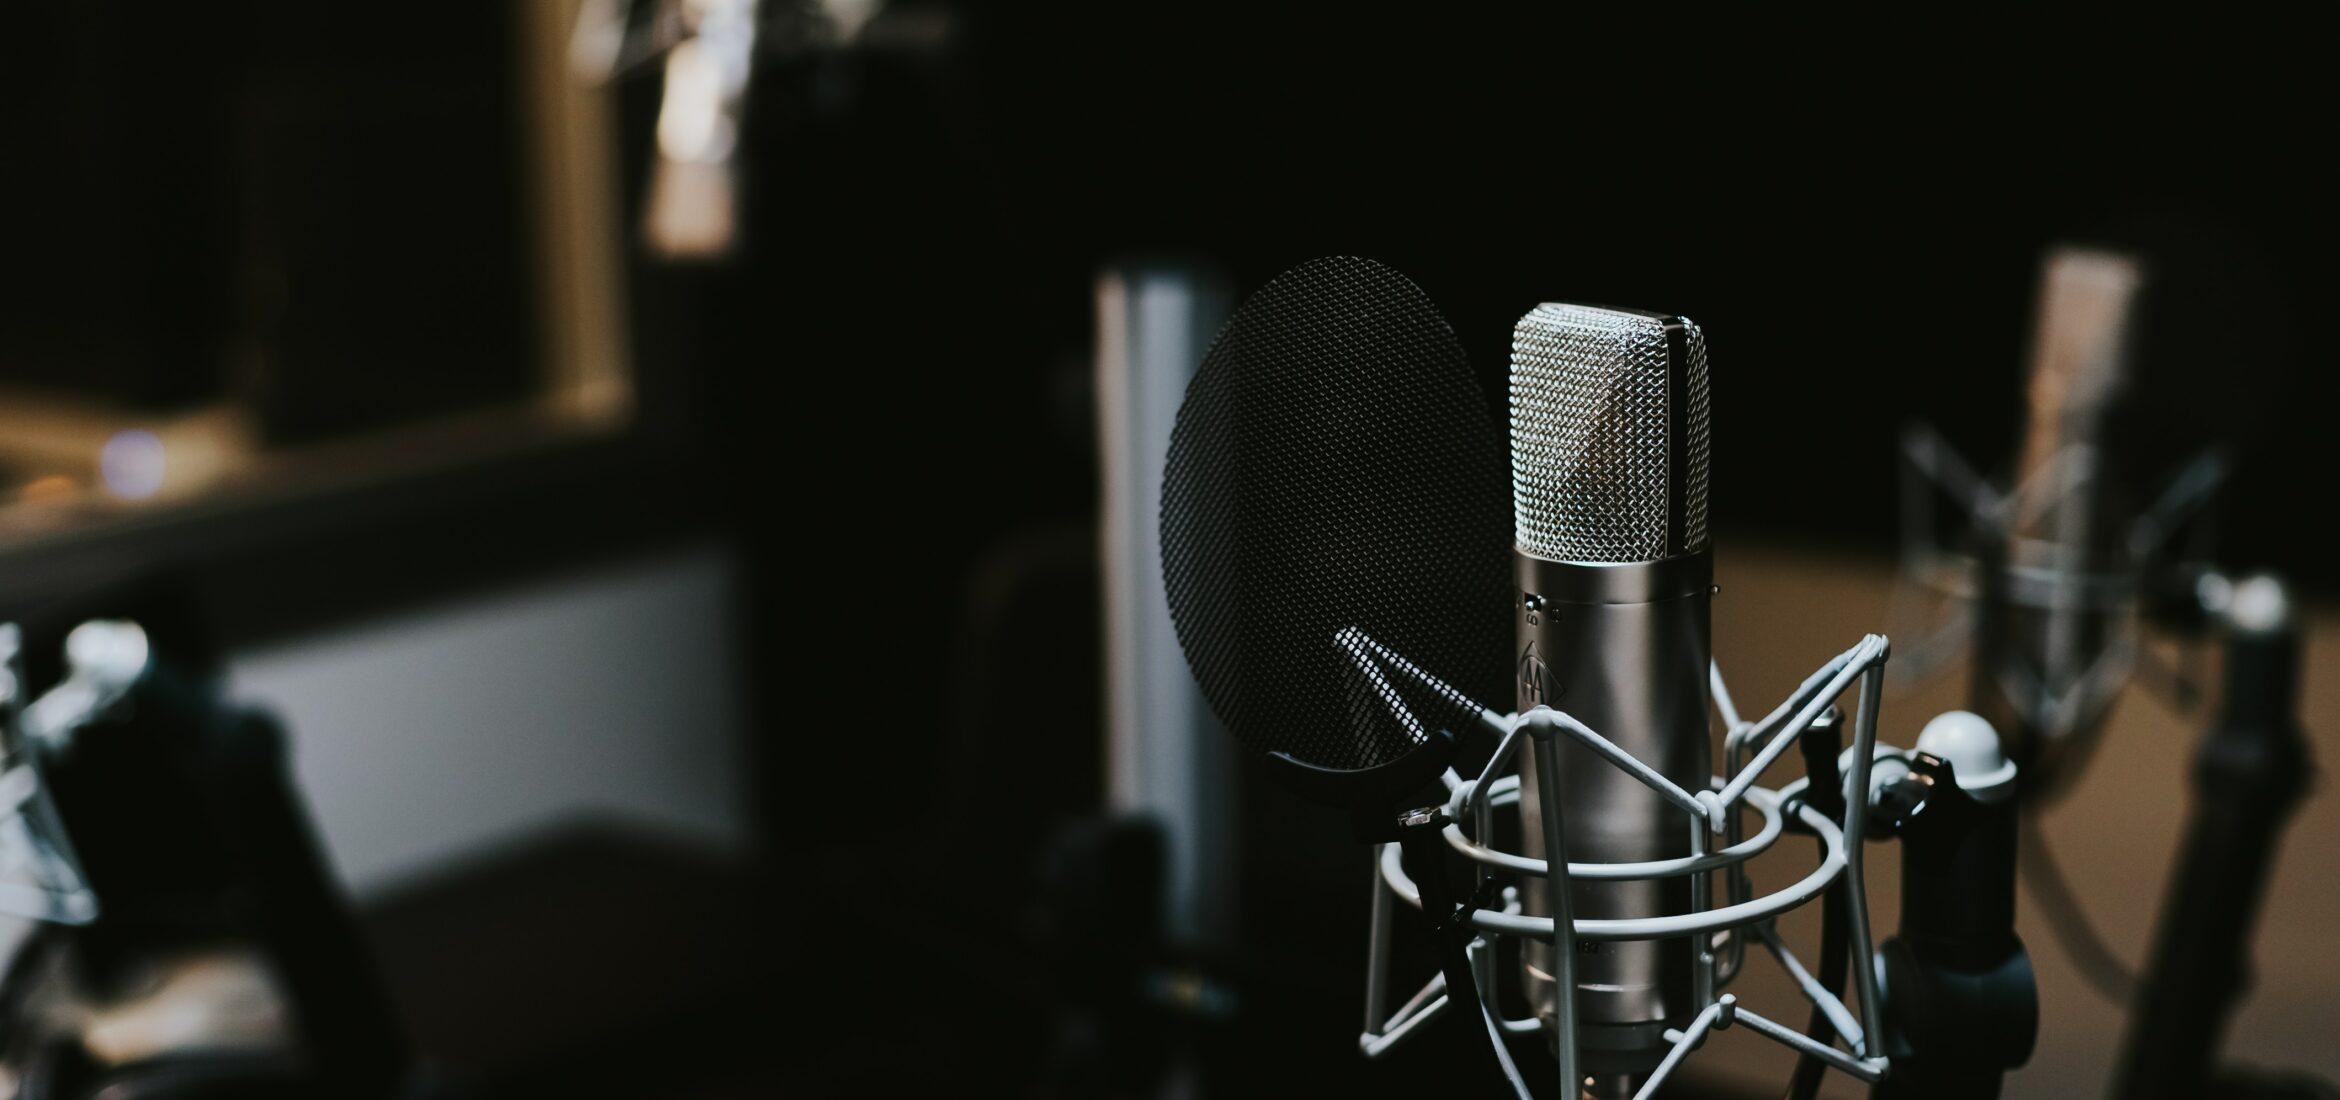
Welcome to this guide on A/D (Analog-to-Digital) and D/A (Digital-to-Analog) converters in the context of music production. These two devices are vital for capturing and reproducing sound in any modern studio. They form the bridge between the analog and digital worlds, ensuring that your vocal take, guitar riff, or full-band recording is translated accurately into your computer, and that digital audio signals leave the digital domain cleanly.
We often rely on converters without giving them much thought. Yet, they play a defining role in the clarity and character of recorded sound. When you plug your microphone into an audio interface and record into a DAW, you are trusting an A/D converter to transform those electric voltage waves into bits and bytes. Conversely, when you press play and hear music through studio monitors, you are depending on a D/A converter to reconstruct that digital audio into an analog signal that moves speaker cones.
In music production, getting good sound isn’t only about expensive microphones or professional rooms. It is also about letting those signals flow through stable, high-quality converters. A subpar converter might dull transients or add noise, diminishing the subtle details you worked so hard to capture. Even mid-range audio interfaces today can offer decent specifications, but it is worth understanding the underlying principles so you can make informed choices and avoid common pitfalls.
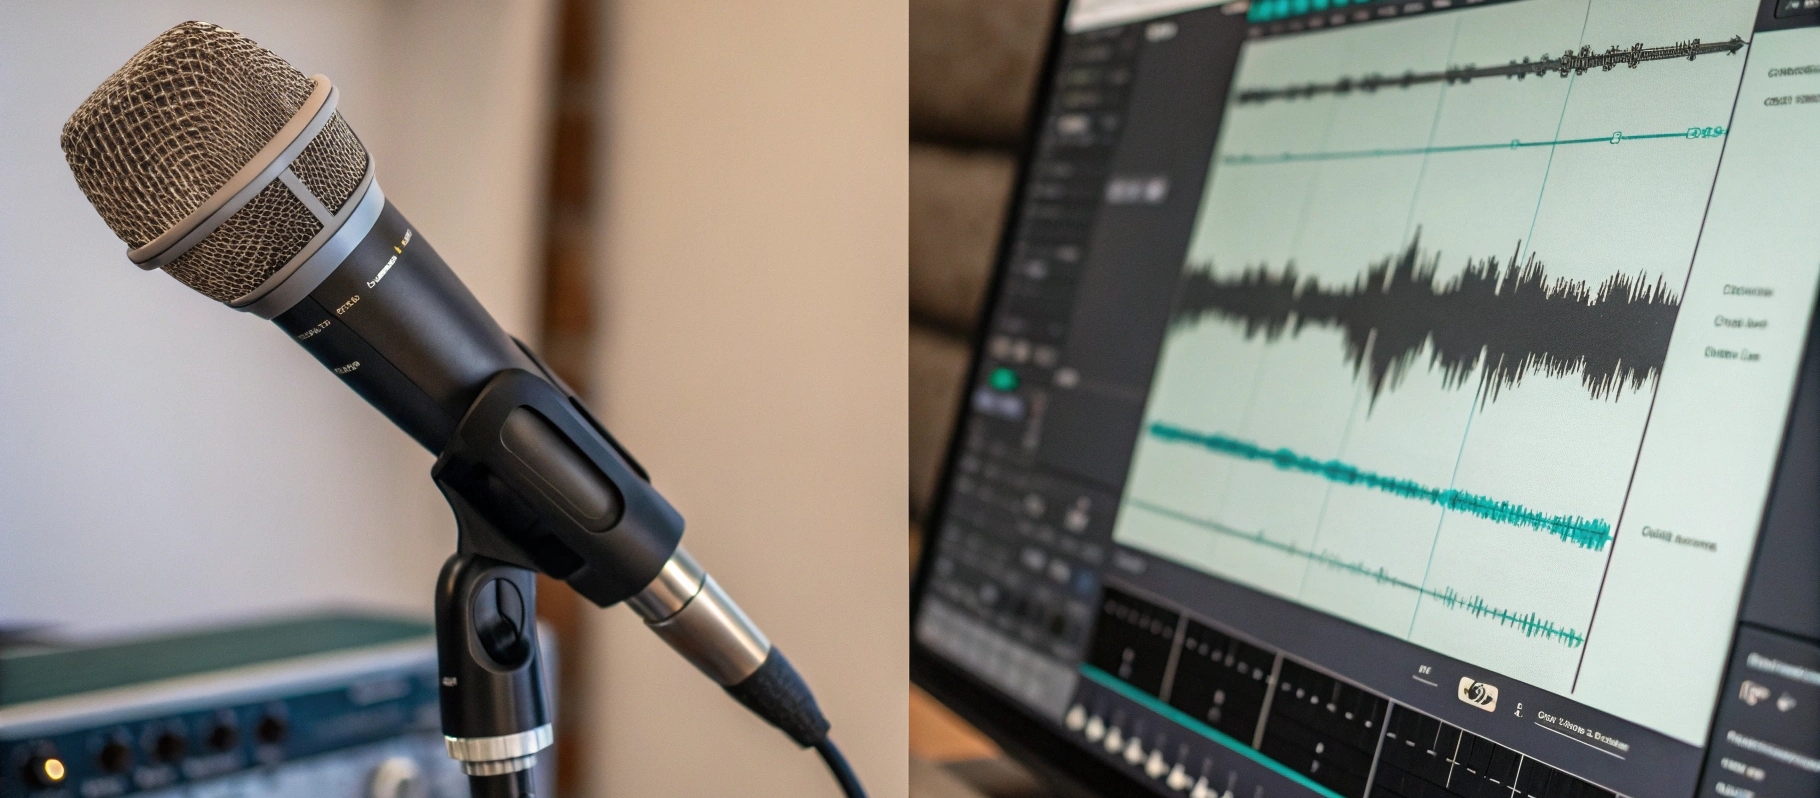
Table of Contents
- Understanding A/D and D/A Converters
- The Mechanics of Conversion
- Why Conversion Quality Matters
- Real-World Examples in Music Gear
- Technical Advice for Better Conversions
- Common Pitfalls and Troubleshooting
- Conclusion
Understanding A/D and D/A Converters
It helps to start with clear definitions. A/D stands for Analog-to-Digital, and D/A stands for Digital-to-Analog. In music production, an A/D converter captures analog audio signals, measures them at periodic intervals, and encodes them as digital data. A D/A converter does the inverse, taking digital data and reconstructing it as a continuous analog waveform.
Why They Matter
Whether you are recording a single vocal track or mixing a complex production, the converters you use will shape the signal at the most fundamental level. An analog signal is a continuous electrical representation of sound. A digital signal is a set of discrete numerical samples. The bridge between these worlds is the converter, which must handle every nuance of your performance.
If you have ever listened to a rough cassette tape transfer, you know how important fidelity can be. In digital audio, fidelity depends on technical factors such as bit depth, sampling rate, and converter design. Modern gear often has excellent specifications, but differences still exist. A high-end converter might reveal deeper low-level detail, produce lower noise, or have more transparent filtering. This can lead to more headroom and clarity, which becomes especially noticeable when stacking many tracks or applying subtle processing.
Where You’ll Find Them
In music production, you encounter converters in audio interfaces (like USB or Thunderbolt devices), dedicated standalone units (like high-end A/D or D/A racks), and even inside hardware samplers or digital mixers. Whenever a signal crosses from analog gear into a computer, or from the computer to speakers, converters take action. Because they are essential at multiple stages, it is worth learning the basics of how they work and how to get the best results from them.
The Mechanics of Conversion
A/D and D/A converters both revolve around two key concepts: sampling rate and bit depth. These determine how precisely an audio waveform is measured and stored, as well as how smoothly it is reconstructed on playback.
Sampling Rate
An analog waveform fluctuates continuously over time. A converter must measure that waveform many times per second to form a digital representation. The sampling rate is how frequently these measurements occur. For instance, a rate of 44.1 kHz means 44,100 samples each second.
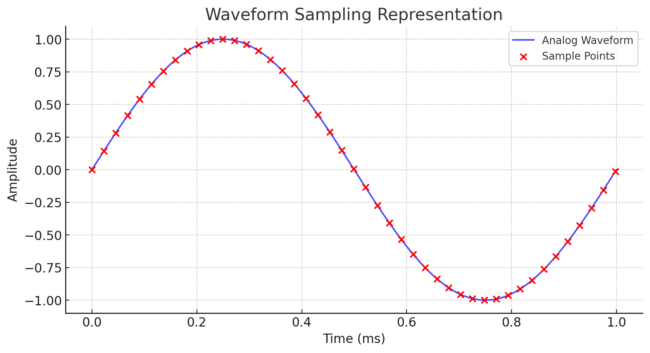
The Nyquist–Shannon theorem states that to capture frequencies up to 20 kHz (about the upper limit of human hearing), you need a sampling rate of at least 40 kHz. Commercial standards like 44.1 kHz or 48 kHz fulfill that requirement. Higher rates such as 96 kHz or 192 kHz offer more “headroom” for ultrasonic content and can minimize certain artifacts in heavy digital processing. However, higher rates also generate larger files and demand more CPU resources.
Bit Depth
While sampling rate deals with how often you measure, bit depth deals with how precisely each measurement is stored. A higher bit depth provides more detail in the amplitude of the waveform. The difference between 16-bit and 24-bit audio is significant: 24-bit audio has a vastly greater dynamic range. It also pushes the quantization noise (the noise introduced by rounding amplitude to the nearest available value) far below the audible threshold.
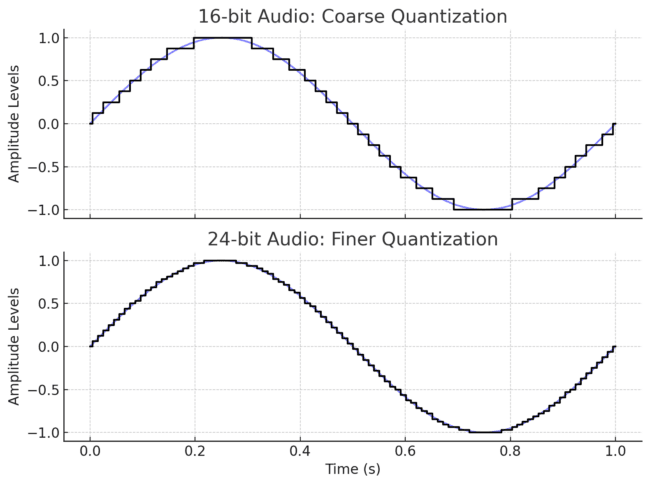
When you record, 24-bit is the standard in most studios. This offers around 16.7 million levels for each sample, which helps preserve quieter details and reduces the risk of noisy or distorted signals. In contrast, 16-bit audio, though still used in CDs, has less dynamic range and can become noisier if levels are not set carefully.
How A/D Conversion Works
During A/D conversion, the converter samples the analog voltage at the set sampling rate. It then quantizes that voltage to the nearest value allowed by the bit depth. This results in a stream of numbers representing the waveform’s amplitude over time. The better the converter and its surrounding circuitry, the more accurately it can capture tiny nuances.
How D/A Conversion Works
D/A conversion takes that series of sample values and recreates the waveform. The converter produces a corresponding output voltage at each sample instant, and an analog filter smooths these stepped voltages into a continuous signal. This is sent to your speakers or headphones, allowing you to hear digital audio as smooth, real-world sound again.
Why Conversion Quality Matters
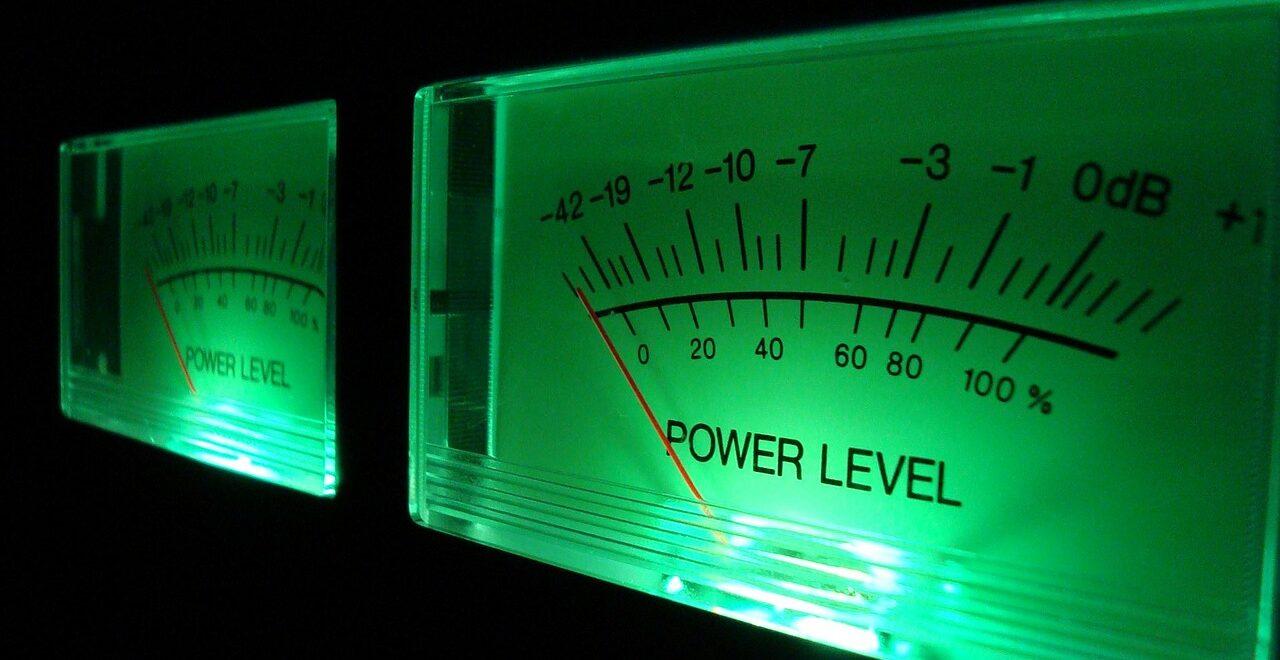
The most important reason to care about converter quality is your final sound. If you capture audio through a noisy or inaccurate A/D stage, you lose detail right from the start. If your D/A stage is poor, you do not hear your mix accurately. Here are some key factors that influence quality.
Dynamic Range and Noise Floor
A quality converter with high bit depth provides more dynamic range, meaning you can record both delicate and loud signals without hiss or distortion. This helps when layering tracks or using lots of processing. A cheap converter can still function, but might add enough noise to become an issue after repeated tracks or heavy compression.
Distortion and Transparency
Converters always introduce a small amount of distortion. Good designs keep it minimal and unnoticeable. Some specialized converters even add deliberate coloration through transformers or specific analog paths for a more “musical” vibe. Others aim for transparency, so the signal is captured or played back exactly as it is.
Clocking and Jitter
Converters rely on a clock to time each sample. If the clock timing fluctuates (known as jitter), it can cause audible distortion or an unclear stereo image. High-end interfaces and dedicated units often include advanced clock designs to ensure stable timing. If you are running multiple digital devices, you must synchronize them to avoid clicks or pops.

Monitoring and Mixing Decisions
Accurate D/A conversion is crucial when making creative decisions. If the playback is muddy or has a harsh top end, you might compensate in your mix, only to discover later that the problem was your converter. Clean D/A ensures you hear what is really happening, so you can mix and master with confidence.
Real-World Examples in Music Gear
Converters appear in many forms. Below are common scenarios you might encounter in music production.
Audio Interfaces
Most producers use an audio interface with built-in A/D and D/A converters. Popular brands include Focusrite, Universal Audio, Audient, PreSonus, and MOTU. Even budget models now boast 24-bit conversion and sample rates up to 192 kHz. They also include mic preamps, headphone outputs, and driver software. For many home studios, a reliable interface with good converters is the backbone of all recording and mixing tasks.
Standalone Converters
Professional studios may use standalone or mastering-grade converters. These devices focus purely on conversion quality, with careful analog circuitry and clocking. Apogee, Prism Sound, Burl, Lynx, and RME are some makers of high-end converter units. Such gear can provide ultra-low noise floors and more transparent sound than many all-in-one interfaces.

Converter Chips and Circuits
Inside each interface or standalone box is an actual converter chip. Common manufacturers include AKM, Cirrus Logic, ESS Sabre, and Burr-Brown. Although the chip matters, the design of the supporting analog circuits and power supply can drastically affect real-world performance. Two interfaces using the same chip may still sound different due to variations in analog engineering.
D/A for Playback and Monitoring
High-quality D/A converters have also found a home among audiophiles, who want pristine playback. In the studio, a detailed DAC can reveal subtle nuances during mixing or mastering. If you cannot hear small changes in reverb tails or EQ, it might be due to a less accurate D/A stage. Some engineers use specialized DACs that exceed the performance of typical audio interfaces, ensuring nothing is lost when previewing a mix.
Hybrid Approaches
Gear like the Burl Audio B2 Bomber or certain Universal Audio units may add analog coloration during A/D capture, then provide a neutral D/A for monitoring. This hybrid approach appeals to those who want some analog “character” without sacrificing a clean signal path when listening. These decisions depend on artistic preference and how you want your recordings to sound.

Technical Advice for Better Conversions
While good gear helps, proper technique is crucial to achieve clean, detailed recordings. Below are general tips to optimize your setup and workflow.
Choose the Appropriate Sample Rate
Pick a sample rate that suits your project. Many professionals record at 48 kHz or 44.1 kHz to keep file sizes manageable. 96 kHz can yield advantages in heavy processing or extreme high-frequency content. However, the audible improvement for final playback may be negligible. Higher rates also require more CPU power, so balance quality with practicality.
Record at 24-Bit Depth
Almost everyone in modern production uses 24-bit for recording. This gives you plenty of headroom. It reduces the noise floor and makes gain staging more forgiving. Even if your final format is 16-bit (like a CD), record and mix at 24-bit and only convert at the very end.
Maintain Proper Gain Staging
Ensure your input levels do not clip the A/D converter. Peaks around -12 dBFS or -6 dBFS give you a safety margin. With 24-bit depth, you still get great resolution even at modest levels, so there is no need to push signals near 0 dBFS. Avoid digital clipping because it introduces harsh distortion that cannot be fixed later.
Watch Your Monitoring Chain
A clean D/A stage is essential when making mix decisions. Use quality cables and balanced connections where possible. If you suspect your interface’s D/A stage is inadequate, consider auditioning a better interface or a dedicated DAC. Even a small improvement in clarity can have a significant impact on your final mix.
Use Dither When Down-Sampling
If you need to reduce bit depth (for example, from 24-bit to 16-bit), apply dither. This process adds low-level noise in a controlled way to mask quantization artifacts. Most DAWs include a dithering option when bouncing or exporting. It keeps your quiet details smoother rather than harshly truncated.
Manage Multiple Digital Devices
When you use multiple pieces of digital gear, you must synchronize their clocks. Let one device act as the master clock, and have the others follow. You can connect them via word clock cables or a digital audio link (such as ADAT or AES) that carries clock data. Inconsistent clocking causes jitter or audible clicks and pops.
Avoid Needless Round-Trips
Each conversion from analog to digital (or back) can add slight noise or color. In a purely digital workflow, do not send a track out as analog and re-record it unless you want that specific analog character. If you do use outboard gear, plan your routing to minimize repeated conversions.
Common Pitfalls and Troubleshooting
Even with a decent interface, issues can arise. Here are a few problems to watch for, along with steps to fix or prevent them.
Aliasing
Aliasing occurs when frequencies above half your sampling rate reflect back into audible ranges, creating unwanted artifacts. Most modern A/D converters use anti-aliasing filters to prevent this. But in plugin processing or when down-sampling, aliasing can creep in. If you hear strange high-pitched or non-musical sounds, consider increasing your sample rate or using plugins that oversample internally. Also, ensure you use quality resampling algorithms if you convert a file’s sampling rate.

Jitter and Clock Instability
Jitter is a fluctuation in the timing of samples. It can cause subtle distortion or reduce stereo clarity. Most single-interface setups will have stable enough clocks. Problems emerge if you try to chain multiple digital devices without proper sync. Make sure there is one master clock and that the others are locked to it. Check your interface’s control panel or front panel to confirm sync.
Digital Clipping
Exceeding 0 dBFS in the digital domain creates harsh clipping. This is most common during recording when the signal is too loud. It can also happen in the DAW’s mixer if combined tracks push the master above 0 dBFS. Keep track levels conservative. If you see red indicators, lower the preamp gain or your plugin output. Unlike analog saturation, digital clipping is not pleasing and is almost impossible to repair after the fact.
Noise and Interference
Sometimes you hear an annoying hum or whine in your recordings. It might not be the converter’s fault. Ground loops or electrical interference can pollute the analog signal before it hits the A/D. Use balanced cables, check for ground loop isolators, and keep audio cables away from power cables. If you experience whine from a laptop power supply, try different outlets or a USB isolator. The converter will faithfully capture everything, including noise, so you must eliminate it at the source.
Latency and Buffer Size
Conversion introduces a small latency while the device captures or plays samples. Buffer size in your DAW also affects overall latency. If your buffer is too large, monitoring feels delayed. If it is too small, you risk pops or CPU overloads. Find a workable balance, and consider direct monitoring if your interface allows it. This routes the signal directly from input to output without waiting on the computer.
Wrong Sample Rate Settings
If your interface is set to 48 kHz but your session is at 44.1 kHz, you might hear audio playing at the wrong speed. Double-check that all hardware and software are aligned. Do not mix files at different rates in one project unless you are certain your DAW is converting them correctly.

Conclusion
A/D and D/A converters are the essential translators that bring real-world sound into the digital domain and back again. Although they may seem technical, understanding their role unlocks better recordings, clearer mixes, and fewer headaches. By choosing a capable interface, recording at 24-bit, and respecting proper gain staging, you can capture your music with fidelity and headroom. By maintaining accurate clocking, you prevent jitter from blurring your audio. And by ensuring your D/A chain is good enough, you hear every detail you need to make informed mix decisions.
For most producers, a single, well-chosen audio interface provides both a solid A/D stage for recording and a reliable D/A stage for monitoring. Even basic units today can achieve great results if used properly. Higher-end converters can refine the last few percentages of clarity or add a sought-after analog flavor when desired. Ultimately, the best approach is the one that suits your style, budget, and workflow. However, it is wise to remember that converters are not a place to cut corners. Any imperfections are baked into your signal at the moment of capture and influence how you hear your work at every playback.
When your converter setup is optimized, you can focus on the creative side of music production. You will know that what enters your DAW is as accurate as possible, and you will trust what you hear when mixing and mastering. That confidence can translate into better recordings, smarter decisions, and polished final mixes. So take some time to understand your converters, set them up correctly, and enjoy the benefits of a clean, transparent signal path. Your music deserves nothing less.
O autorze

Néstor Rausell
Wokalista, muzyk i specjalista ds. marketingu treściNéstor Rausell to wokalista rockowego zespołu „Néstor Rausell y Los Impostores”. W MasteringBOX pracuje jako specjalista ds. marketingu.
Zostaw komentarz
Zaloguj się, aby skomentować