Optimizing the performance of your Digital Audio Workstation (DAW) can feel like navigating a dense maze of technical settings and workflow decisions. Yet, when you’re juggling dozens of tracks and plugins, the last thing you want is for your system to buckle under the load—leading to crackles, pops, and frustrating interruptions. Whether you’re a beginner just learning about buffers and sample rates or an advanced producer looking to refine your existing workflow, this comprehensive summary will guide you through strategies to keep your DAW running smoothly. You’ll discover how to manage CPU load, reduce latency, and ensure you spend more time creating music rather than wrestling with technical headaches.
Table of Contents
- Understanding CPU vs. Latency Basics
- General Performance Tips for All DAWs
- Audio Interfaces and Latency
- Advanced Workflow Strategies
- DAW-Specific Optimization Tips
- Audio Interface Considerations and Direct Monitoring
- Advanced Workflow Strategies in Detail
- Ensuring Smooth Playback
- Extended Strategies for Complex Sessions
- Troubleshooting Common Issues
- Conclusion
Understanding CPU vs. Latency Basics
It’s important to start with the core principle of DAW performance: the delicate balance between CPU usage and latency. Every time you record a new audio or MIDI part, or load another plugin, you add more complexity to the session. If your computer’s processor struggles with these calculations, you can end up with stutters and pops. Simultaneously, pushing for extremely low latency can also strain the CPU. In this section, we’ll explore exactly why that happens and what you can do to control it.
The CPU-Latency Trade-Off
The relationship between CPU load and latency is straightforward but vital to understanding DAW performance. A smaller buffer size gives you lower latency, meaning you hear the results of your actions—like playing a note on a MIDI keyboard—almost immediately. The downside is that the CPU has less time to process audio, increasing the risk of overload when you stack up many plugins and tracks.
On the other hand, a larger buffer size eases the load on your processor. The computer has more time to handle complex tasks, which is ideal during mixdown when real-time interactivity is less important. However, bigger buffers add to your latency, making real-time performance more cumbersome for tasks like recording vocals or playing software instruments.
Rule of Thumb:
- Smaller buffer sizes (64–128 samples) for tracking or performing in real time.
- Larger buffer sizes (512–2048 samples) for mixing and mastering when direct responsiveness is less critical.
Impact of Sample Rate on DAW Performance
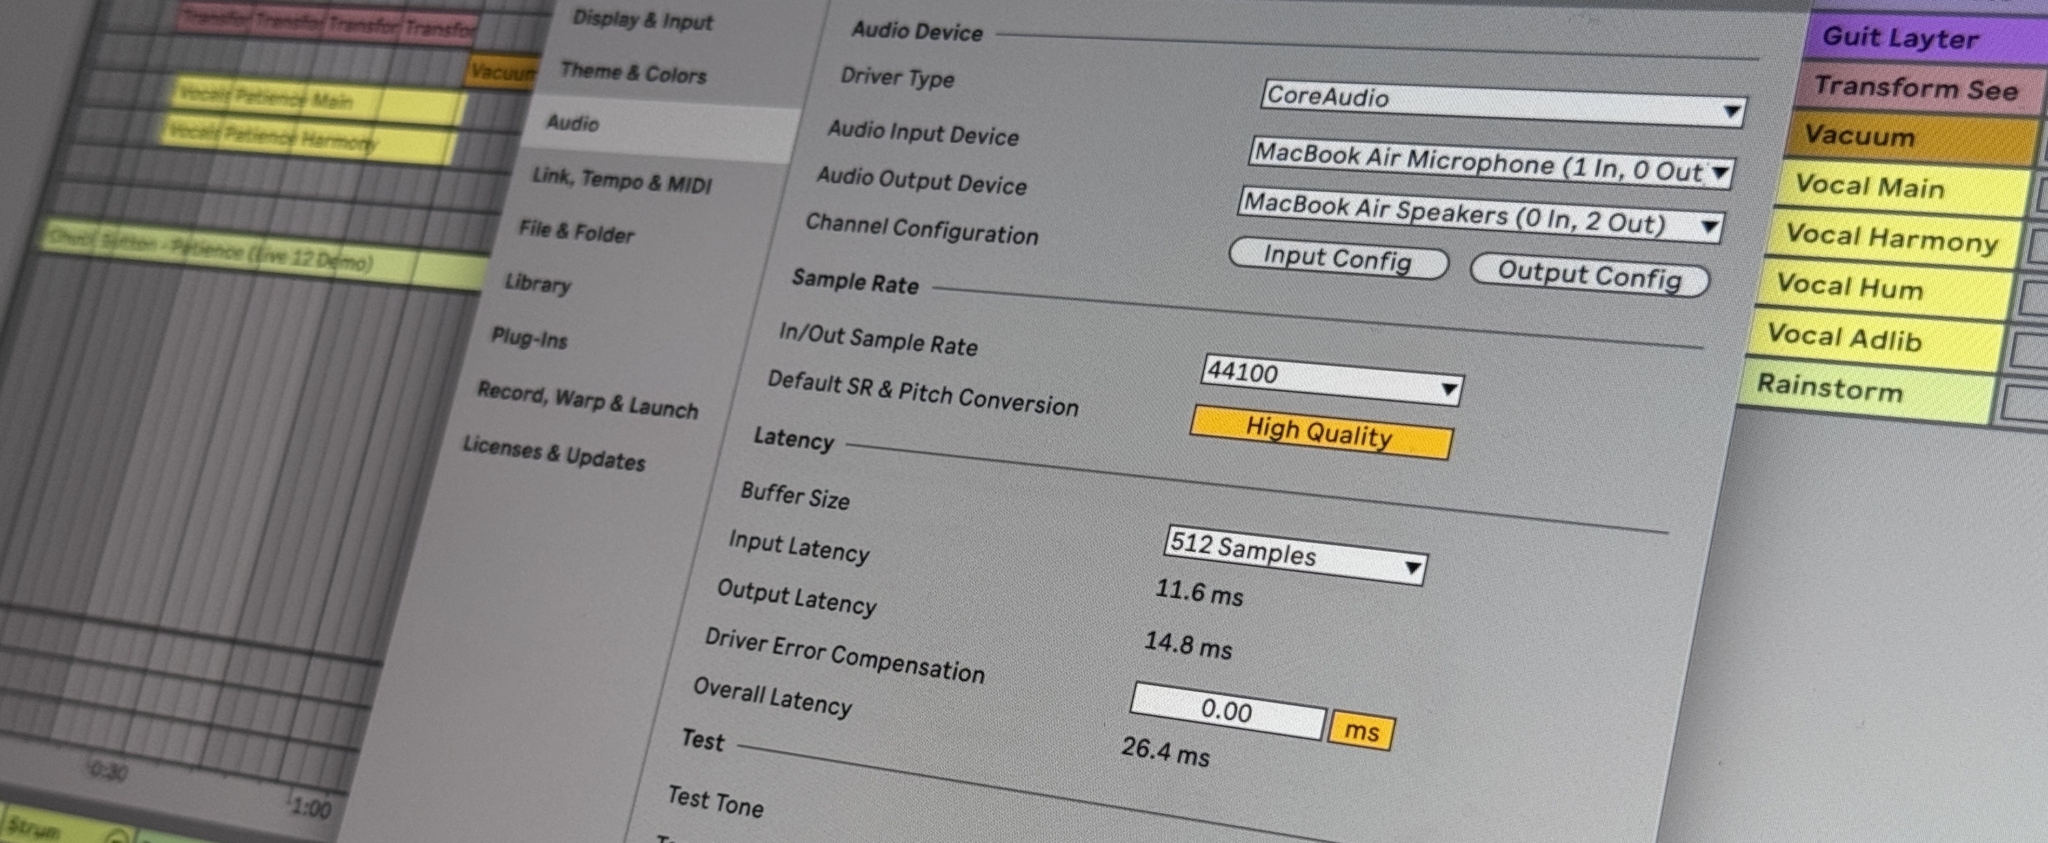
Along with buffer size, the sample rate significantly affects how much strain you put on your CPU. Higher sample rates, such as 88.2 kHz or 96 kHz, produce more detailed audio but dramatically increase the processing load. Unless you have a specific requirement for ultra-high fidelity, sticking to standard rates like 44.1 kHz or 48 kHz is typically enough for most productions.
It’s also wise to remember that if you do choose a higher sample rate, your plugins and virtual instruments will consume more CPU. If your system starts to bog down under the weight of large projects, it may be beneficial to revert to a lower sample rate before attempting other fixes.
Key Insights for Beginners
If you’re just starting out, the most important takeaway is that there is no single perfect setting. Each project is different, so your best bet is to begin at a moderate buffer size—perhaps 128 or 256 samples—and experiment. If you start hearing dropouts, increase the buffer. If you feel the latency is too high while playing or singing, lower the buffer. It’s a continuous dance, but with practice, you’ll intuitively know which settings work best for your workflow.
General Performance Tips for All DAWs
No matter which DAW you’re using, some fundamental strategies apply across the board. These approaches can dramatically increase your system’s efficiency and let you run larger, more complex projects.
Adjust Buffer Size as You Move Through the Production Process
When you’re laying down tracks or performing on virtual instruments, use the smallest buffer size your system can handle without audio glitches. This keeps latency to a minimum. The moment you switch gears to mixing, raise your buffer size. By doing so, you free up CPU cycles and reduce the risk of audio dropouts as you add effects and processing.
Why This Helps
- During recording, low latency prevents distracting delays.
- During mixing, high latency is less of a concern, so you can relieve CPU stress.
- Switching between buffer sizes is a quick, effective method to manage CPU load in real time.
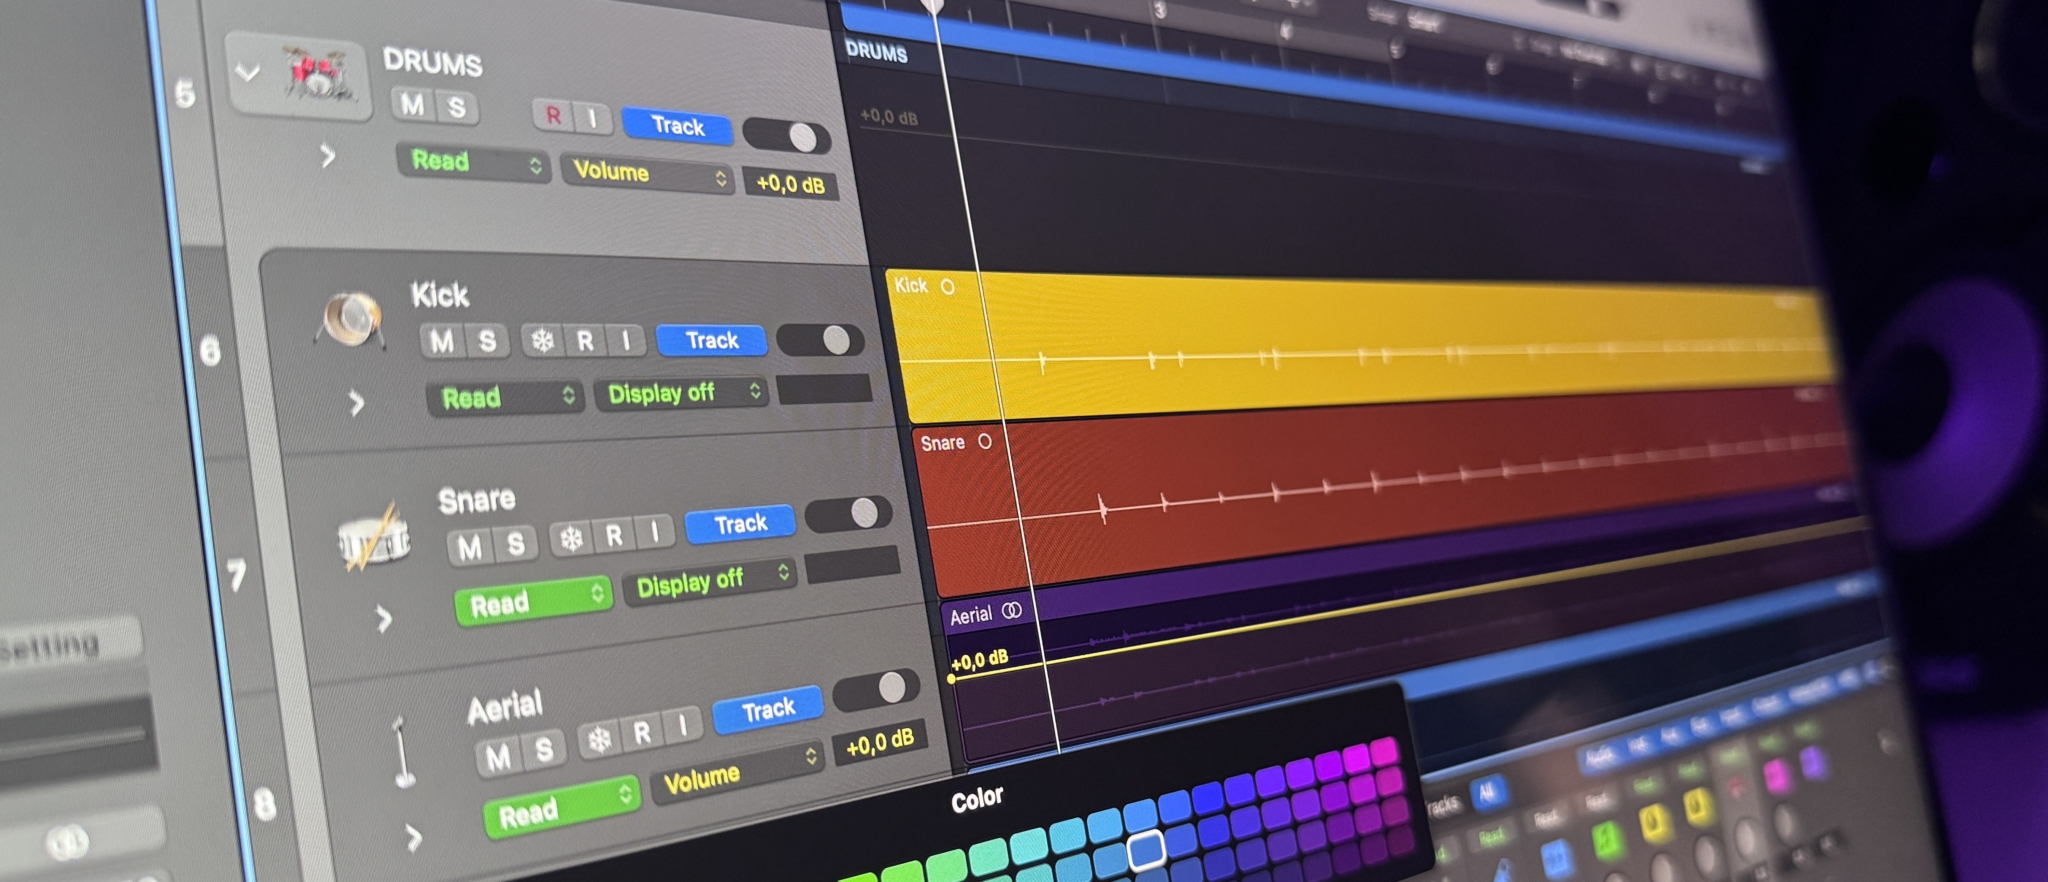
Freeze Tracks and Bounce to Audio
One of the most significant techniques for CPU management is freezing or bouncing instrument tracks to audio. Virtual instruments often require substantial CPU resources, especially if they feature high-quality sample libraries or complex synthesis. Freezing (or rendering) these tracks takes a “snapshot” of the sound and plays it back as a simple audio file, freeing your CPU from having to calculate the instrument’s output in real time.
Practical Tips
- Freeze Tracks: If your DAW has a one-click freeze feature, use it on any track that is finalized enough not to require constant tweaking.
- Bouncing to Audio: For DAWs without a dedicated freeze button, manually bounce the track to audio. This is a great option if you’re confident you won’t need further edits on the instrument’s MIDI or plugin settings.
- Stem Bouncing: Sometimes it’s efficient to bounce group stems (like all backing vocals or the entire drum kit) to further reduce load. This approach ensures you have fewer individual tracks to manage, freeing CPU and simplifying your mix.
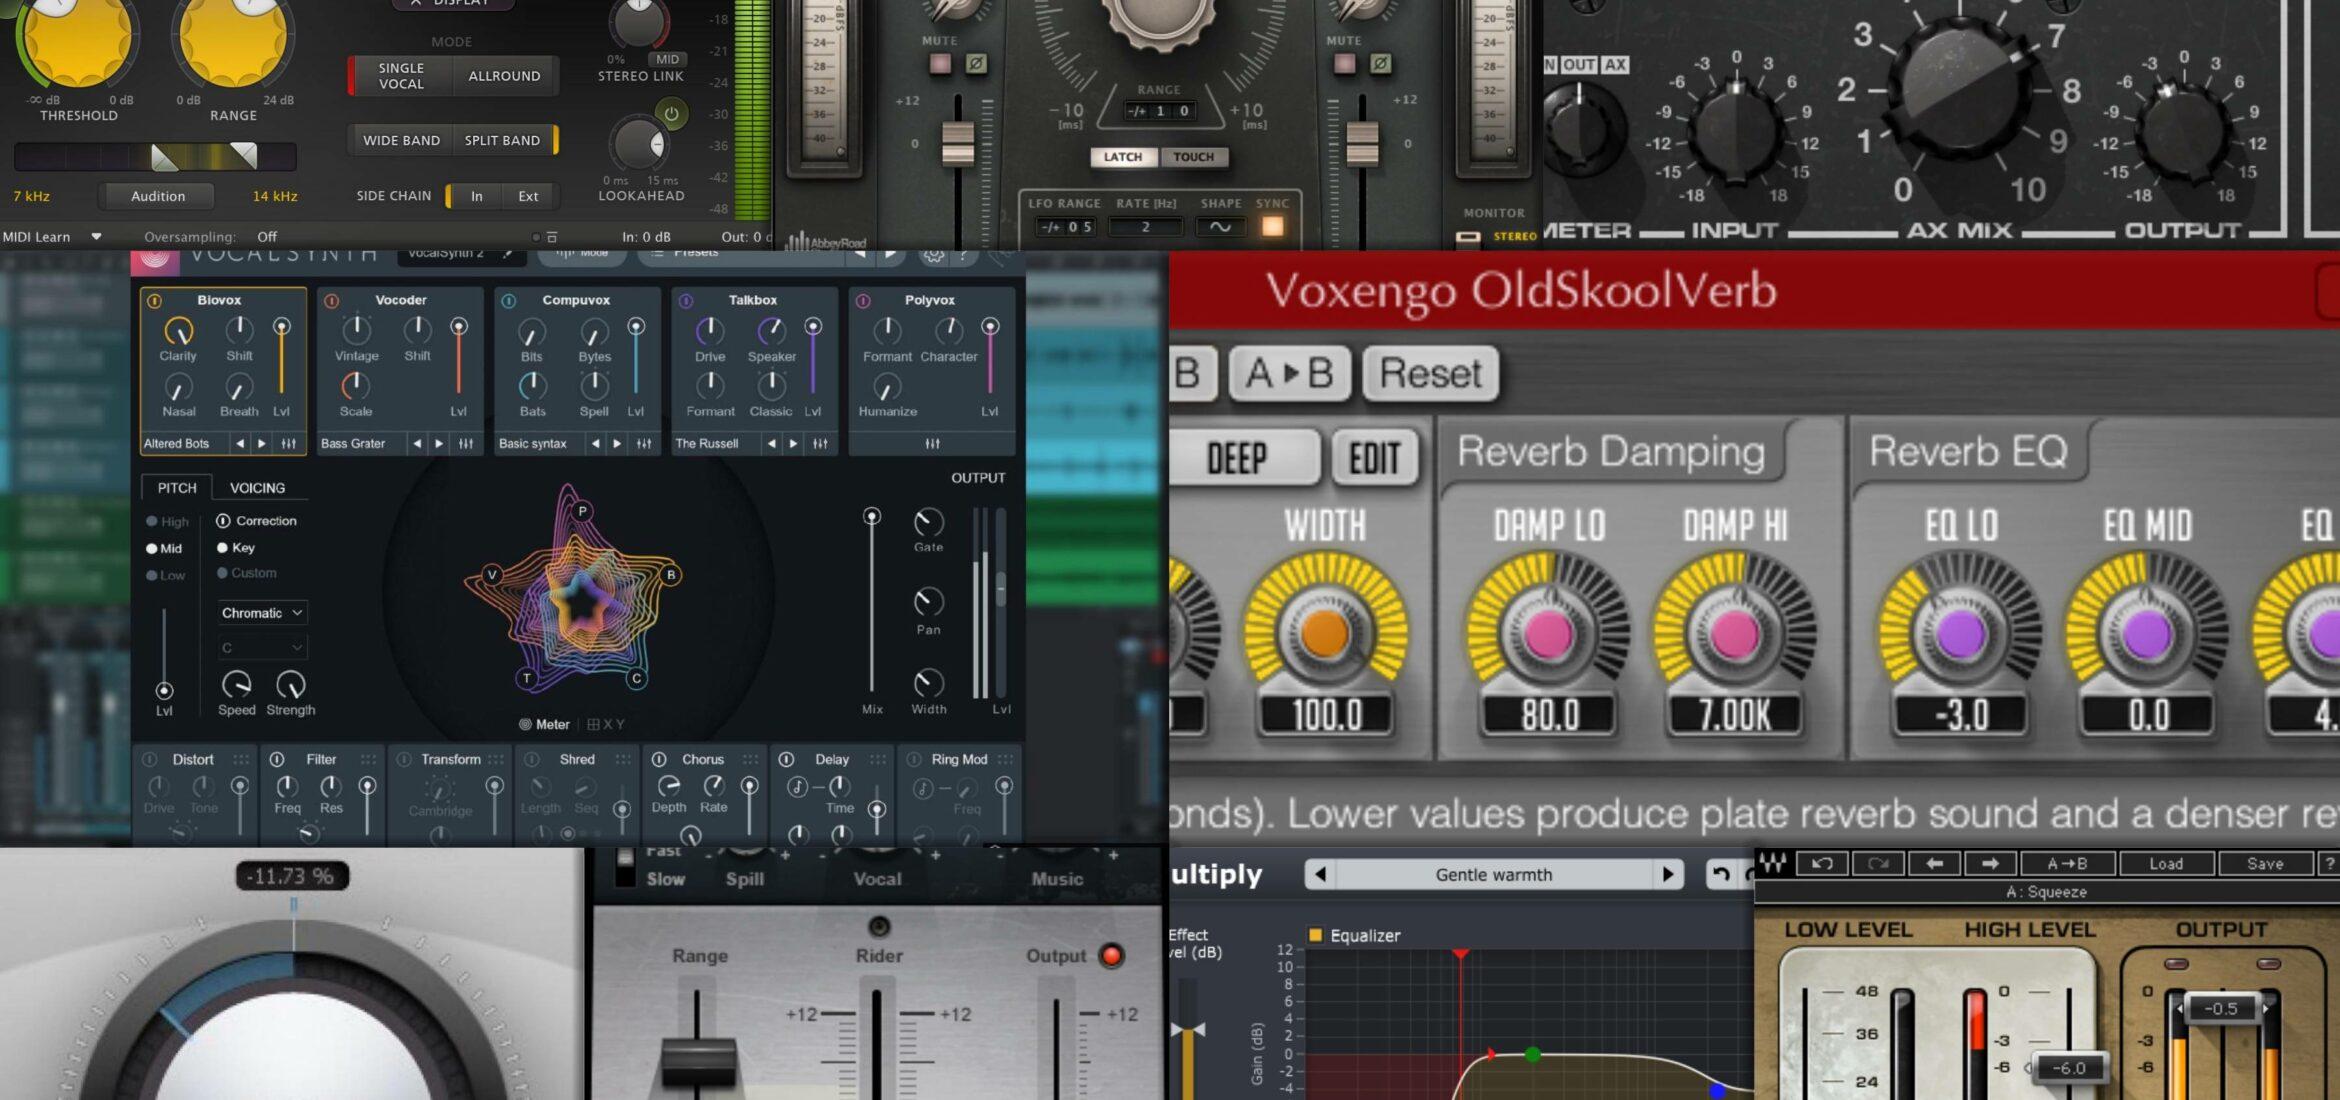
Manage Plugins and Plugin Delay Compensation
Plugins can be the biggest offenders when it comes to high CPU usage. Effects like reverbs, mastering limiters, and linear-phase EQs can introduce significant latency. Your DAW compensates by delaying other tracks to keep everything in sync, which increases the overall load.
Key Techniques
- Use Minimalist Versions: Some plugins have low-quality or “eco” modes that reduce CPU consumption. Switch to high-quality settings only when necessary—often during the final stages of mixing or right before you bounce the track.
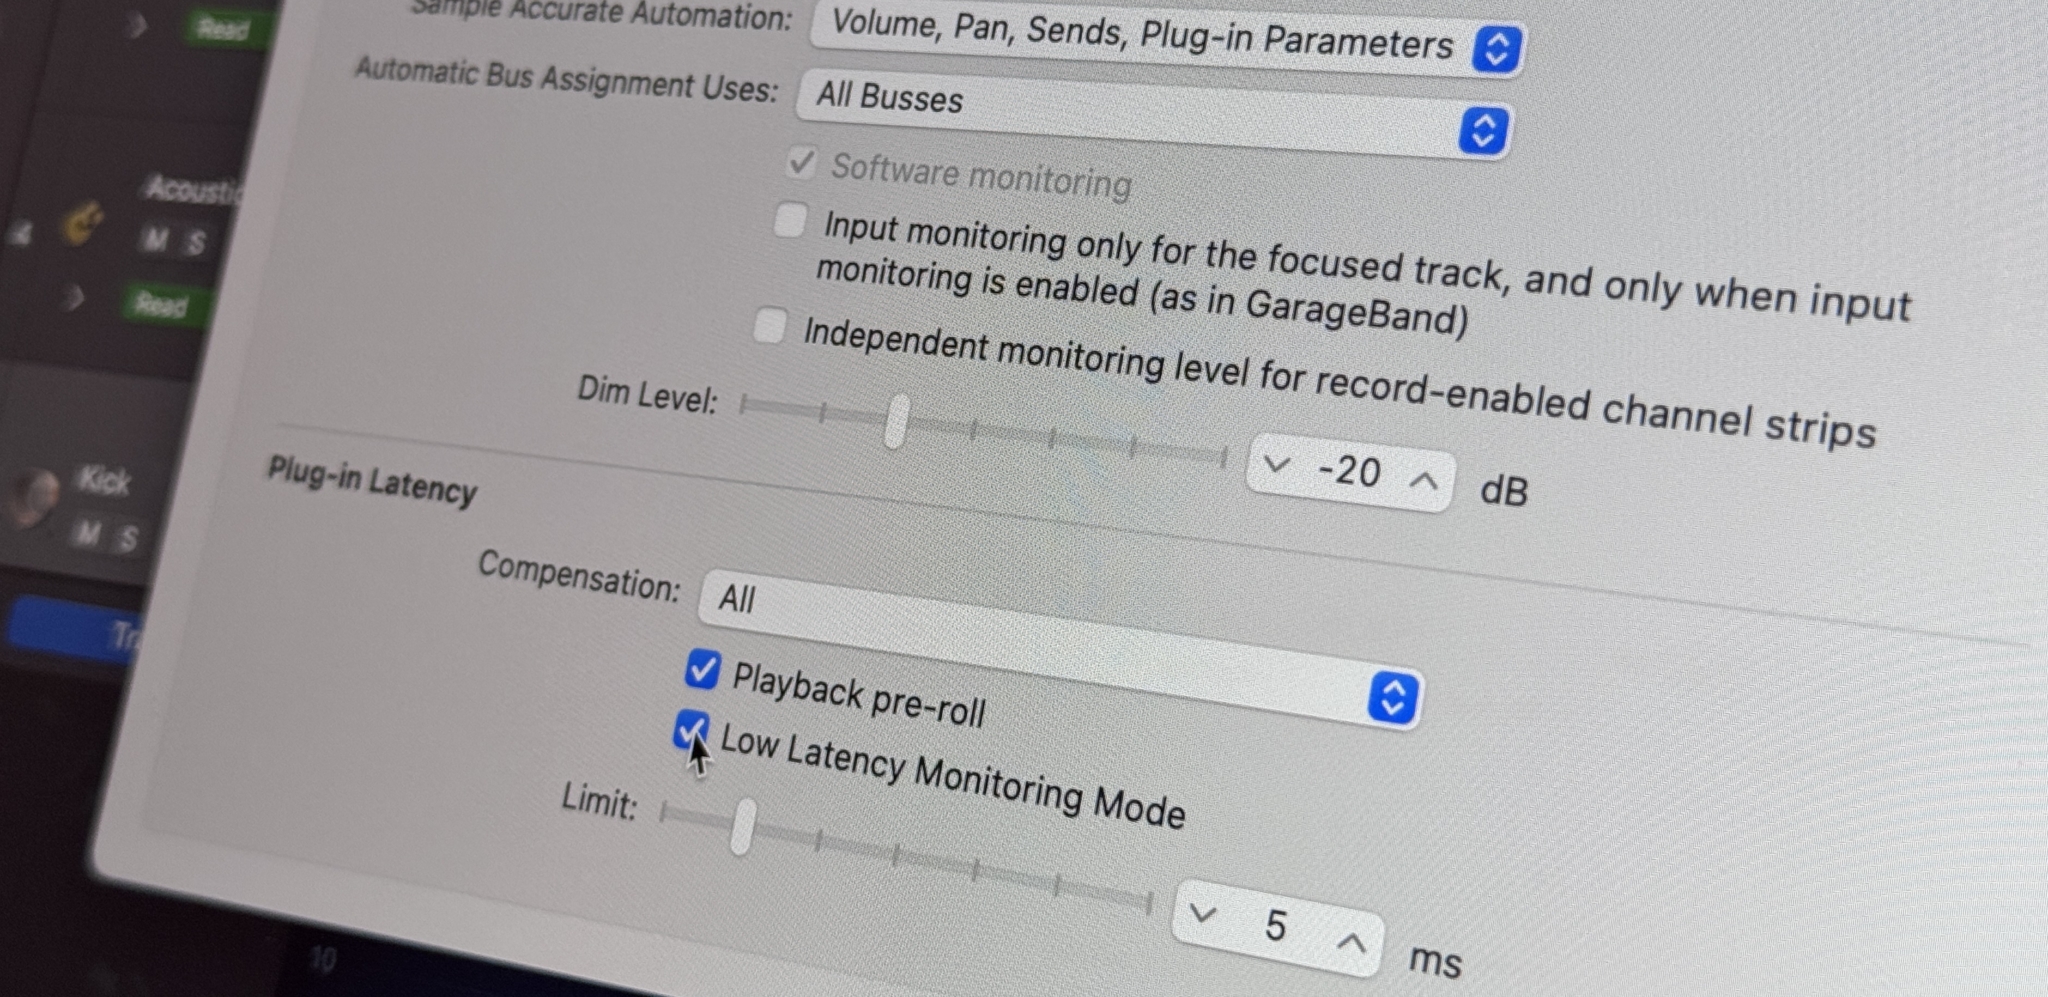
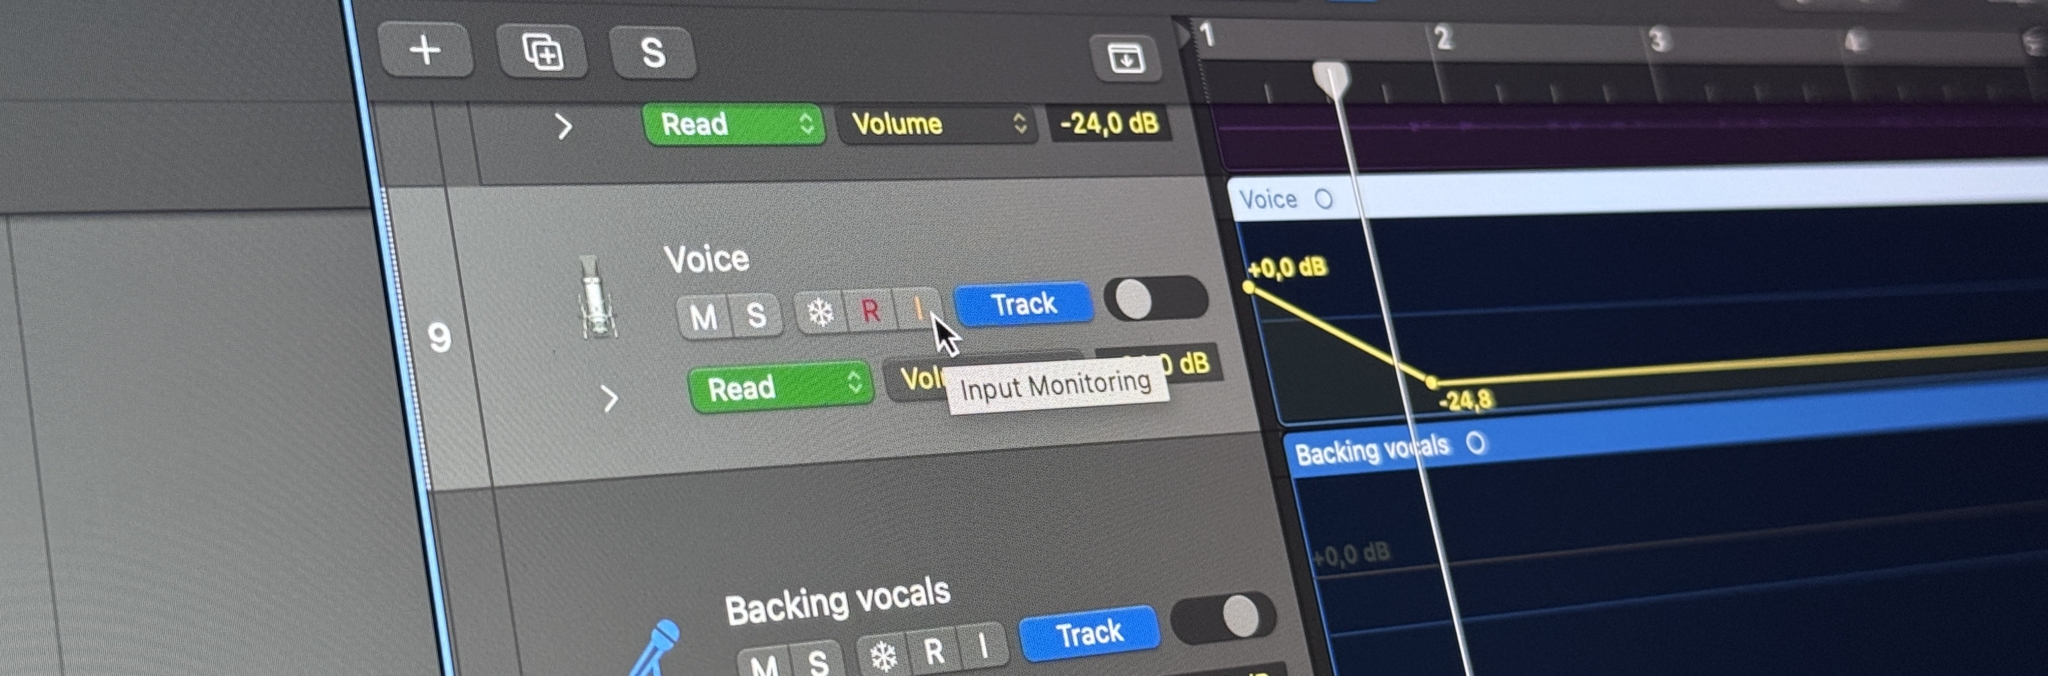
- Bypass Latent Plugins While Tracking: Many DAWs have a low-latency monitoring mode that disables or bypasses high-latency effects when you’re recording or monitoring. This keeps your direct monitoring tight and responsive.
- Limit Oversampling: Oversampling is a feature found in some plugins that can improve audio quality but at the cost of extra CPU. Save oversampling for mixdowns or mastering if you’re short on processing power.
Disable Unused Inputs and Tracks
Every enabled input or output in your interface consumes some resources, even if you’re not actively recording. If you have a multi-channel interface but are only using two channels, disable the extras in your DAW’s audio preferences. Similarly, mute or fully disable tracks you don’t need. Many DAWs let you deactivate tracks, effectively shutting down their plugins and saving CPU.
Close Background Applications and Maximize System Resources
Your DAW doesn’t operate in isolation. Video calls, web browsers with dozens of open tabs, and other background processes all compete for CPU, RAM, and disk bandwidth. By closing unnecessary programs, you ensure your computer dedicates its power to your music.
Additional System Tweaks
- Enable High Performance Mode: On Windows, set your power plan to “High Performance,” and on macOS, ensure your energy-saver options don’t throttle CPU.
- Keep Your Computer Cool: Good ventilation helps prevent thermal throttling. Overheating often forces CPUs to run slower.
- Restart Before Large Sessions: This ensures any leftover processes or memory leaks are cleared.
Audio Interfaces and Latency
Your audio interface and its drivers play a crucial role in real-time audio performance. A solid interface with optimized drivers can handle lower buffer sizes more reliably than a budget or generic built-in sound card.

Choosing the Right Driver and Updating Firmware
On Windows, always opt for ASIO drivers provided by your interface manufacturer or consider ASIO4ALL if you lack dedicated drivers. On macOS, the system’s CoreAudio driver is typically efficient, so just make sure you keep your interface’s firmware and drivers current.
Tips for Reducing Interface-Related Latency
- Direct Monitoring: Many interfaces have a direct monitoring option that routes the input signal straight to the output without going through the DAW. This essentially removes any software-related latency.
- Consolidate Devices: If possible, use one audio device. Running multiple interfaces simultaneously can complicate your setup and cause inefficiencies.
- Check for Updates: Regularly visit your audio interface manufacturer’s website for driver and firmware updates that may fix bugs or boost DAW performance.
Advanced Workflow Strategies
If you’re working on massive sessions—dozens or even hundreds of tracks—these advanced techniques can help you sidestep potential bottlenecks.
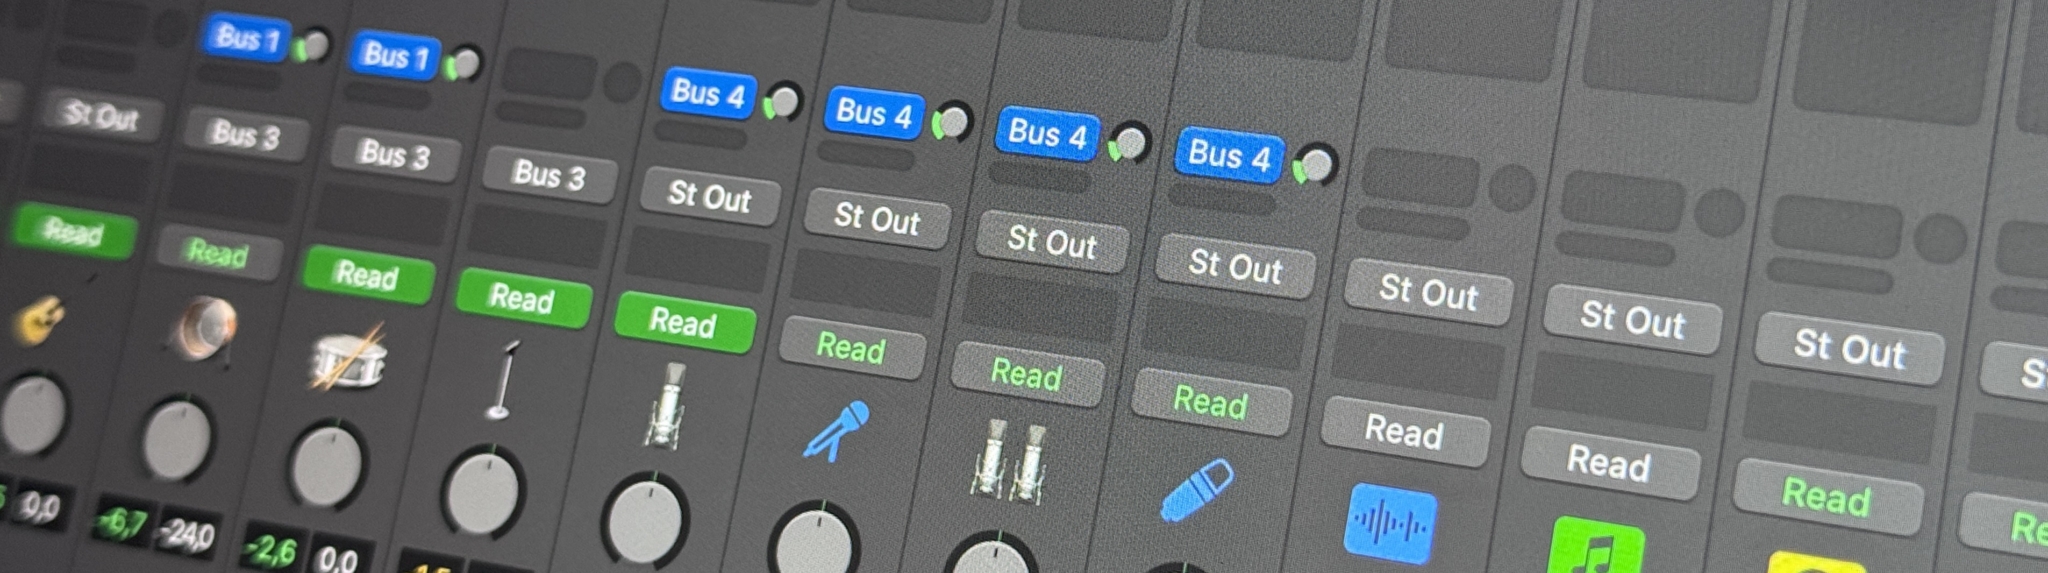
Organize, Bus, and Bounce
Grouping tracks can simplify your session and conserve CPU resources. For instance, routing all drums to a single bus means you can apply compression, EQ, or saturation once rather than on individual tracks. Eventually, you can bounce or render that bus as a single audio stem if you still need more CPU room.
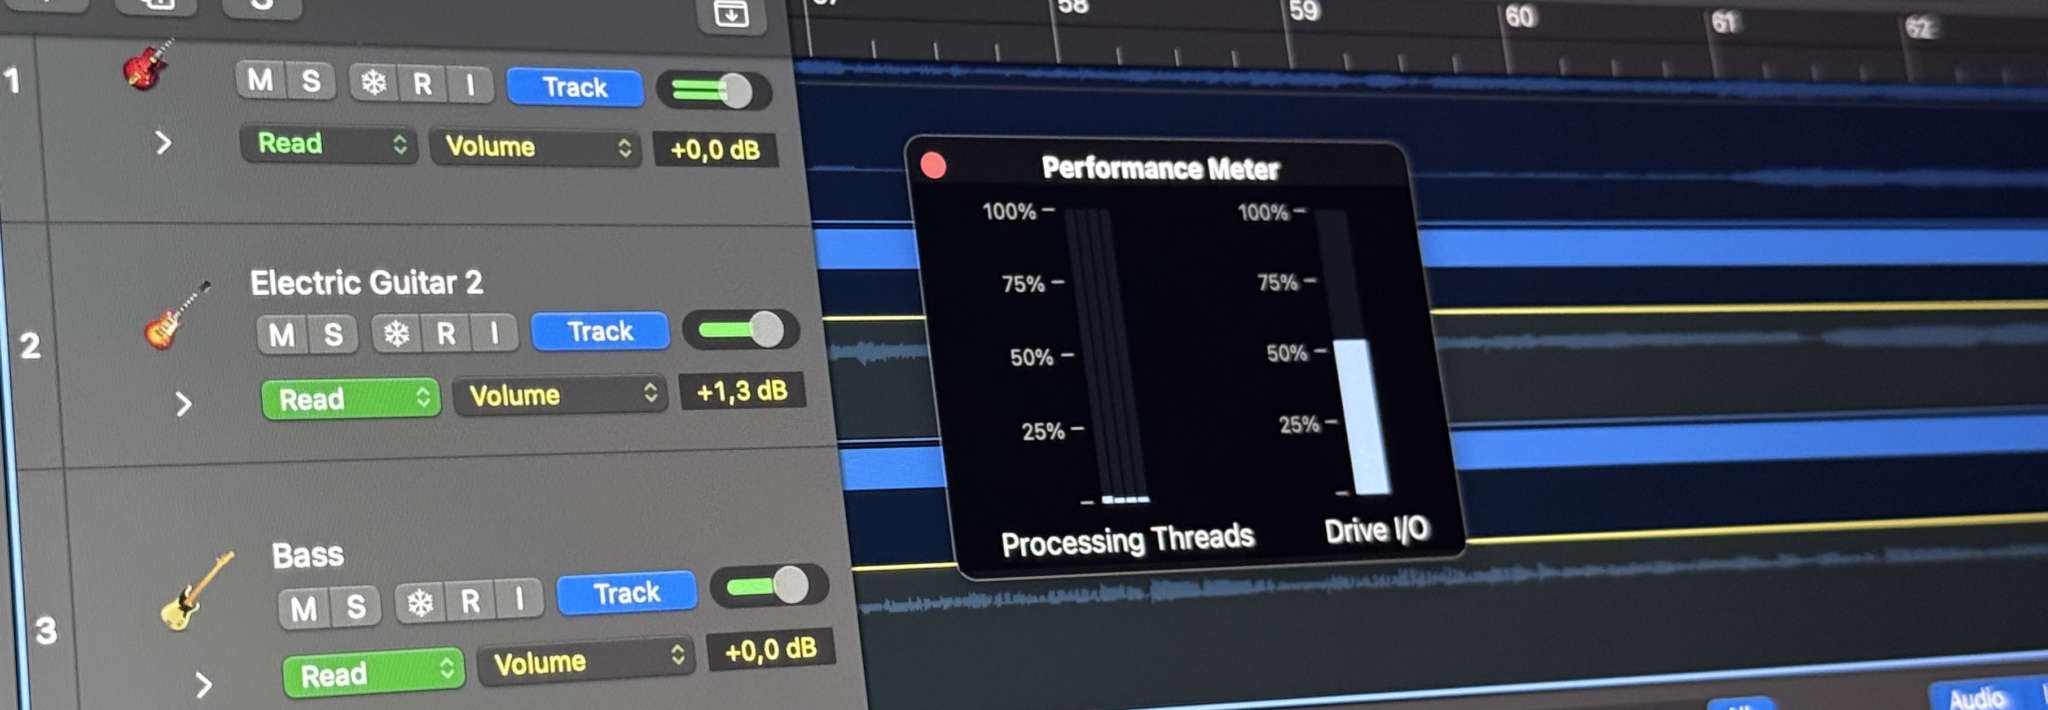
Keep an Eye on CPU-Hungry Plugins
Plugins like advanced reverbs or mastering suites can push your CPU to the edge. Regularly monitor your DAW’s performance meters to identify if one track is disproportionately straining your system. Freezing or bypassing those heavy plugins can make a world of difference.
Balance Multiple Cores
Many modern computers have multiple cores, but some DAWs and plugins distribute workloads differently. If one track overloaded with processing is pegging a single core, try distributing the load across different tracks or buses, or freeze some of the more demanding plugins on that track. This can help your DAW’s overall performance.
Separate Phases of Production
Professional producers often separate the writing and arranging phase from the mixing phase, and the mixing phase from the mastering phase. Committing to audio tracks once you’re finished programming parts makes the mixing session lighter and more focused. This not only reduces CPU load but also encourages you to finalize creative decisions rather than perpetually revisiting them.
DAW-Specific Optimization Tips
Each DAW has its unique toolset and quirks when it comes to performance optimization. While the general principles remain the same, some platforms have special features that can dramatically improve efficiency.
Logic Pro
Logic Pro is a staple for many Mac-based producers, featuring Low Latency Mode, track freezing, and Bounce In Place functionality.
Low Latency Mode
When active, Low Latency Mode bypasses or disables plugins that add significant delay. This makes recording more responsive, particularly useful if you have heavy processing on your master bus.
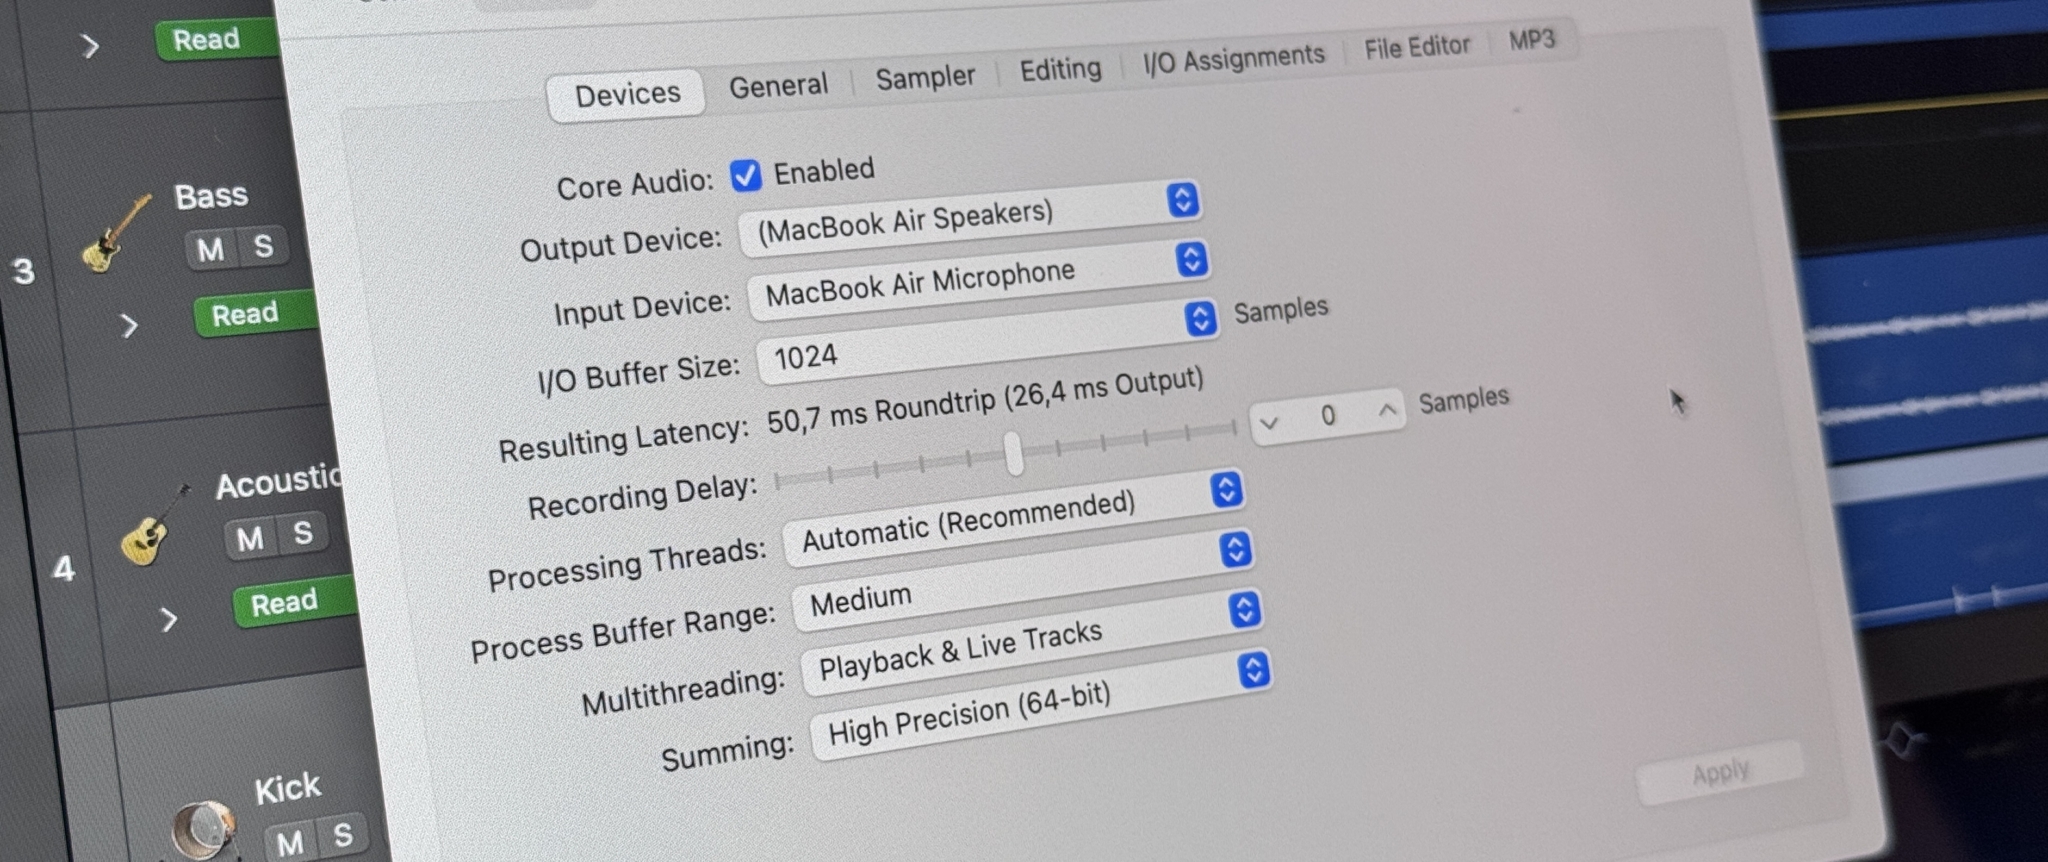
Process Buffer Range
Logic Pro offers different process buffer ranges (Small, Medium, Large). A larger process buffer can stabilize DAW performance during mixing, while a smaller buffer reduces latency during recording. Pick the mode that aligns with your current workflow.
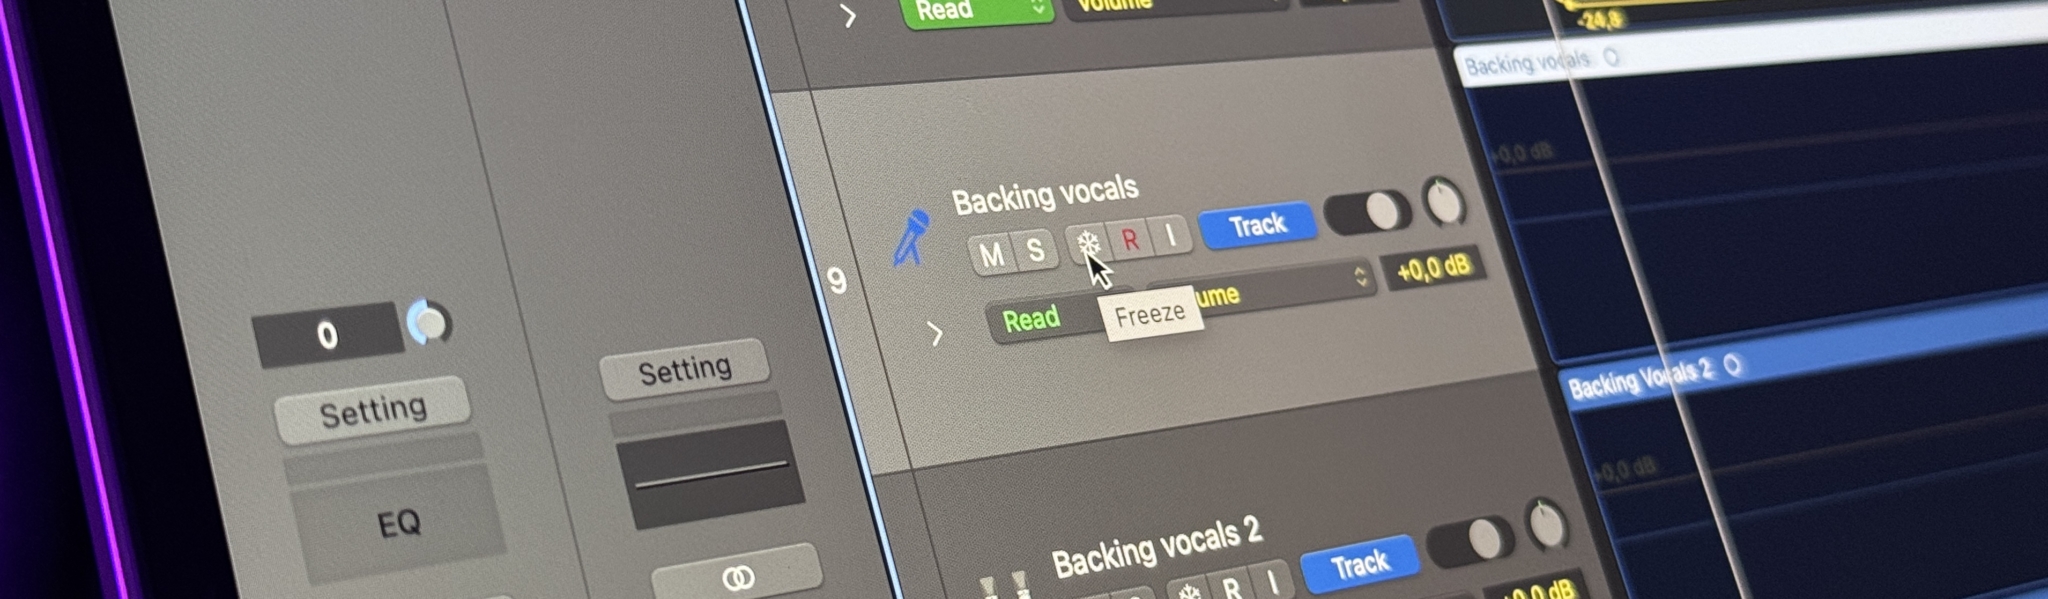
Freeze and Bounce In Place
Freezing an instrument track in Logic is as simple as clicking the Freeze button on the channel. For audio tracks or more complex operations, use Bounce In Place to render the effects onto a new file. You can easily revert by keeping backups or simply not deleting the original track.
Cubase
Cubase provides a robust set of features for managing DAW performance, including ASIO Guard and Constrain Delay Compensation.
ASIO Guard
ASIO Guard dynamically allocates a secondary buffer for non-real-time tracks, easing CPU loads. You’ll find settings for Low, Normal, or High intensity. Higher settings often improve stability during large sessions, though you might experience a slight delay when adjusting parameters on certain tracks.
Constrain Delay Compensation
When tracking, this feature disables plugins that introduce high latency on the record-enabled tracks. It keeps your monitoring tight while you lay down parts, and you can turn it off for a full-quality mix later.
Freeze and Render In Place
Cubase supports track freezing for instruments and audio, as well as a Render In Place feature. Render In Place creates a new audio track with the currently applied effects. This is helpful if you want to commit to specific plugin settings or free up resources while preserving the original track for future adjustments.
Ableton Live
Ableton Live excels in creative workflows, offering simplified freeze/flatten functions and warp settings that can impact CPU.
Freeze and Flatten
Just right-click on any track in Live and select Freeze. This prints the track’s audio with its plugins. If you’re happy with the result, right-click again and choose Flatten to replace the frozen track with a standard audio clip that uses no extra CPU.
Warp Modes
Live’s Warp feature is powerful but can be CPU-intensive, especially in Complex or Complex Pro modes. If you don’t need advanced time-stretching, switch to Beats or Re-Pitch mode. Alternatively, disable warping entirely for clips that don’t need to sync to your project’s tempo.
Reduced Latency When Monitoring
By enabling this option in preferences, you can bypass delay-inducing plugins for any record-enabled or monitored track. This significantly reduces latency while playing or singing. Once you’re done recording, you can disable the mode to restore your full mix setup.
Pro Tools
Pro Tools is a long-standing industry standard, known for both audio and post-production capabilities. Its features like Track Commit and Low Latency Monitoring can help you optimize DAW performance.
Playback Engine and CPU Usage Limit
Set your HW Buffer Size appropriately for recording or mixing. You can also adjust how much CPU Pro Tools is allowed to use. Giving it too much can sometimes lead to instability, so a slight margin can help. Keep an eye on your CPU usage meters in the System Usage window.
Track Freeze and Commit
Recent versions of Pro Tools support track freezing. Additionally, Track Commit creates a new audio track with the printed effects, letting you deactivate the original track. This not only saves CPU but also gives you the flexibility to edit the printed audio.
Low Latency Monitoring
If you have an interface that supports direct monitoring, Pro Tools’ Low Latency Monitoring mode can bypass the software mixer for near-zero-latency recording. This is especially valuable for vocal sessions or solo instrument recording where timing is critical.
FL Studio
FL Studio is beloved for its fluid pattern-based workflow. Although it doesn’t have a dedicated “freeze” button, you can still accomplish similar tasks with consolidation and export options.
Smart Disable
Smart Disable automatically shuts off processing for plugins not currently passing audio. This can substantially reduce CPU usage in sessions with many instruments or effects that only play sporadically.
Consolidate Tracks
Select patterns or entire tracks in the Playlist, then choose Consolidate. FL Studio creates an audio clip of the selected material. You can then mute or disable the original instrument to reclaim CPU resources.
Plugin Wrapper Settings
Some plugins behave better with fixed-size buffers enabled or disabled. If a particular plugin is causing glitches, try toggling these settings in the plugin wrapper to see if DAW performance improves.
Audio Interface Considerations and Direct Monitoring
Your audio interface remains a critical component in overall system performance. Even if you follow all the DAW optimization tips, a poor driver or outdated firmware can bottleneck your setup. Direct monitoring can further reduce latency during recording by routing signals outside the DAW. This zero-latency path can be key for large sessions where even a small buffer size might not be enough to ensure seamless tracking.
Getting the Most Out of Your Interface
- Stay Updated: Regularly check for driver and firmware updates.
- Minimize Round Trip: If your interface offers DSP processing (like built-in reverb or compression), you can use those for zero-latency monitoring effects.
- Check Buffer Sizes: Even with a high-quality interface, pushing the buffer size too low can cause crackles. Strive for balance between responsiveness and stability.
Advanced Workflow Strategies in Detail
When your session grows to dozens of tracks, it’s often not enough to simply freeze a few instruments or bump up the buffer size. Additional workflow strategies can help you keep everything organized and efficient.
Work in Phases
A tried-and-true method in professional audio production is dividing your project into distinct phases:
- Composition and Arrangement: Keep buffer sizes low as you write and record. Once parts are nailed down, freeze or bounce them.
- Mixing: Convert your session to audio tracks so that your CPU isn’t handling live synths or complicated effect chains. You can still re-import any audio if you need adjustments.
- Mastering: Export a stereo mix, then open a separate project to apply final mastering plugins. This reduces overhead and keeps your mastering chain clean.
Keep Incremental Backups
After freezing or bouncing, many producers worry about losing the original MIDI data or plugin settings. The simplest solution is maintaining incremental project versions. For example:
- MySong_v1_beforeFreeze
- MySong_v2_afterFreeze
- MySong_v3_mixdown
That way, you can always revert if you decide to change a synth patch or MIDI pattern you previously bounced.
Monitor DAW Performance Regularly
Modern DAWs often provide some form of performance meter. Make a habit of checking it, particularly after you add a new device or instrument. If you see a sudden spike in CPU usage, you’ll know which plugin might be causing the problem.
Parallel vs. Serial Processing
If one channel has an extensive chain of effects, it may overload a single core. Sometimes it’s beneficial to split the chain across multiple aux tracks or parallel chains. This allows the DAW to distribute the load more evenly.
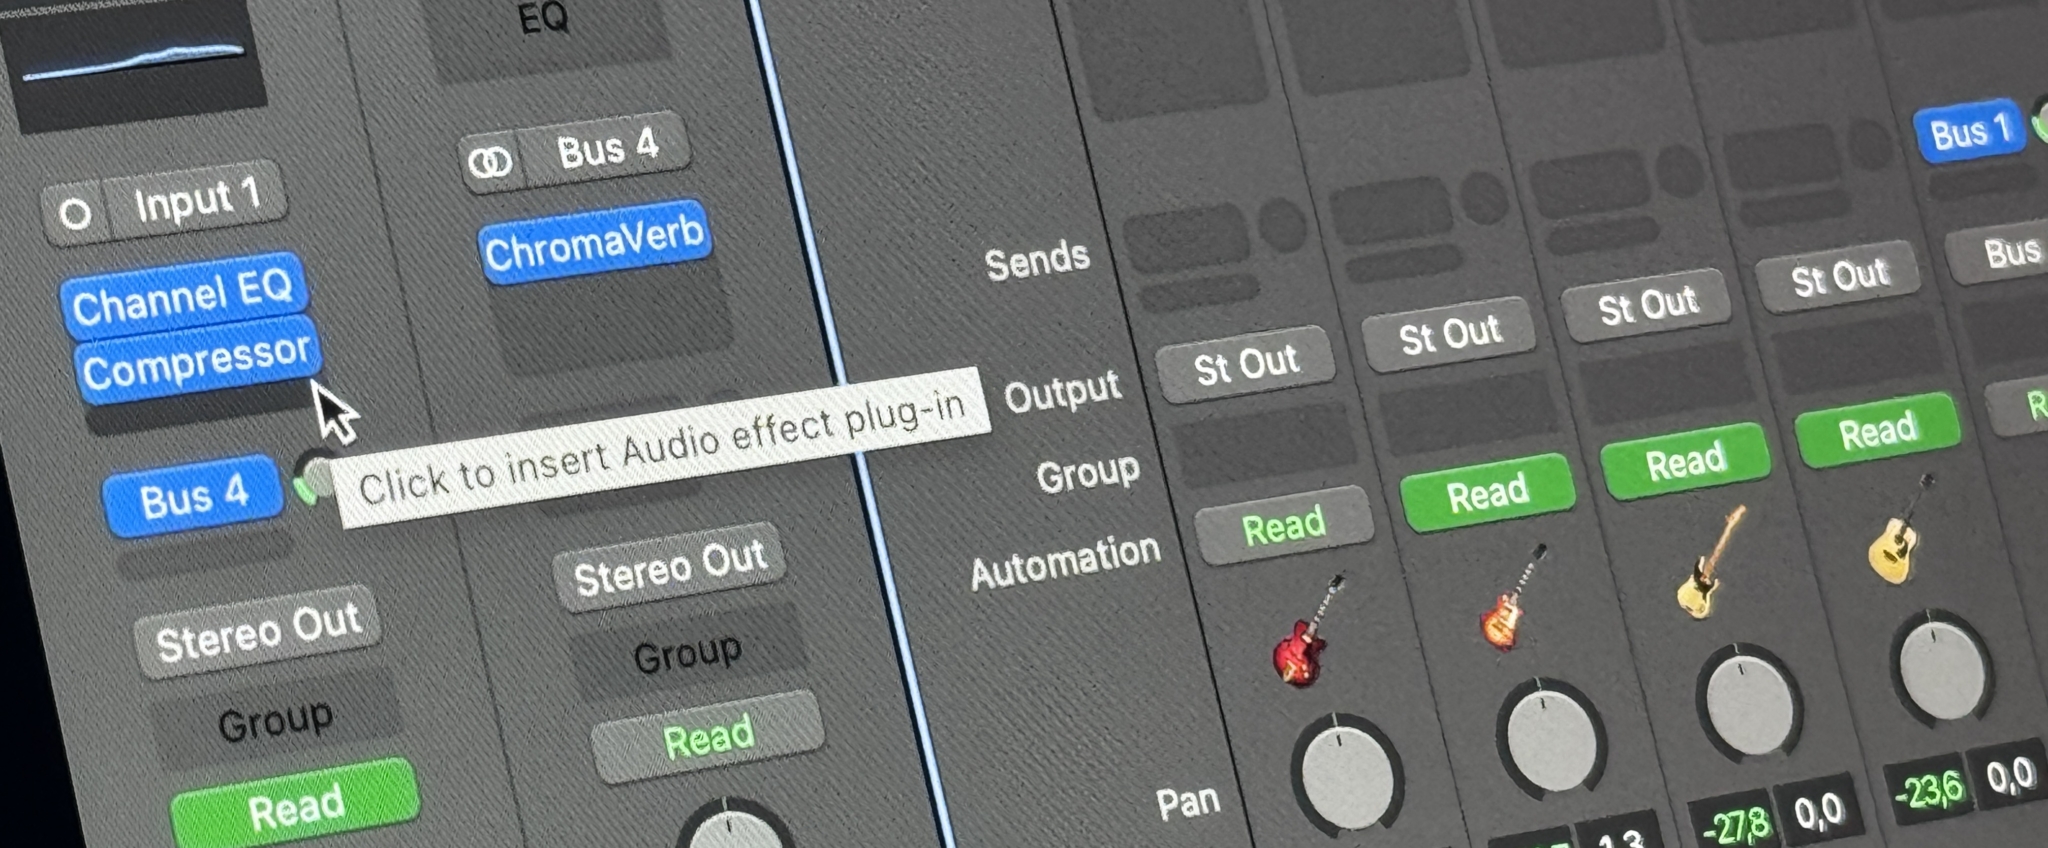
Use Sends for Common Effects
Applying the same reverb plugin across 20 tracks is a fast way to spike CPU usage. Instead, set up a single reverb return track (aux channel) and use sends from your individual tracks. You’ll not only save CPU, but it’s also easier to maintain a cohesive sense of space in your mix.
Ensuring Smooth Playback
Audio dropouts and CPU overload messages can break your creative momentum. By proactively managing your DAW settings and workflow, you’ll drastically reduce the chances of encountering such issues.
Planning is Everything
Plan your sessions with buffer size and CPU usage in mind. If you know you’ll be recording multiple live instruments in real time, don’t load a mastering limiter on your master bus. If you anticipate heavy sound design phases with resource-intensive plugins, be prepared to freeze tracks once you’ve finalized a part.
Be Prepared to Commit
It’s tempting to keep everything editable until the last moment. However, committing (freezing, bouncing, or rendering) is one of the most effective ways to ensure smooth playback. The fewer real-time calculations your CPU has to make, the more stable your system will be.
Work with Your Tools, Not Against Them
Every major DAW has specific features designed for performance optimization—Low Latency Mode, Constrain Delay Compensation, Freeze/Commit, ASIO Guard, etc. Familiarize yourself with these options and use them strategically. They’re built into your software to help you avoid the pitfalls of large sessions.
Extended Strategies for Complex Sessions
Even with the tips covered so far, some users will push their sessions to the absolute limit—perhaps working with orchestral libraries, massive modular synth patches, or extremely large track counts. If you’re in this camp, a few additional strategies might be helpful.
Use Lightweight Sample Libraries During Composition
Large sample libraries for orchestral instruments or big drum kits can eat up CPU and RAM. During the early phases of composition, consider using lighter versions of these libraries or approximations of the sounds you plan to use. Once you finalize the arrangement, swap them for the full-quality samples or bounce those tracks to audio.
Offline Processing for Non-Realtime Tasks
In many DAWs, you can apply offline processing to audio clips. Rather than inserting a CPU-heavy effect in real time, you apply it once, and the DAW renders the result to the clip. If you only need that effect for a special segment, this approach uses significantly fewer resources than leaving the effect active throughout the entire timeline.
Limit Multisampling and High-Quality Modes
Some modern plugins offer extremely high-quality algorithms, such as 16x oversampling or linear-phase processing. While these can enhance your sound, they also dramatically increase CPU load. Restrict these premium settings to crucial tasks or turn them on only during final rendering.
Consider an External DSP Solution
If you routinely max out your CPU, you could invest in external DSP accelerators (some audio interfaces offer built-in DSP). These devices handle certain plugins on dedicated hardware, freeing your main CPU. Although not a necessity for everyone, it’s worth researching if you frequently hit performance ceilings.
Troubleshooting Common Issues
Even after employing all these techniques, you might still encounter bumps along the road. Here are some quick troubleshooting steps for when issues arise.
Audio Dropouts When Adding a New Plugin
- Increase Buffer Size: If you were using a small buffer for recording, move it up a notch.
- Freeze or Disable a Different Plugin: Maybe a different track is already hogging CPU. Freeing some headroom might solve the problem.
- Check Your Plugin Version: Outdated or buggy plugins can cause CPU spikes.
Random Pops and Clicks in the Middle of Playback
- Check Thermal Throttling: Overheating can cause sudden CPU slowdowns.
- Close Background Programs: Perhaps an update or antivirus scan kicked in unexpectedly.
- Drive Issues: Ensure your audio files are on a sufficiently fast drive (e.g., SSD) and that the drive isn’t near full capacity.
High Disk Usage
- Defragment or Optimize Drives: If you use HDDs, fragmentation can hurt DAW performance. SSDs are more efficient but can also slow down if they’re nearly full.
- Disk Cache Settings: Some DAWs allow you to preload audio into RAM, which can help if you have plenty of memory.
Latency Feels Too High Even With a Low Buffer
- Check Plugin Delay: Some plugins add significant latency. Bypass them or engage low-latency modes while recording.
- Use Direct Monitoring: If your interface supports it, this offers near-zero latency monitoring independent of buffer size.
Conclusion
Optimizing DAW performance is a multifaceted challenge that involves balancing CPU usage, latency, and workflow strategies. Begin by understanding fundamental concepts like buffer size, sample rate, and the impact of plugins. Then, move on to more specific techniques such as freezing tracks, bouncing to audio, and disabling unused I/O. Make strategic use of your DAW’s specialized features—like Logic Pro’s Low Latency Mode or Cubase’s ASIO Guard—to keep your workflow nimble and responsive.
Remember, it’s an ongoing process. Your gear, software versions, and project demands will evolve. Continuous refinement of your approach ensures that your creative process remains uninterrupted and your music can reach its full potential. By implementing the strategies outlined here, you’ll be better equipped to tackle large-scale projects with confidence, knowing that your computer and DAW are perfectly tuned to support your artistic vision.
Sobre el autor

Dídac
CEO y Fundador de MasteringBOXDídac es un ingeniero de audio profesional, productor musical e ingeniero de software. También es el fundador de MasteringBOX y el autor de muchos de los artículos del blog.
Deja un comentario
Inicia sesión para comentar