Recording live performances capture the energy of real performances in a way studio sessions cannot. They document each spontaneous moment. They highlight the synergy between performers and audience. They also help preserve a unique event in audio form. This article explores how to record live music performances, from basic gear and mic placement to advanced mixing and post-production. The aim is to guide readers of different skill levels, starting with simple concepts and moving to more technical ideas. Practical tips and examples will appear throughout, with attention to readability and clarity.
Table of Contents
- Gear
- Mic Placement and Unpredictable Environments
- Typical Setup Examples
- Technical Guidance for Live Recording
- Common Pitfalls
- Adapting to Different Venues
- Tips for Post-Processing
- Conclusion
Gear
Recording live performances gear can range from simple handheld recorders to complex systems with multiple mics, an audio interface, and a mixer. The right choices depend on your budget, goals, and venue. Even minimal setups can yield solid results if used well. Understanding how handheld recorders, dynamic microphones, lavalier microphones, shotgun mics, audio interfaces, mixers, and essential accessories work together will help you build a rig that fits each show.
The best approach is to start with a simple signal path and expand as your needs grow.
Handheld Recorders
Handheld recorders are compact devices with built-in microphones. They are portable, battery-powered, and often record in stereo. Users can place them almost anywhere without needing multiple cables. This makes them popular for beginners who need a straightforward way to capture a room mix. Their small form factor helps them fit on small stages or on top of mic stands. They can also serve as backup recorders if you are running a larger setup.

In a small club or rehearsal space, a handheld recorder near the stage can capture an authentic room sound. It will pick up direct audio from instruments and vocals, while also including audience reaction. Because the internal microphones often have a broad pickup pattern, you should be mindful of crowd noise. You also need to set input levels carefully, as live music can get much louder than anticipated.
Handheld recorders may include external mic inputs. This is beneficial if you want to incorporate other microphones into the same recorder. Some handhelds feature dual recording modes, which create a safety track at a lower level. This can prevent accidental clipping when volume peaks spike unexpectedly. Regularly checking the recorder’s meters helps you avoid unpleasant distortion.
Microphones
Microphones are at the heart of any live recording setup. Choosing the right type—and placing it well—determines how much control you will have in the mix. Three common options for live work are dynamic microphones, lavalier microphones, and shotgun microphones, each suited to different roles on stage and in the room.
Dynamic Microphones
Dynamic microphones are the workhorses of live sound. They are robust, handle high SPL (sound pressure levels), and reject a lot of background noise when used up close. Classic handheld dynamics are a standard choice for vocals and often appear on snare drums, toms, and guitar cabinets.
Most stage dynamics use a cardioid or supercardioid polar pattern. This focuses on the sound directly in front of the mic while reducing spill from monitors, drums, and the crowd. For live recording, that focus is a major advantage: you capture more of the intended source and less of the chaos around it.
On a loud stage, a dynamic vocal mic placed close to the singer’s mouth gives a strong, present signal. The singer can move a bit without completely disappearing from the mix. For instruments, a dynamic mic pressed near a guitar amp’s grille or angled at a snare drum lets you capture punch and detail while keeping cymbal wash and room noise under control.
Dynamic mics are also forgiving. They do not require phantom power, and they tend to cope well with rough handling and less-than-perfect placement. For many engineers, a small collection of versatile dynamic microphones is the core of their live recording toolkit.
Lavalier Microphones
Lavalier microphones, also called lapel mics, are tiny clip-on microphones. They are often used in broadcasting and theater. Their small size lets them attach to clothing or instruments discreetly. This is useful when you need close-miked audio but do not want large stands onstage. A performer can move around freely, with minimal impact on mic placement.
Because lavaliers often have an omnidirectional pickup pattern, they can capture surrounding ambient sound. This can be good or bad, depending on your environment. Placement is key. A lav mic clipped to a singer’s clothing will remain at a consistent distance. This consistency stabilizes volume levels. However, a lav mic can rustle against fabric if not secured properly.
Lavs are especially helpful for acoustic sets in intimate venues. A singer-songwriter might place one near the sound hole of a guitar. Another might be clipped near the performer’s collar to grab vocals. You can then blend these signals with any ambient mic. This approach keeps the performance sounding natural while retaining separation between vocal and instrument.
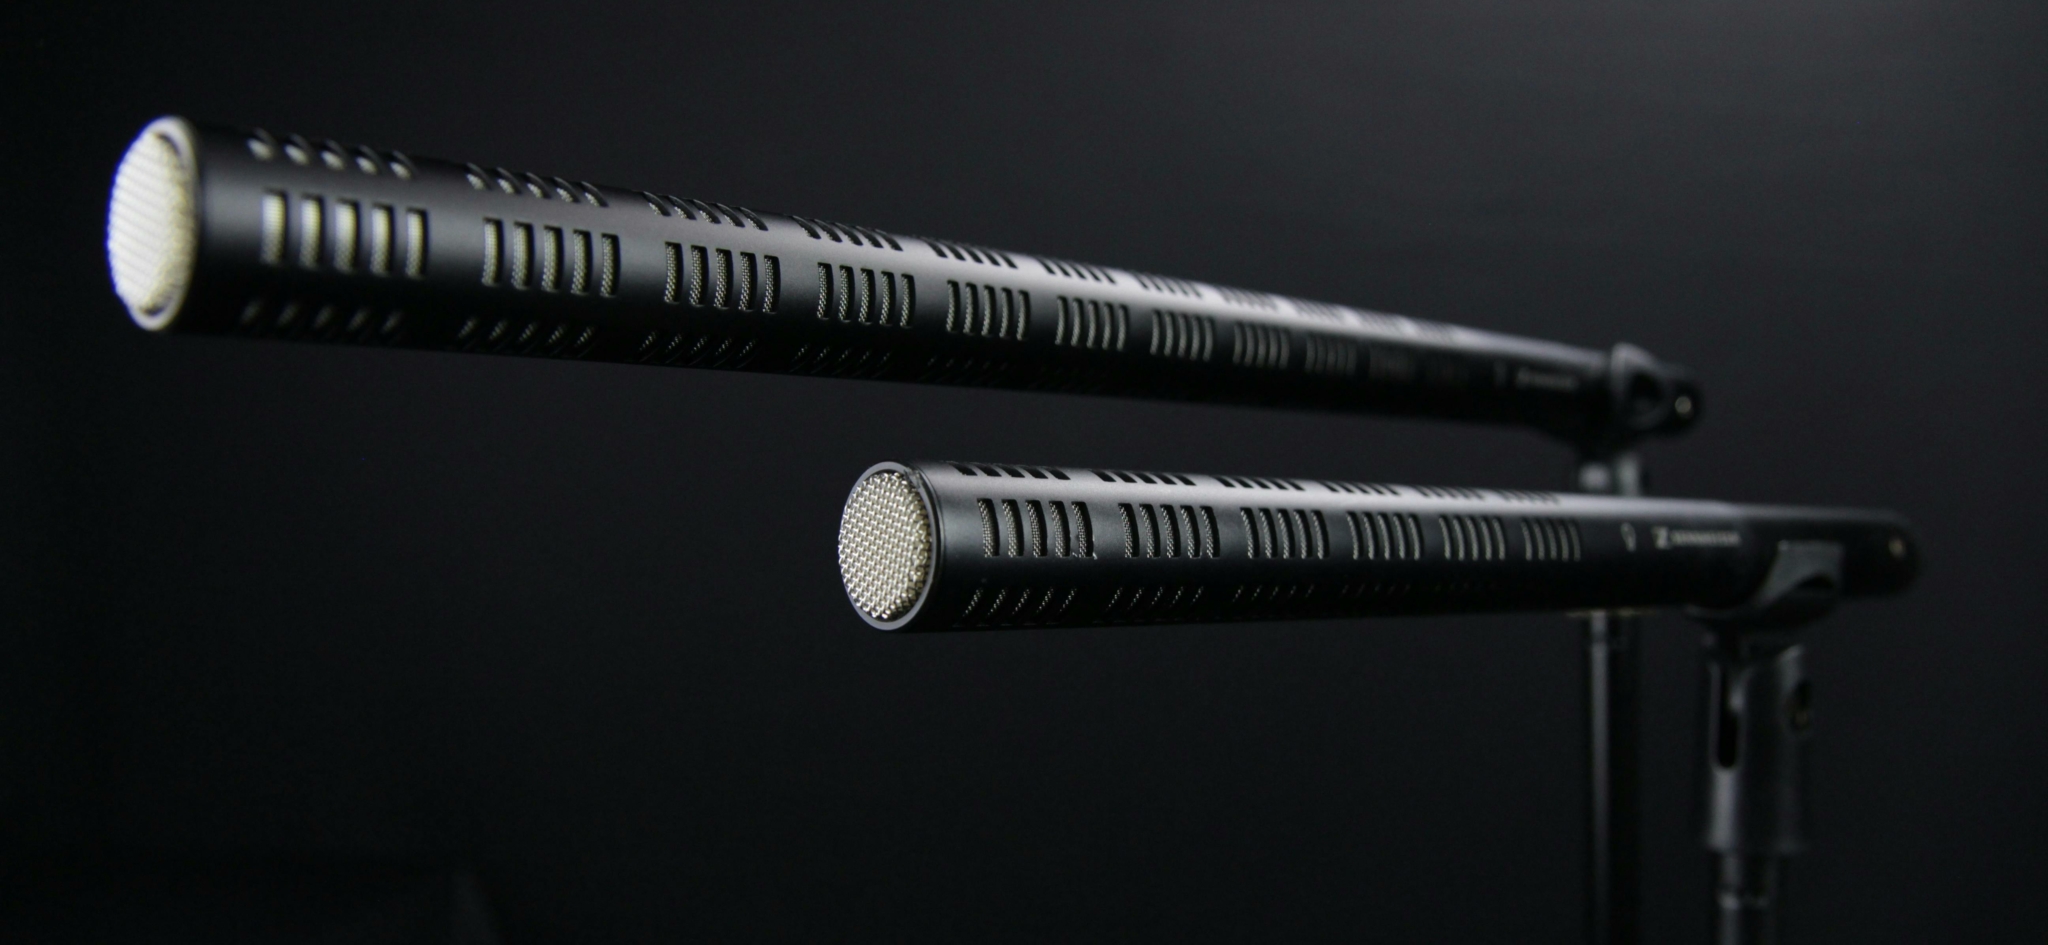
Shotgun Microphones
Shotgun microphones are long, directional mics. They use an interference tube to reduce sounds from the sides or rear. They excel in capturing distant sources clearly. This is helpful in large or noisy venues. A shotgun mic can be placed farther from the stage while still focusing on the main performance. This isolation reduces crowd chatter, although it does not eliminate it completely.
Engineers sometimes use shotgun mics to pick up audience reactions, especially applause or cheering. By aiming the mic at the crowd, you can highlight specific sections of applause with less bleed. A shotgun can also function as an onstage spot mic, aimed at a choir or percussion section. Live setups should consider feedback risk if that mic is fed to stage monitors. For pure recording, feedback is less of a concern.
Audio Interfaces and Multitrack Recorders
If you want separate control over each instrument and microphone in post-production, you need something more flexible than a single handheld recorder. This is where audio interfaces and dedicated multitrack recorders come in.
An audio interface converts analog signals from your microphones and instruments into digital audio for a laptop or tablet. Each mic or line input becomes its own track in your DAW. This lets you:
- Adjust gain separately for each source
- Apply EQ and compression to individual channels later
- Mute or replace problematic tracks without losing the entire performance
In a live context, a small 2–4 input interface is enough for solo artists or duos. Larger bands benefit from interfaces or stage boxes with 8, 16, or more inputs. Many modern mixers also double as USB interfaces, sending each channel directly to your computer.
Standalone multitrack recorders perform a similar role without a laptop. They record multiple isolated channels to an SD card or internal drive. This can be more reliable in rough environments, since you’re not relying on a computer during a crowded, high-energy show.
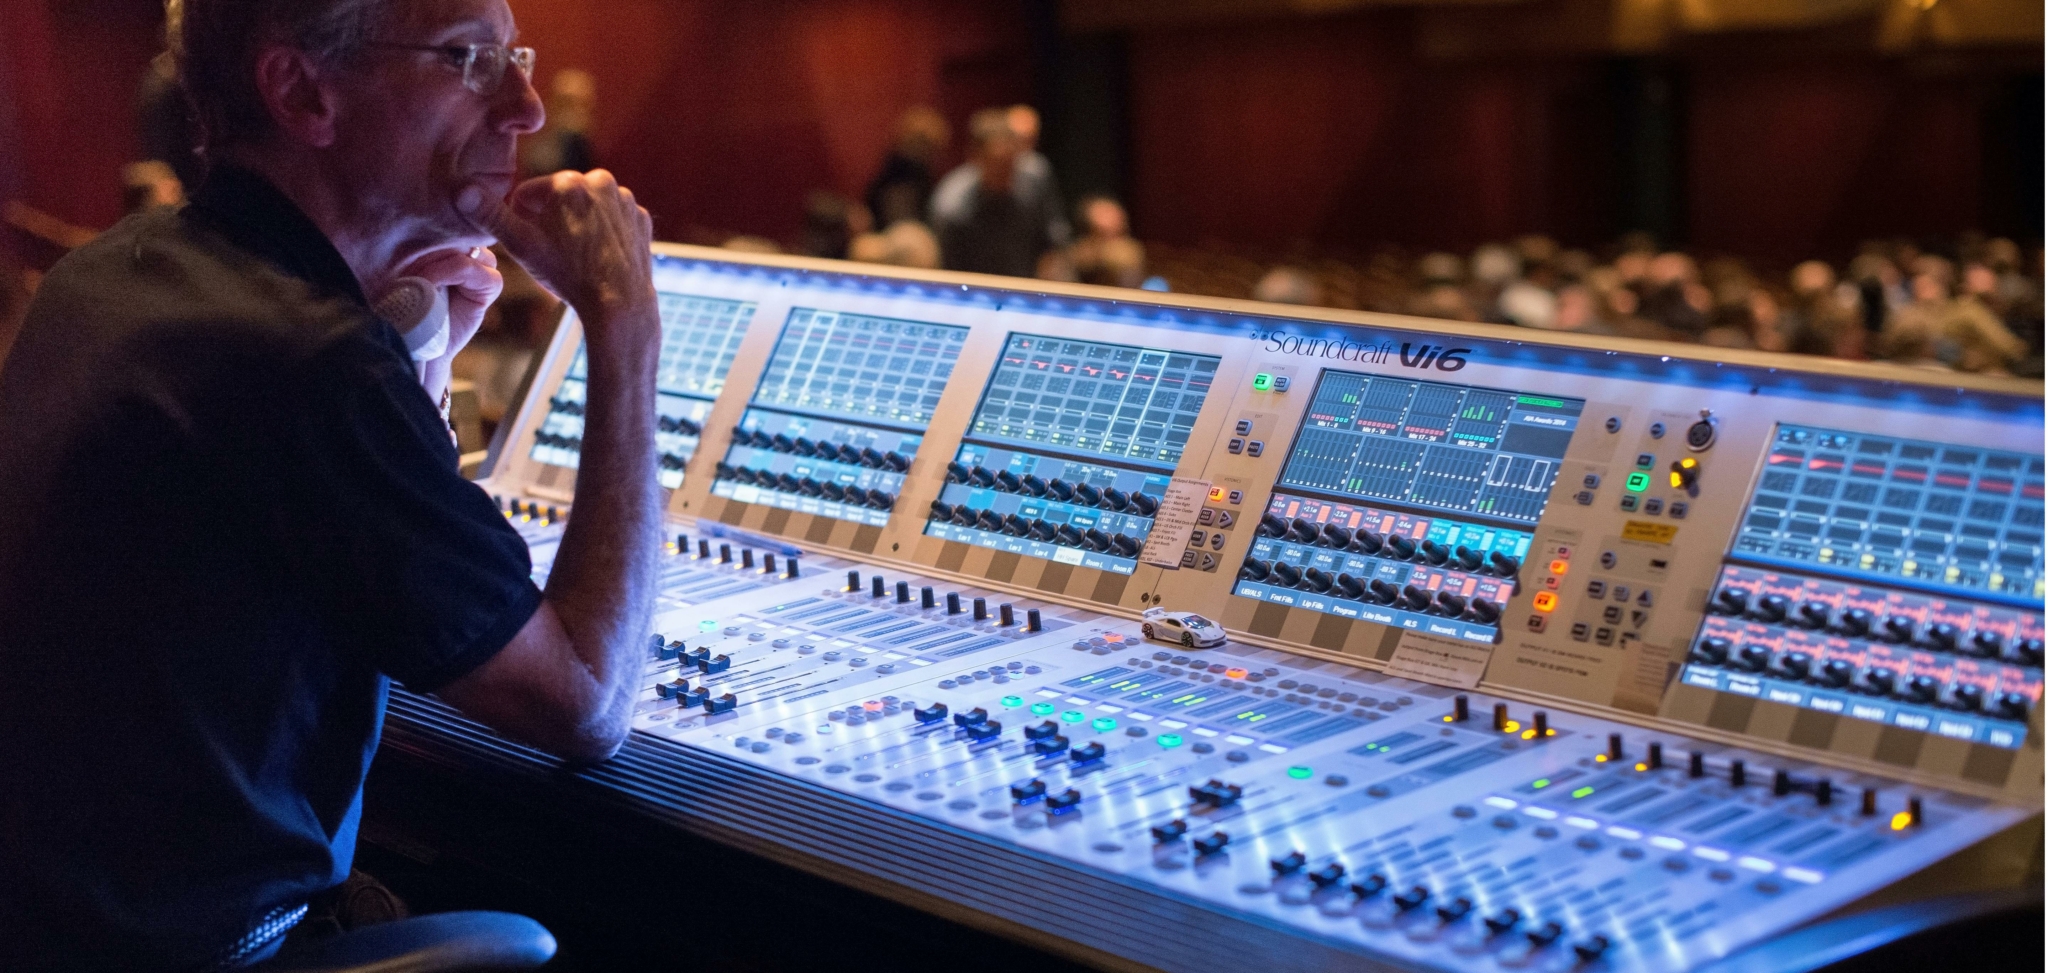
Mixers and Submixers
A mixer combines multiple mic and line inputs into one or more outputs. In live recording, mixers serve two common roles:
- Creating a front-of-house mix for the audience
- Providing a recording mix or multitrack feed for your recorder or interface
For simple gigs, a compact analog mixer can balance vocals, instruments, and playback tracks, feeding a stereo output into your recorder. This gives you a quick, ready-to-use mix with basic EQ and level control.
Digital mixers go further. Many can:
- Save and recall scenes between bands
- Provide built-in EQ, compression, and effects
- Offer direct outputs or USB multitrack sends for each channel
When the house mixer is already busy handling the PA, you can use a small additional mixer as a submixer. For example, you might blend multiple drum mics down to a stereo pair before sending them to your recorder to save inputs.
Cables, Stands, and Power
Even the best microphones and interfaces are useless without reliable cables, sturdy stands, and solid power.
- Use balanced XLR or TRS cables for microphones and long runs to reduce hum and interference.
- Keep spare cables on hand; live shows are where weak connectors and worn cables tend to fail.
- Sturdy mic stands allow precise placement and help avoid handling noise or accidental movement.
- Power strips and extension cords with surge protection keep your rig powered safely, especially in older venues.
Gaffer tape is your friend. Taping down cables reduces trip hazards and protects your connections during a crowded show.
Monitoring: Headphones and Speakers
Accurate monitoring helps you make better decisions during recording:
- Closed-back headphones let you check levels and noise without being overwhelmed by the room. They are essential when setting input gain and troubleshooting hums, buzzes, or crackling cables.
- If you’re recording from a control room or backstage area, a small pair of reference speakers can help you evaluate the overall balance in near real time.
Monitoring does not need to be loud; it just needs to be clear enough for you to catch problems before they ruin a take.
Putting It All Together
As your skills grow, you might combine these tools in more complex ways. A typical small-venue setup might be:
- Close mics (dynamic and condenser) on key instruments and vocals
- A digital mixer sending a multitrack feed to a laptop or standalone recorder
- One or two ambient mics to capture crowd and room sound
- Solid cabling, stands, and headphones to keep everything stable and monitored
Start with what you have—maybe just a handheld recorder and one mic—and expand as needed. Each show teaches lessons about gear limitations and creative solutions, guiding how your live recording setup evolves over time.
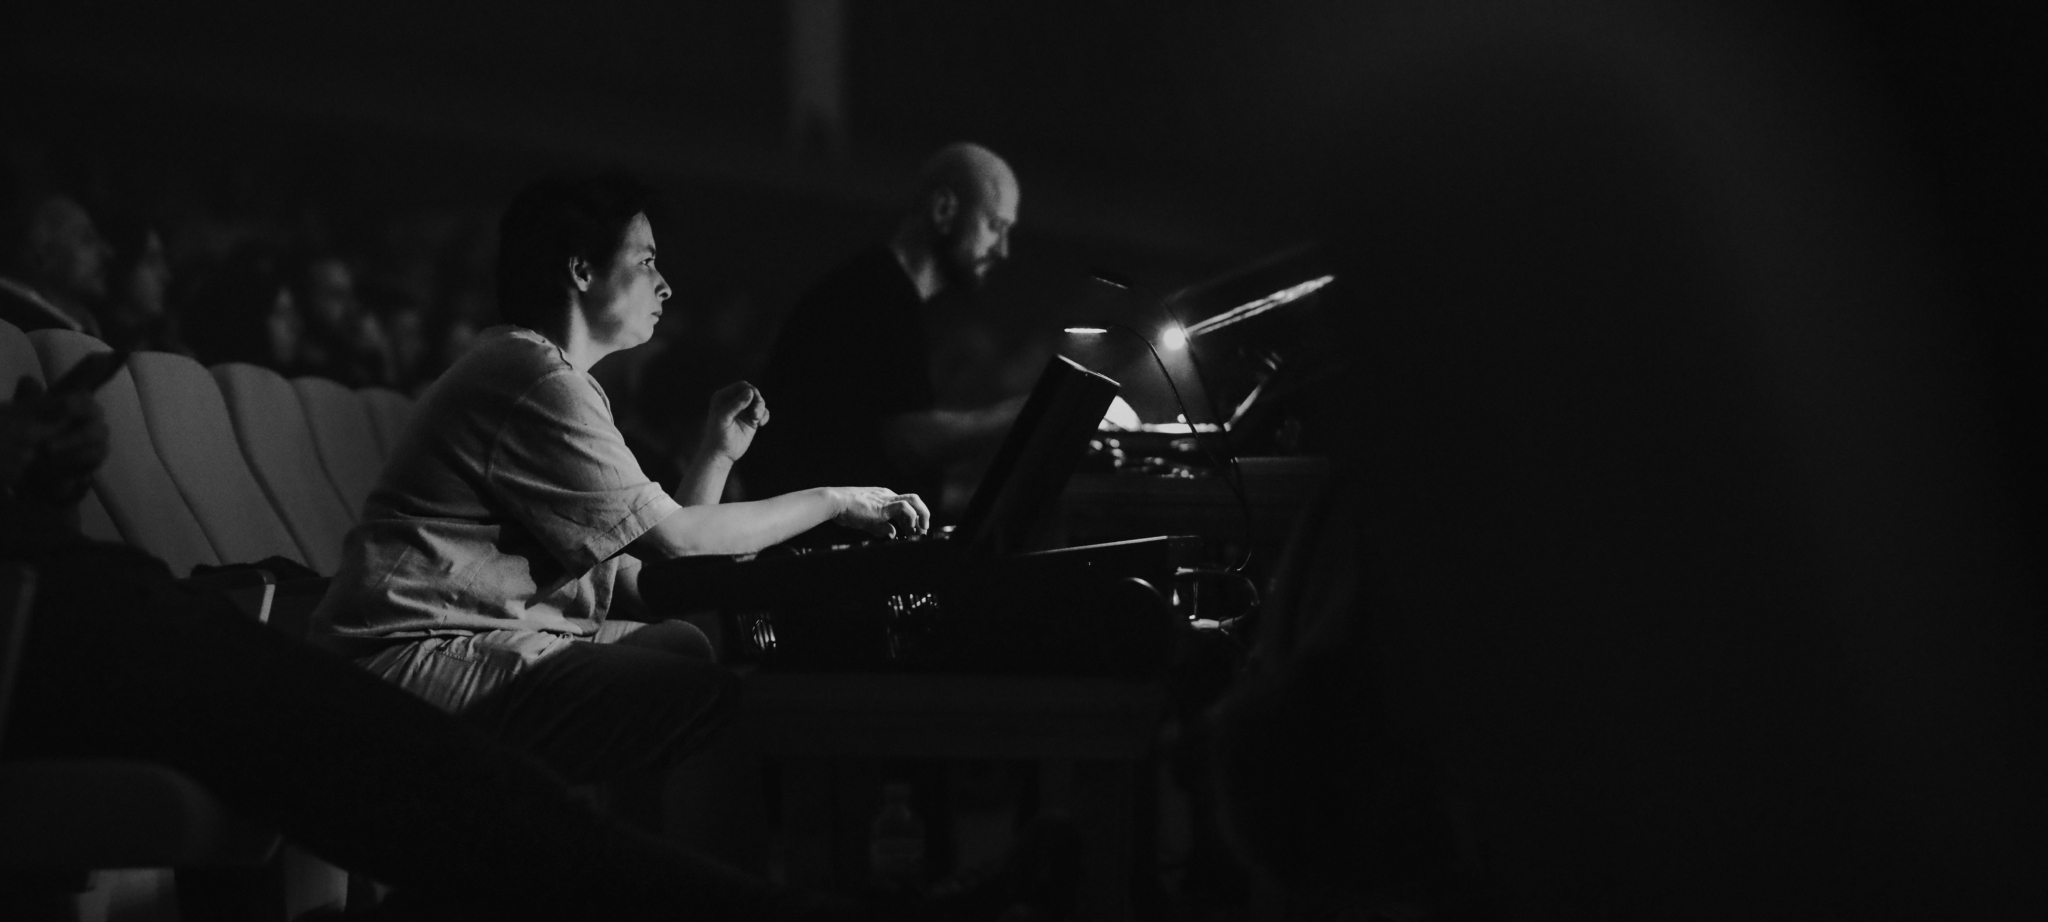
Mic Placement and Unpredictable Environments
Placing microphones for a live show can be challenging. You need to deal with audience movement, limited stage space, and varying acoustics. Correct mic placement helps you capture the clearest sound and reduce unwanted noise. Understanding how to approach unpredictable venues and ways to secure gear is key.
Close Positioning
Try to place each mic as close to its intended sound source as possible. This maximizes the direct signal and reduces ambient bleed. In a noisy environment, positioning a mic near the sound source gives clarity. A handheld recorder in the back of the room can pick up crowd chatter or reverberation. Moving it closer to the stage captures more direct sound. Lav mics are especially valuable for close pickup, since they remain near a performer’s chest or instrument.
Directional Aiming
When using shotgun or cardioid microphones, aim them away from unwanted noise. This could be a loud cooling fan or a chatty area of the venue. By aiming the mic’s rear or side null zones toward those distractions, you reduce their impact on your recording. Tapers who record from the audience often place mics on tall stands, angled at the PA stacks. This approach yields a clearer band sound and diminishes the roar of the crowd behind the stands.
Venue Acoustics
Venues vary greatly in acoustic properties. A concert hall might have lush reverb, while an outdoor stage has almost none. In a large, reverberant hall, positioning mics too far from the performers can result in a murky wash of reflections. Getting closer to the stage can retain clarity without losing the space’s natural ambiance. Outdoor festivals have minimal reflections. You might place mics closer or add more microphones to compensate for the lack of natural resonance.
Planning for Unpredictable Situations
Live shows involve many uncontrollable factors. Crowd members can bump your stands. Musicians might move more than expected. The house mix might change mid-set. It helps to keep gaffer tape, extra batteries, and wind protection for mics at the ready. If someone blocks your mic, consider a secondary recorder or alternate vantage point as backup.
High-Pass Filtering
Many field recorders and microphones include a high-pass filter, sometimes called a low-cut. Engaging this filter can remove rumble from footsteps, air conditioners, or wind. You likely do not need sub-bass from the crowd or from random thumps. Removing those frequencies provides extra headroom and a clearer mix. In post-production, you can add warmth if needed. But you cannot remove heavy distortion once captured.
Typical Setup Examples
Different performances require different recording strategies. A solo acoustic artist in a quiet café has simpler needs than a full rock band with blaring amps. An orchestra in a grand concert hall calls for a carefully balanced approach. By adapting to each scenario, you can achieve high-quality results in a variety of contexts.
Solo Acoustic Artist
A single musician with a guitar or piano needs intimate sound. A one-mic technique places a condenser mic about two feet from the performer. Aim it between the singer’s mouth and the instrument. This approach balances vocals and the instrument in a single capture. If the instrument is too loud, angle the mic slightly toward the mouth. If the voice is too dominant, reposition the mic toward the instrument.
A two-mic technique includes one close vocal mic and one instrument mic. This provides more control in mixing. The vocal mic might be a dynamic or condenser, placed about a foot from the mouth. The instrument mic might point near the guitar’s 12th fret or a piano’s soundboard. If the guitar has a pickup, you can record it directly to blend with the mic signal. In a quiet room, placing an ambient recorder at the back can capture applause and natural reverb.
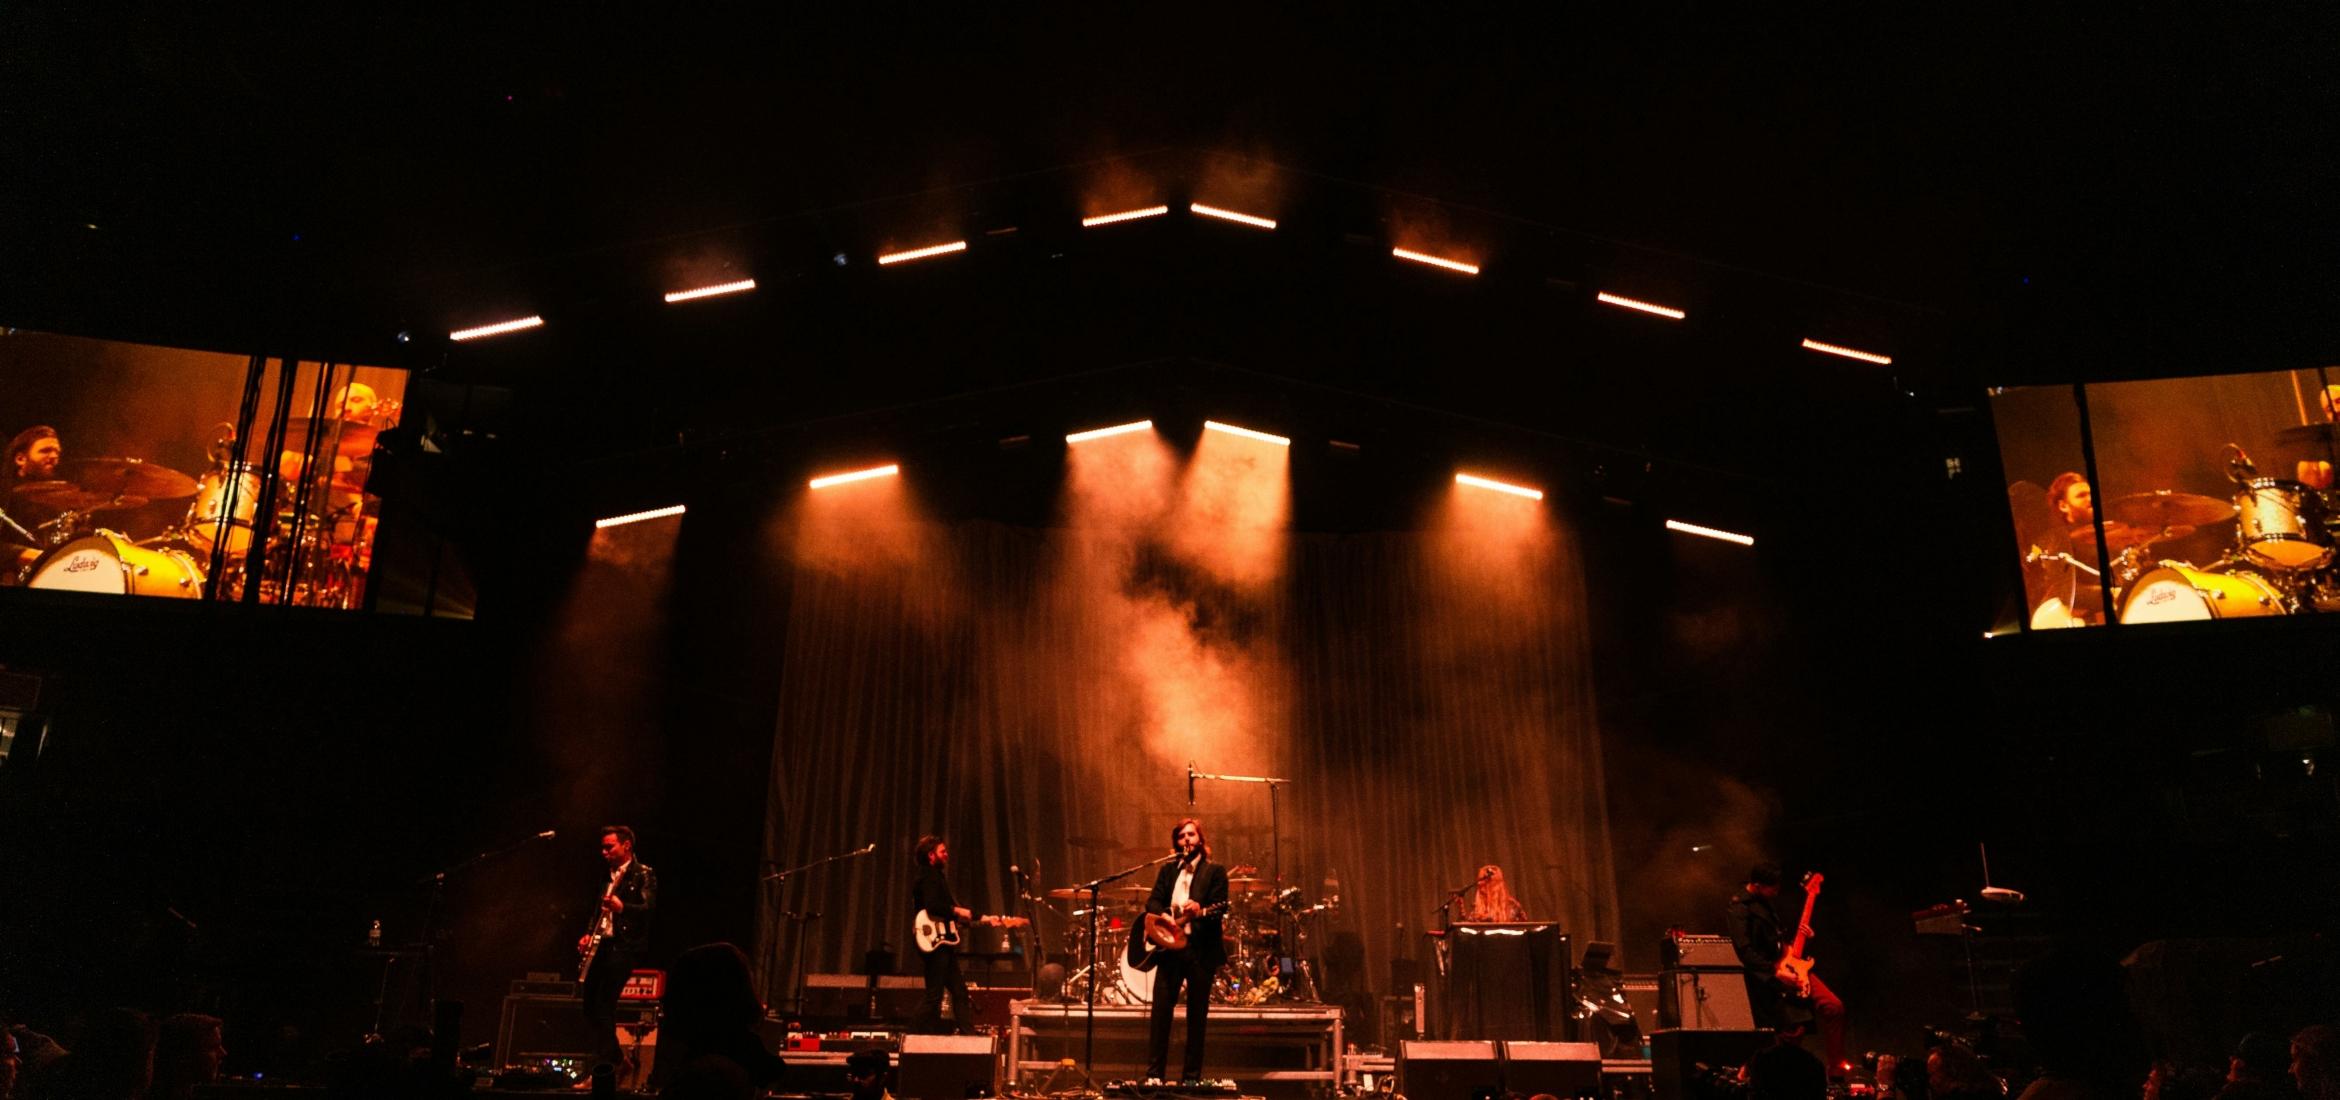
Full Band
A full band’s live recording is more complex. There may be multiple vocals, guitars, bass, drums, and keyboards. One simple method is taking a stereo feed from the venue’s mixing console. That feed will contain whatever the sound engineer has balanced for the audience. But it might be unbalanced for recording purposes if certain elements are already loud on stage. Another approach is multitrack recording. You split each microphone on stage and send it to a separate recorder input. This allows for detailed post-production mixing. Ambient or room mics can capture crowd response and the venue’s natural reverberation.
You can also combine these approaches. A stereo board mix can be blended with a pair of stage-facing mics. Or you can add in a few direct lines from critical sources like lead vocal and kick drum. If the band uses in-ear monitors, you might record their monitor feed as well. Full band setups often require careful gain staging and close attention to potential feedback issues.
Orchestra or Large Ensemble
Large ensembles perform in spaces designed for acoustic music. A traditional approach involves placing a main stereo array above the conductor to capture the collective sound. This pair could be a spaced omni setup, an ORTF pair of cardioid mics, or a more elaborate three-mic array known as a Decca Tree. Spot mics can then be placed for certain sections or important soloists. Wide cardioid or omnidirectional mics might be used to preserve a natural, balanced timbre.
Orchestra recordings often benefit from additional ambient mics at the back of the hall. This captures extended reverb and audience reactions. If the ensemble is very large, you might use multiple spot mics. The key is to avoid clutter and keep sightlines clear for the audience. Live orchestral recording demands planning and a deep understanding of concert hall acoustics.
Technical Guidance for Live Recording
Recording live performances requires more than setting up gear and pressing record. You need to manage gain staging, apply basic EQ where needed, and possibly use limiters or compressors to control dynamics. Stereo imaging is another key topic, especially when capturing the spatial feel of a performance. Proper handling of these technical elements will save time in post-production and prevent irreversible mistakes.
Gain Staging
Gain staging means adjusting input levels to avoid distortion. In a live environment, volume levels can spike suddenly. It’s wise to aim for peak levels around minus twelve decibels or lower. That way, there is enough headroom for unexpected volume surges. Many handheld recorders include input meters or peak LEDs to signal overloads. Some devices offer dual recording at different levels, providing a backup safety track.
When signals clip in digital recording, the distortion is permanent. It’s better to record slightly lower and boost the signal later. In a 24-bit system, the noise floor is quite low. That allows for a more cautious approach. Always remember that the stage volume might change during the show if a guitarist turns up an amp or a performer sings louder mid-set.
EQ Considerations
Many live recordists use high-pass filters to remove unwanted low frequencies. This is especially valuable for vocals, guitars, and overhead mics. Feedback can be reduced if you notch out problematic frequencies in a live mix. However, you may not want to do too much EQ on the recorder itself. Capturing a clean signal is often preferred, with more detailed tone shaping done later.
If you do tap into the mixing board’s outputs, keep in mind that the house engineer may have already cut or boosted certain frequencies to suit the room. That might not be ideal for your recording, but it’s part of the live sound. You can note these adjustments and address them in post. Some subtle corrective EQ in real time can solve major problems, like severe muddiness or extreme brightness. But too many changes on the fly can complicate the process.
Limiting and Compression
Live shows have big dynamic swings. One minute, a singer might be whispering, and the next minute the drums might explode. A limiter on the recorder can help tame sudden peaks. This avoids clipping while preserving overall dynamics. Check whether your recorder’s limiter is an analog design that works before the analog-to-digital conversion. That design is more effective at preventing digital overload.
Light compression on critical channels can keep them audible in the final mix. A small ratio on a vocal mic can soften harsh peaks. But heavy compression risks making the sound dull or lifeless. If you have the option, record with minimal compression and apply more later. That approach grants you more flexibility in the final mix.
Stereo Imaging
Stereo imaging shapes how wide or narrow your recording sounds. An X/Y configuration uses two cardioid mics placed close together at an angle. This is good for mono compatibility and reduces phase issues. A spaced pair of omnis can deliver a wide, immersive feel but might introduce phase cancellations. An ORTF setup splits the difference. The best choice depends on how you want the final recording to sound.
If you are capturing multiple channels, you can later pan them in the mix. Placing certain instruments slightly left or right can recreate their stage positions. Ambient mics can be panned wider for a sense of space. If you only have a mono feed, consider subtle stereo enhancement tools in post. However, over-widening can lead to phase issues when played in mono.
Common Pitfalls
Recording live performances can present many surprises. Even experienced engineers encounter unexpected challenges. Feedback, distortion, excessive crowd noise, and equipment failures can ruin a great performance. Knowing how to plan for these pitfalls increases the odds of producing a clean, exciting recording.
Feedback
Feedback occurs when a mic picks up signal from a speaker and loops it back, causing a howl or squeal. This is a particular risk when you feed the recorder’s mic signals to stage monitors. If you only record for later use, feedback is less likely. But it can still happen if your mic is near a monitor, or if the stage volume is high. Aim directional mics away from speakers. Stay alert for any ringing frequencies so you can adjust if necessary.
Distortion and Clipping
Distortion from clipping is permanent and undesirable. Always leave enough headroom when setting your levels. Use a pad or reduce the preamp gain on loud sources like drums or guitar amps. Sudden volume spikes can occur if a musician moves closer to the mic. Some analog equipment can saturate pleasingly, but digital clipping rarely adds anything beneficial. Regularly check levels during the performance, even if you did a thorough soundcheck.
Crowd Noise
Audience noise can either add vibrancy or become a hindrance. In quiet acoustic shows, laughter and light applause can add charm. In rowdy rock gigs, shouting and singing can overshadow the music. If you place a recorder among chatty patrons, the recording might feature them more than the band. One solution is to raise the mic stands above the crowd. Directional mics help reduce off-axis chatter. In post-production, you can reduce sections of unwanted crowd noise. Alternatively, you might emphasize enthusiastic singing or cheering if it supports the performance’s energy.
Phase Issues
Multiple mics can produce phase cancellations when they capture the same source at different times. This can cause thin or hollow sounds. Position mics using guidelines such as the three-to-one rule. If you are mixing multiple channels, you might need to shift a track’s timing in post to align it with others. Carefully check the polarity of each track. Flipping polarity on a spot mic sometimes restores low-end warmth. Phase issues are tricky but can be managed by careful setup and attentive listening.
Equipment Failures
Live shows are not repeatable. Losing a recording due to battery failure or a loose cable is heartbreaking. Always bring extra power sources and memory cards. Gaffer tape can secure cables so nobody trips over them. Having a secondary recorder or backup mic in place is wise. Even a modest backup is better than nothing. Reliability is key. If something does fail, try to remain calm and focus on salvaging what you can.
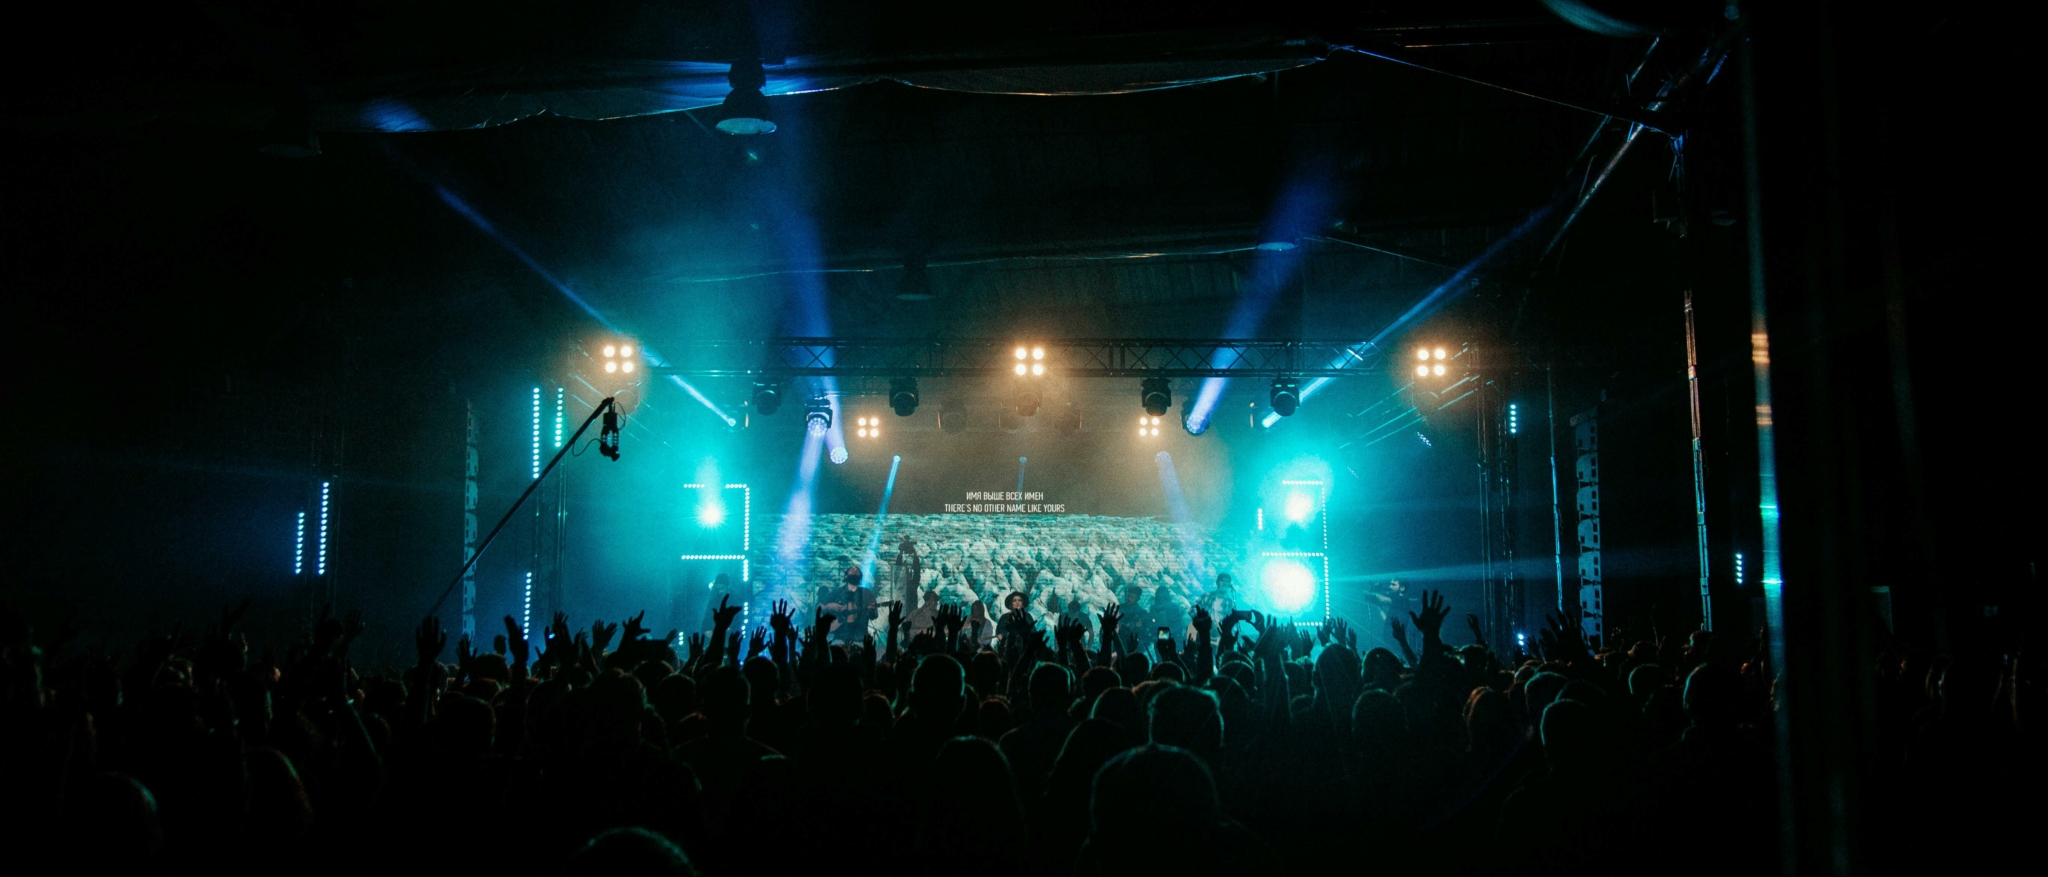
Adapting to Different Venues
Recording live performances approaches change depending on the venue. A grand concert hall with a natural reverb is different from a cozy club with a loud bar. Open-air festivals present their own unique challenges. Learning how to adapt mic placement and gear choices to each space is crucial for great results.
Open-Air Performances
Outdoor shows remove the walls and ceilings that typically reflect sound. This reduces natural reverb. The main sonic source is the PA. Placing a stereo pair pointed at the main speakers captures the overall band mix. You can add a second pair pointed at the crowd to record applause and singing. Wind noise can be a big problem outside. Use windscreens or furry covers to reduce wind rumble. Because there is no acoustic reinforcement from the room, low-frequency energy might feel weaker. A direct feed from the console can help reinforce the bass in the final mix. Watch out for generators or other environmental noises. Angling your mics away from these sources can reduce unwanted hum.
Concert Halls
Concert halls often feature long reverb tails and carefully designed acoustics. Orchestras and choirs rely on that natural ambience. Placing your main microphones at an appropriate height above the conductor’s position can give a balanced blend of instruments. Excessive distance can lead to a muddy wash of echoes. If the hall is extremely reverberant, consider more directional microphones or closer spot mics to maintain clarity. Also be mindful of audience noise. Even a single cough can echo in a quiet movement of the music.
Theaters and Clubs
Theaters tend to be drier than concert halls, though some can still reflect sound significantly. Clubs often have limited acoustic treatment and can be packed with enthusiastic crowds. The house PA might dominate the sound if guitar amps are also blaring on stage. One approach is taking a feed from the mixing board while also using ambient mics to capture the room. This method blends direct signals and room resonance. Crowd chatter can be significant, so mic placement above head level helps. The stage volume can also be very loud. You might need directionally aimed mics to keep each instrument focused.
Tips for Post-Processing
Once the show is finished, the real shaping happens in post-production. A well-executed mix can transform raw captures into a polished final recording. The challenge is retaining the energy of a live set while removing distracting elements. Careful editing, noise reduction, EQ, and dynamic control work together to achieve clarity without losing excitement.
Organizing and Syncing Sources
If you used multiple recorders or a multitrack system, you need to align these recordings. Identifying a loud peak, like a snare hit, can serve as a reference point. Nudging tracks so they line up precisely helps avoid flam effects. Once everything is synced, label tracks clearly to streamline your workflow. You might name them Kick, Snare, Guitar Left, Guitar Right, and so on. Creating a backup of the raw files before you begin editing is wise.
Noise Reduction and Cleanup
Live environments carry extra noises. People talk or move around. Air conditioning systems create hum. Some might cough during quiet passages. Specialized plugins can reduce ambient hiss or low-frequency rumble. You can also remove short bursts of unwanted sound with spectral editing. The trick is to avoid overusing noise reduction, which can make audio sound unnatural. In some cases, the best approach is manual editing. Silence or reduce the crowd mic during quieter sections if audience chatter becomes distracting.
Balancing and EQ
A good live mix requires balancing instruments and vocals so everything is clear. You might automate levels if a singer goes quiet in the verses. EQ is helpful to cut boxy frequencies or to add brightness where needed. Many engineers roll off low-end rumble on anything that doesn’t need deep bass. That might include vocals or guitars. This approach frees up headroom for the drums and bass instruments. If your environment added an unpleasant resonance, a gentle cut in the offending range can smooth things out.
Dynamics Processing
Compression glues tracks together and controls volume spikes. It can also add punch to drums or presence to vocals. A subtle ratio on the lead vocal helps it remain steady in the mix. Parallel compression on drums can bring extra impact without squashing the entire kit. However, extreme compression can sap the life from a performance. Finding a balance is an art. Recording live performances often benefit from preserving some dynamic range for natural excitement.
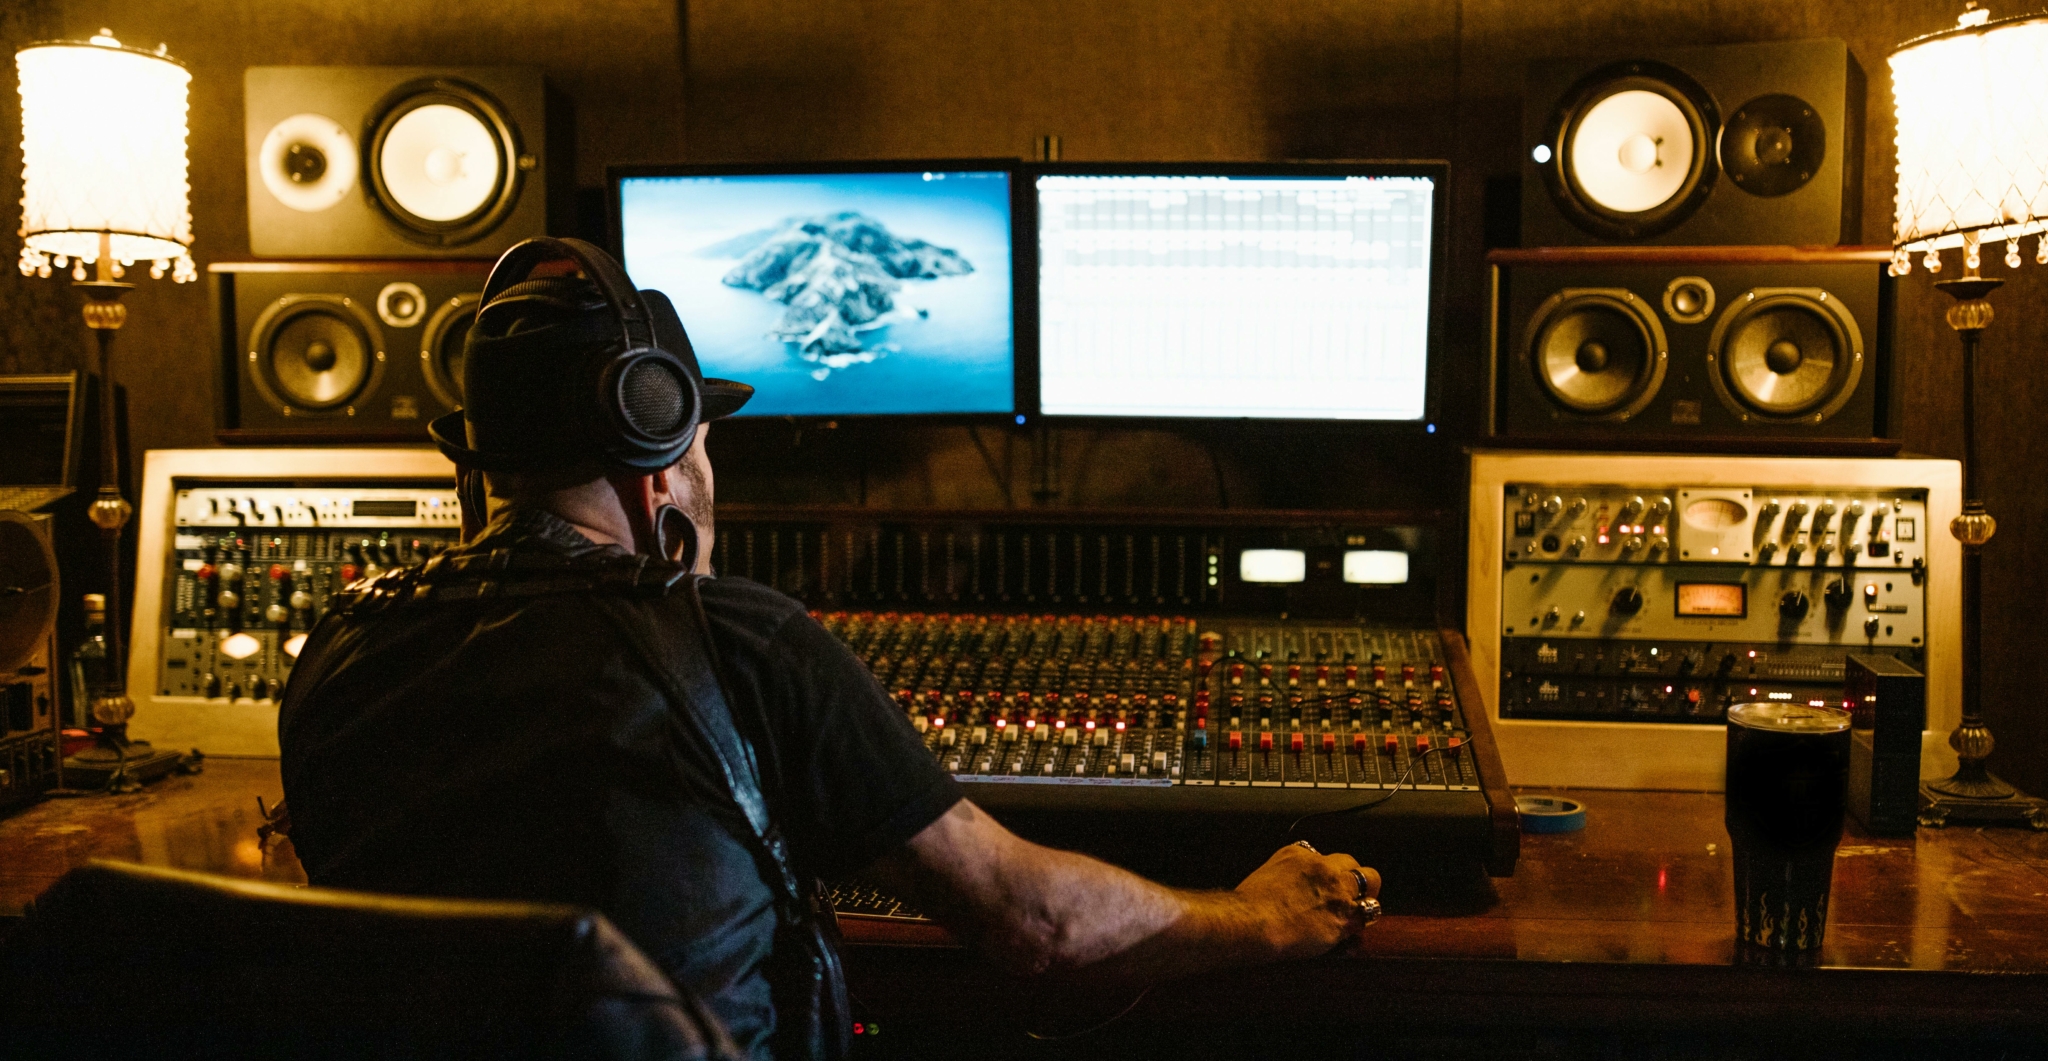
Reverb and Effects
Despite having recorded in a live space, you may still want to add reverb in post. This can unify close-miked sources or fill out a dry board feed. A short room reverb can replicate the sense of being in the venue. If the show took place outside, adding reverb might give it a livelier feel. You can also experiment with delays or modulation effects if they match the band’s style. However, subtlety is key. Overprocessing can distract from the essence of the performance.
Audience and Atmosphere
Crowd reactions can enhance the feeling of a live recording. To highlight applause or cheering, you can automate the audience mics upward between songs. You might lower them during quiet intros if chatter is distracting. When the crowd sings along, that might become part of the final mix’s charm. The choice depends on how the artist wants the live album or recording to feel.
Mastering
After your mix sounds cohesive, mastering finalizes the overall loudness, tone, and consistency. You might apply a limiter to catch any transient peaks. Many engineers aim for a target loudness that remains faithful to the live dynamic. Each track on a live album should flow into the next, possibly with crossfades or continuous ambience. This preserves the concert atmosphere. Monitoring on different speakers or headphones helps ensure the mix translates well everywhere.
Conclusion
Recording live music requires adaptability, planning, and a willingness to embrace imperfection. The charm of a live performance often lies in its spontaneous quality. By choosing suitable gear, placing mics with care, and managing technical aspects like gain and EQ, you can capture the excitement on stage. Knowing common pitfalls helps you avoid feedback, distortion, or missed moments. Different venues demand adjustments, whether in a resonant hall, a busy club, or an open-air festival.
Post-production is your opportunity to balance and polish the raw recordings. Editing and mixing choices can highlight the best moments while retaining the show’s energy. Crowd reactions and a sense of space can draw listeners into the event long after it ends. Final mastering ensures the recording stands up to repeated plays, preserving the emotional intensity and sonic details.
Live recording can be challenging, but the rewards are worth it. Capturing an unrepeatable musical moment provides a document of the artist’s true expression. It lets listeners relive the night or discover the performance for the first time. Whether you begin with a handheld recorder or a complex multitrack rig, the principles remain the same. Good preparation, smart mic placement, and diligent post-production can bring a live show to life for anyone who hits play.
Over de auteur

Néstor Rausell
Zanger, muzikant en specialist contentmarketingNéstor Rausell is de leadzanger van de rockband “Néstor Rausell y Los Impostores”. Bij MasteringBOX werkt hij als marketingexpert.
Laat een reactie achter
Log in om een reactie te plaatsen

