At its core, a DAW is a creative environment where you handle all stages of music production: from the raw idea that starts as a single recorded riff or beat, right through to the polished final track that’s ready for release. DAWs not only capture audio, but also host virtual instruments, allow MIDI editing, automate complex effects processing, and provide the tools for mixing and mastering a song. In short, a DAW is the nerve center of the modern production workflow.
Table of Contents
- What is A DAW?
- History of DAWs
- Core Features of a DAW (and Why You Should Care)
- The Inner Workings of a DAW
- Working With Audio: Recording and Editing
- Using MIDI: Creating Beats and Triggering Instruments
- Effects and Plugins: Sound Shaping Power
- Mixing in the DAW
- Which DAW Is Right for You
- Gear Up: What You Need to Get Started
- Top Tips for Getting Started (and Going Pro)
- Beyond the DAW: Mastering Your Workflow
- The Future of DAWs
- Conclusion
What is A DAW?
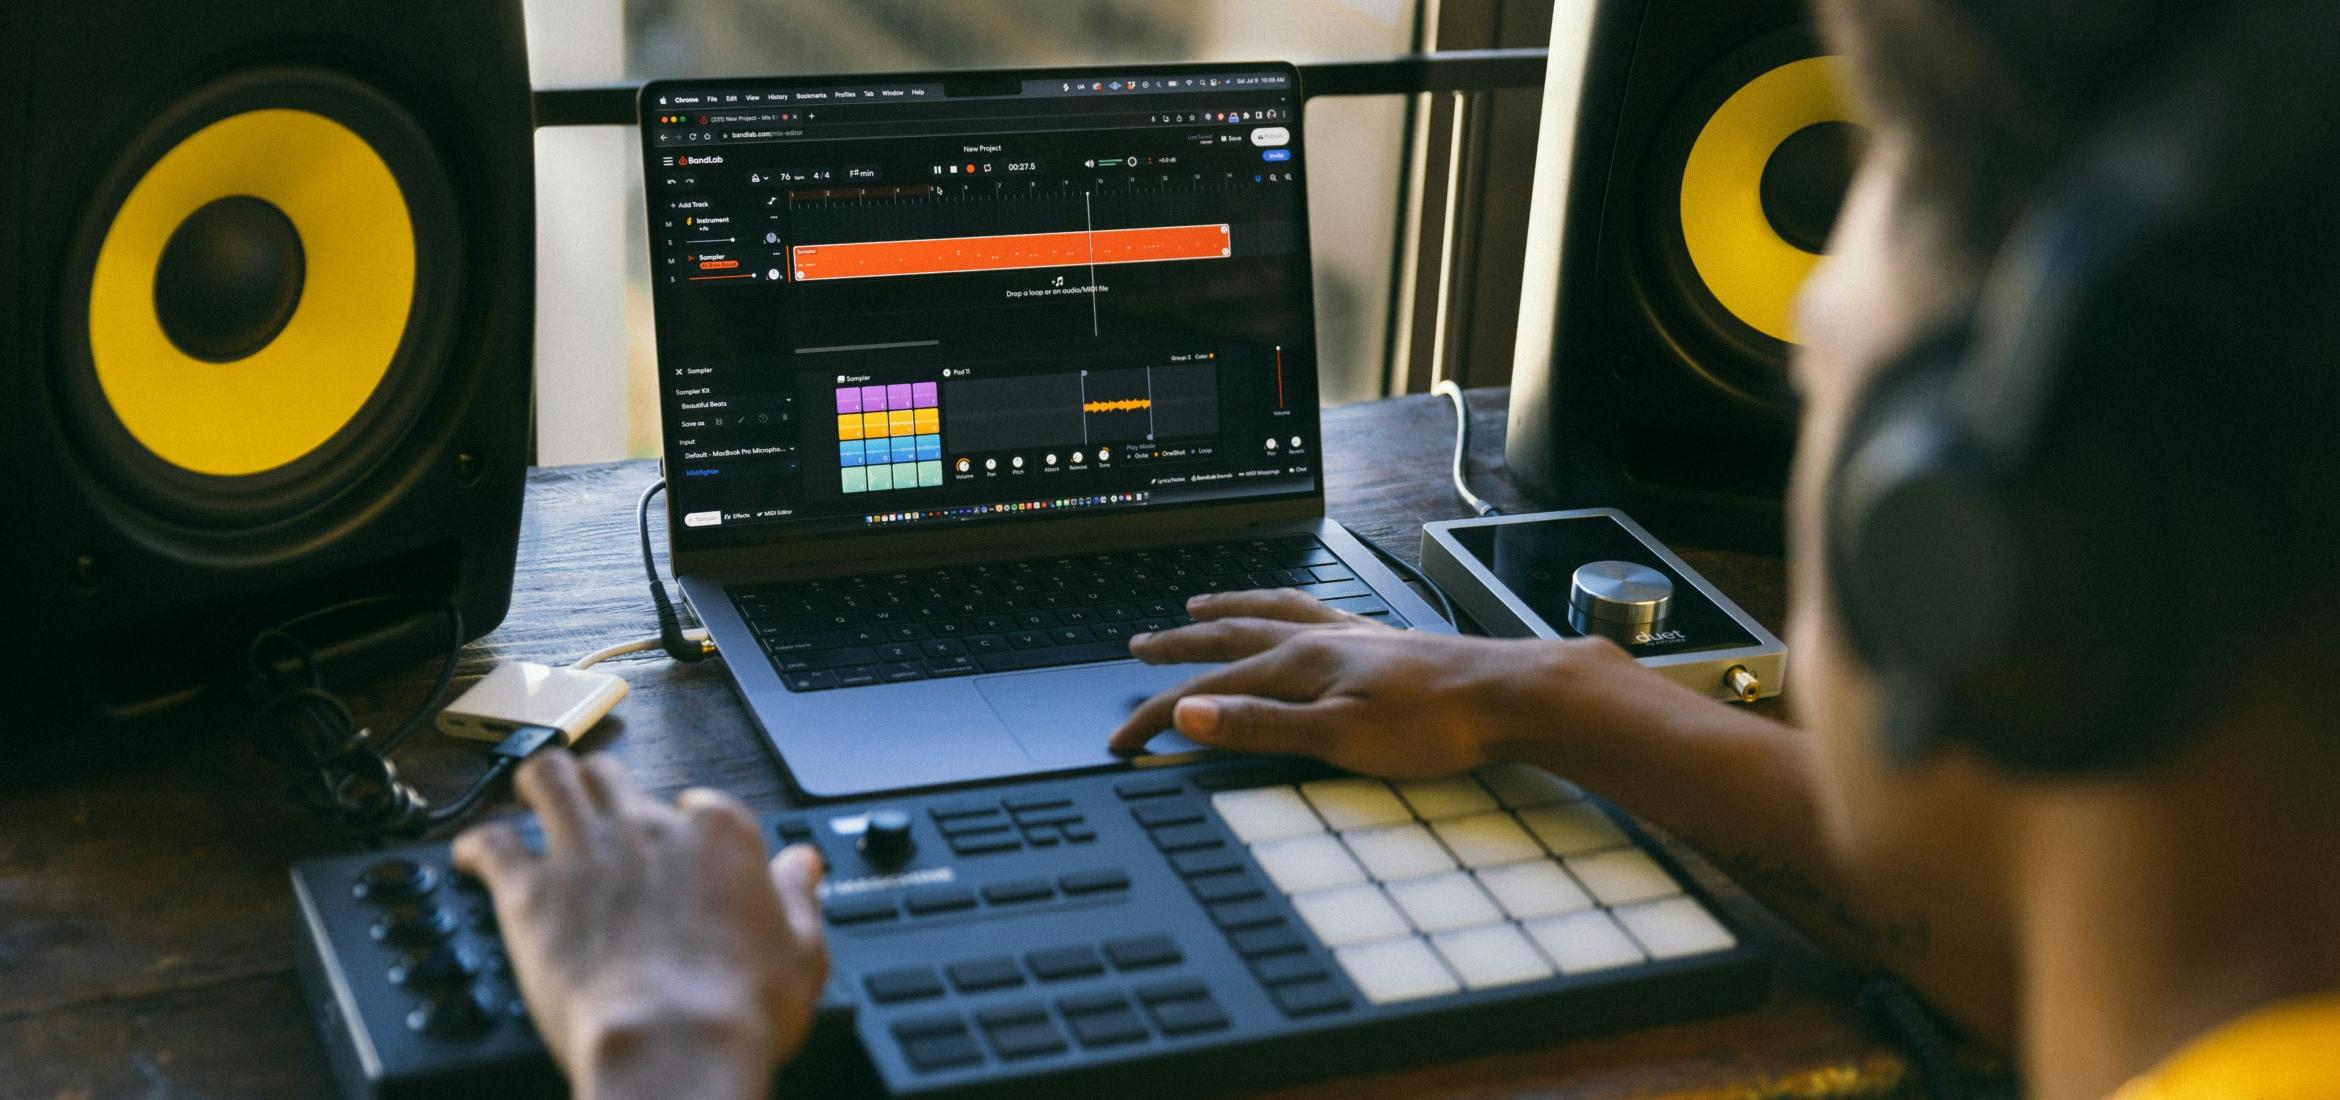
A DAW (short for Digital Audio Workstation) is software that you run on your computer (or tablet, or even smartphone in some cases) to record, edit, produce, and create music. If you’ve ever watched a behind-the-scenes video of an artist or producer working in a studio, you’ve probably seen a DAW on their screen, with colorful waveforms, MIDI notes, and mixing channels laid out in neat rows. These days, the DAW has effectively replaced the traditional, physical mixing consoles and tape machines that used to fill entire studios.
It’s an exciting time to get into music production—whether you’re a total beginner or a seasoned pro, DAWs have made music-making accessible, affordable, and deeply customizable. It no longer takes thousands of dollars in outboard gear or giant tape decks to lay down a few tracks. Instead, you can get started with just a laptop, a DAW, an audio interface, and your favorite instrument (or no instrument at all if you’re working with software synths and drum machines).
History of DAWs
It’s one thing to say that DAWs are amazing and that we all use them. But how did we get here? Why did these programs take over?
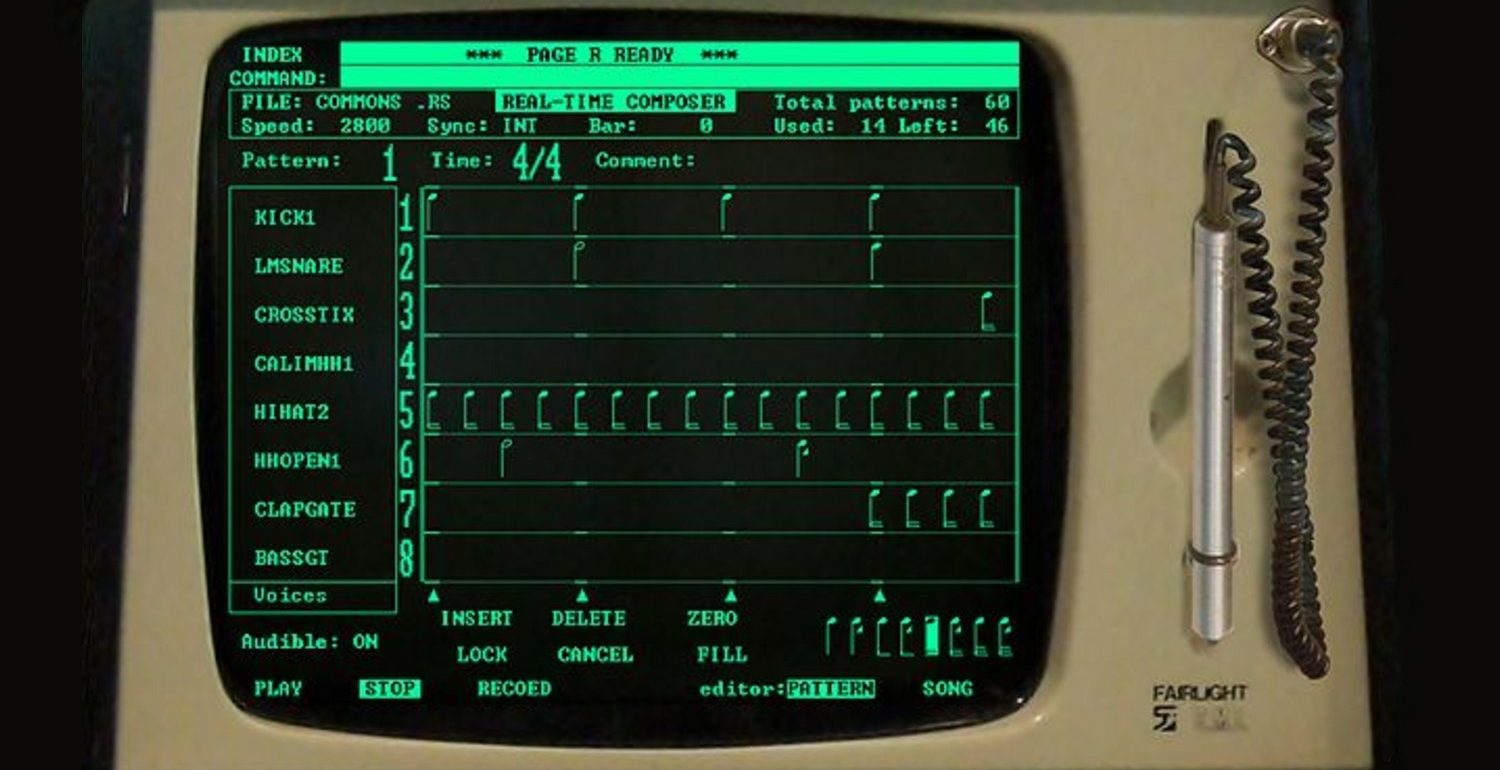
It might help to remember that before there were DAWs, there was tape—and lots of it. Picture a musician in the 1970s or 1980s heading into a studio full of expensive analog gear. Large hardware mixing desks dominated the room, reel-to-reel tape machines were used to record tracks in real time, and editing involved physically cutting and splicing sections of tape with a razor blade. It was labor-intensive, time-consuming, and required a specialized engineer just to keep everything running. Despite the romance of vintage studios, this was an expensive, complex process that closed the door to many aspiring artists.
From Tape to Early Digital
In the late 1970s and 1980s, computers and digital recording began to creep into professional studios. These first attempts at digital audio workstations were extremely costly and required specialized hardware. Early adopters saw huge advantages, particularly when it came to editing: once you’ve converted sound into data, you can cut, copy, and paste virtually instead of physically slicing tape. That was a game-changer.
Companies like Steinberg played a major role. As early as the late 1980s, Steinberg’s Cubase was already letting users on personal computers sequence music with MIDI. Suddenly, producers could program drum machines, trigger synthesizers, and automate song structures in a way that was way more flexible than a purely hardware-based setup. A few short years later, Steinberg introduced digital audio recording into Cubase, and the DAW as we know it truly took shape.
Big Developments and the Popularity Boom
By the mid-1990s, personal computers had gained enough power to handle multiple tracks of digital audio, and software developers began rolling out plug-in architectures—like Steinberg’s VST (Virtual Studio Technology). This allowed third-party developers to create software instruments (like synthesizers) and effects (like reverbs, delays, compressors, and more). Suddenly, your computer could house a virtual studio, bridging the gap between huge racks of hardware and a small home setup.
All this innovation spelled the end of requiring big budgets and pro studios to produce a record. The transformation was so powerful that it sparked an explosion of bedroom producers, indie artists, and small project studios all over the world. By the 2000s, artists of all genres could realistically produce a professional-sounding track using only a DAW and a few carefully chosen pieces of hardware (like an audio interface and studio monitors).
As a result, the DAW is no longer seen as a novelty—it’s the epicenter of almost every modern recording studio. Even if you’re a staunch hardware lover, eventually, that sweet analog signal is going to go into a DAW for editing, mixing, or mastering.
Core Features of a DAW (and Why You Should Care)
As you explore different DAWs—Cubase, Ableton Live, Pro Tools, Logic Pro, FL Studio, REAPER, and more—you’ll notice each one has a slightly different personality. Some emphasize live performance features, others focus on super-detailed audio editing or advanced scoring. But the fundamental features of a DAW remain consistent across the board:
- Audio Recording: This is the heart and soul of any DAW. You can connect a microphone or instrument (say, guitar or bass) to an audio interface, arm a track in your DAW, and hit “record.” The DAW captures your performance as a digital audio file, storing it safely on your hard drive.
- Audio Editing: Once audio is recorded, you can slice it, move it, time-stretch it, crossfade it, or even reorder entire sections in seconds. Editing is non-destructive, meaning you can always go back if you change your mind—no more destructive tape slicing.
- MIDI Sequencing: MIDI stands for Musical Instrument Digital Interface. It’s basically data that tells virtual instruments (software-based) or hardware instruments (physical synthesizers, drum machines, etc.) which notes to play, how loud, and for how long. You can draw these notes in with a mouse or play them from a MIDI controller like a keyboard or drum pad.
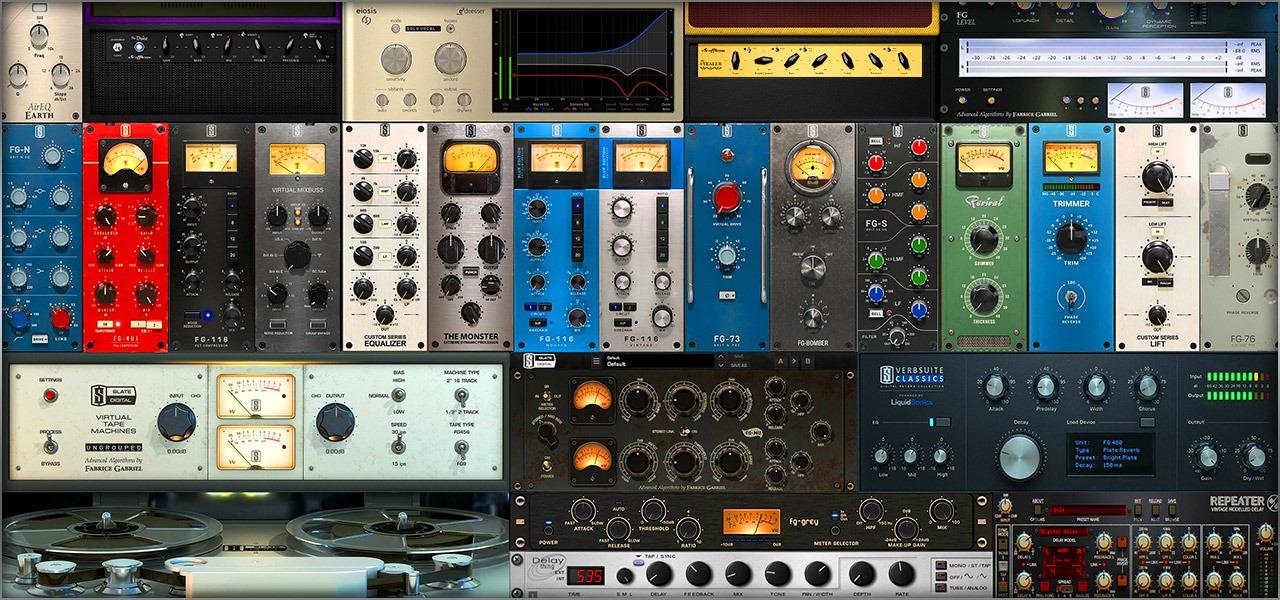
- Virtual Instruments & Effects: These are “plugins” you can load inside the DAW to generate sounds (like synths, sampled pianos, or drum machines) or to shape your audio (EQ, reverb, distortion, guitar amp simulators, and so on). Modern DAWs typically come with a library of built-in instruments and effects, but they also let you add third-party plugins in formats like VST, AU, or AAX.
- Mixer & Signal Routing: Think of the DAW’s mixer as your virtual console. Each track (audio, MIDI, instrument) has its own channel strip with level (volume) control, pan, inserts for effects, sends to bus effects, etc. You can group tracks, create auxiliary
- Arrangement & Timeline: The timeline interface provides a visual representation of the project, where audio and MIDI clips can be organized, edited, and sequenced to form the complete composition.
The Inner Workings of a DAW
Understanding the inner workings of a DAW is crucial for any music producer looking to unlock its full potential. This section delves into the essential components that make up a DAW as wel as some technical aspects of it. This will provide a clear picture of how each part contributes to the overall music production process.
Main Components
A DAW is composed of several key elements that work together to make recording and producing music an intuitive process. Let’s break down these components:
Audio and MIDI Tracks
At the most fundamental level, DAWs deal with audio tracks and MIDI tracks. Audio tracks record actual sound waves from your instruments or vocals, while MIDI tracks capture data such as note information, velocity, and timing. MIDI doesn’t produce sound by itself; instead, it sends instructions to virtual instruments or external synthesizers, which then generate the sound.
For beginners, this might seem overwhelming. But imagine recording your acoustic guitar on an audio track and then using a MIDI track to layer a virtual drum beat on top. This combination allows you to experiment with different sounds and arrangements without needing a full band in the room.
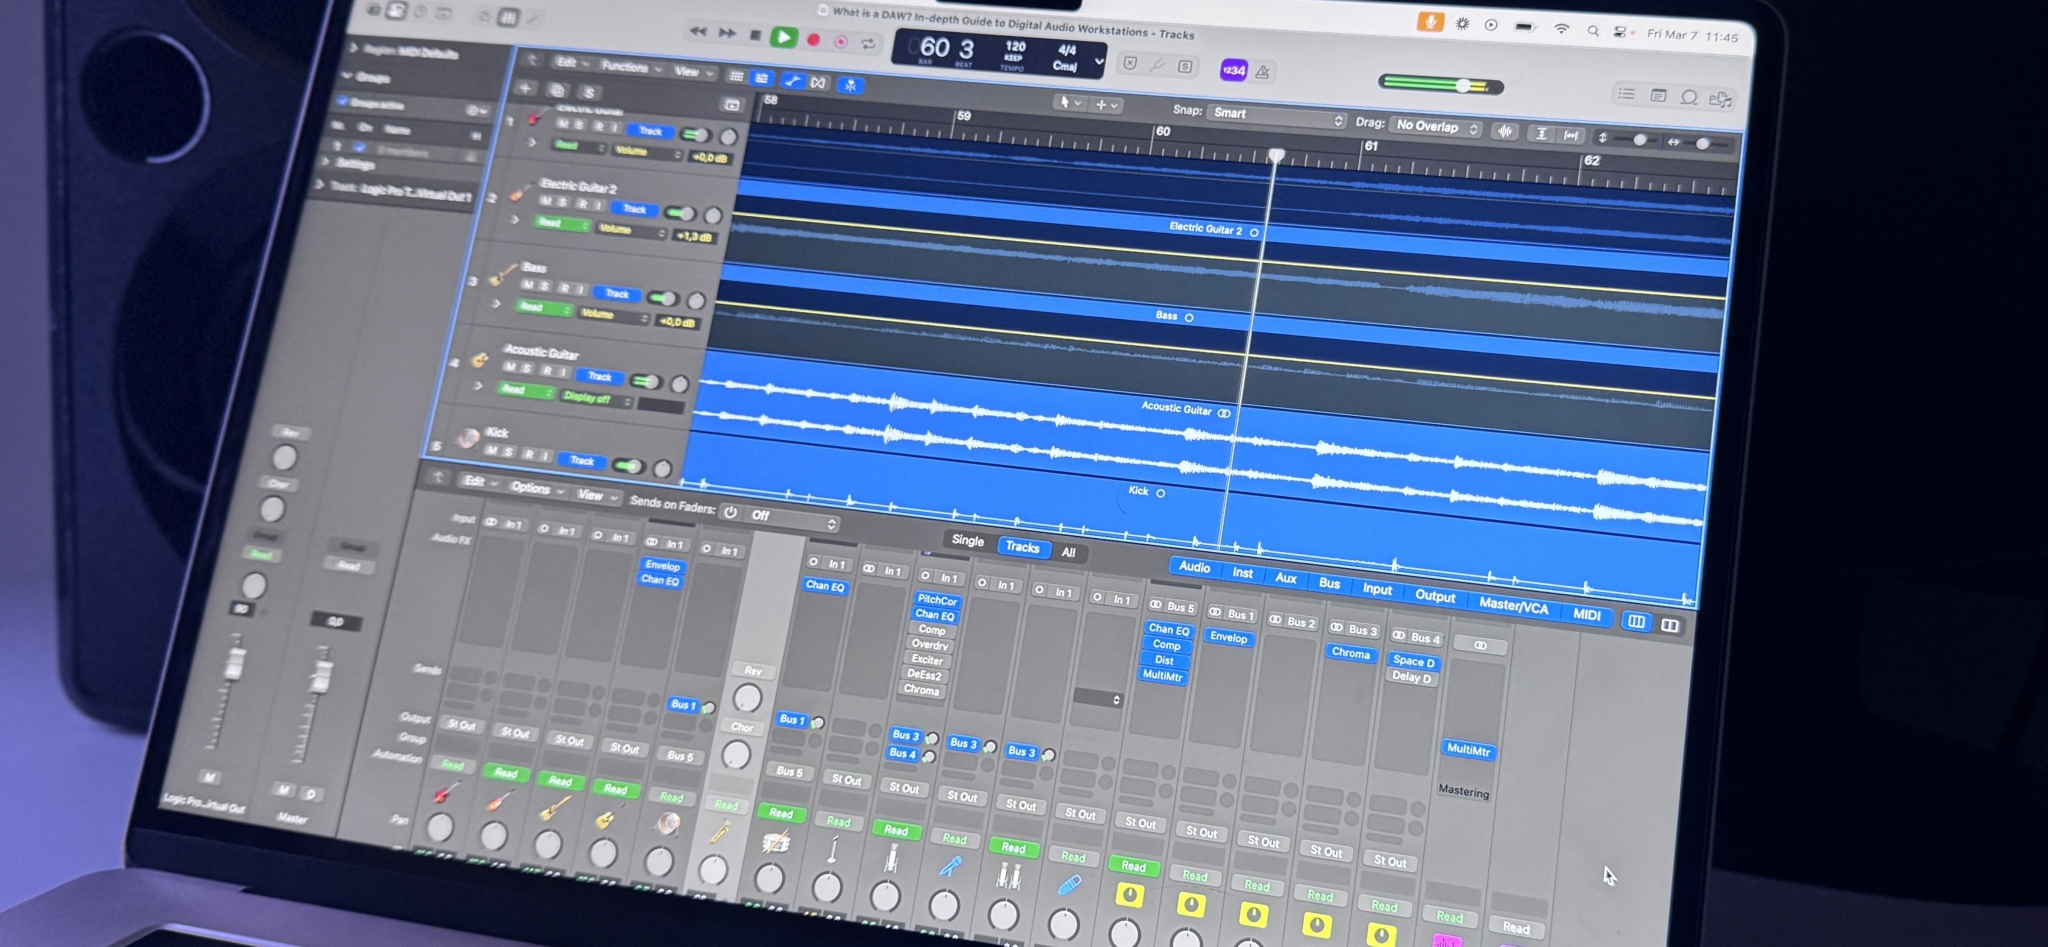
The Timeline and Sequencer
The timeline or sequencer in a DAW is where all your recorded audio and MIDI clips are arranged. It functions like a digital storyboard—each clip is placed along the timeline, and you can see how the different elements of your track interact over time. The playhead moves across the timeline during playback, triggering each clip at the right moment.
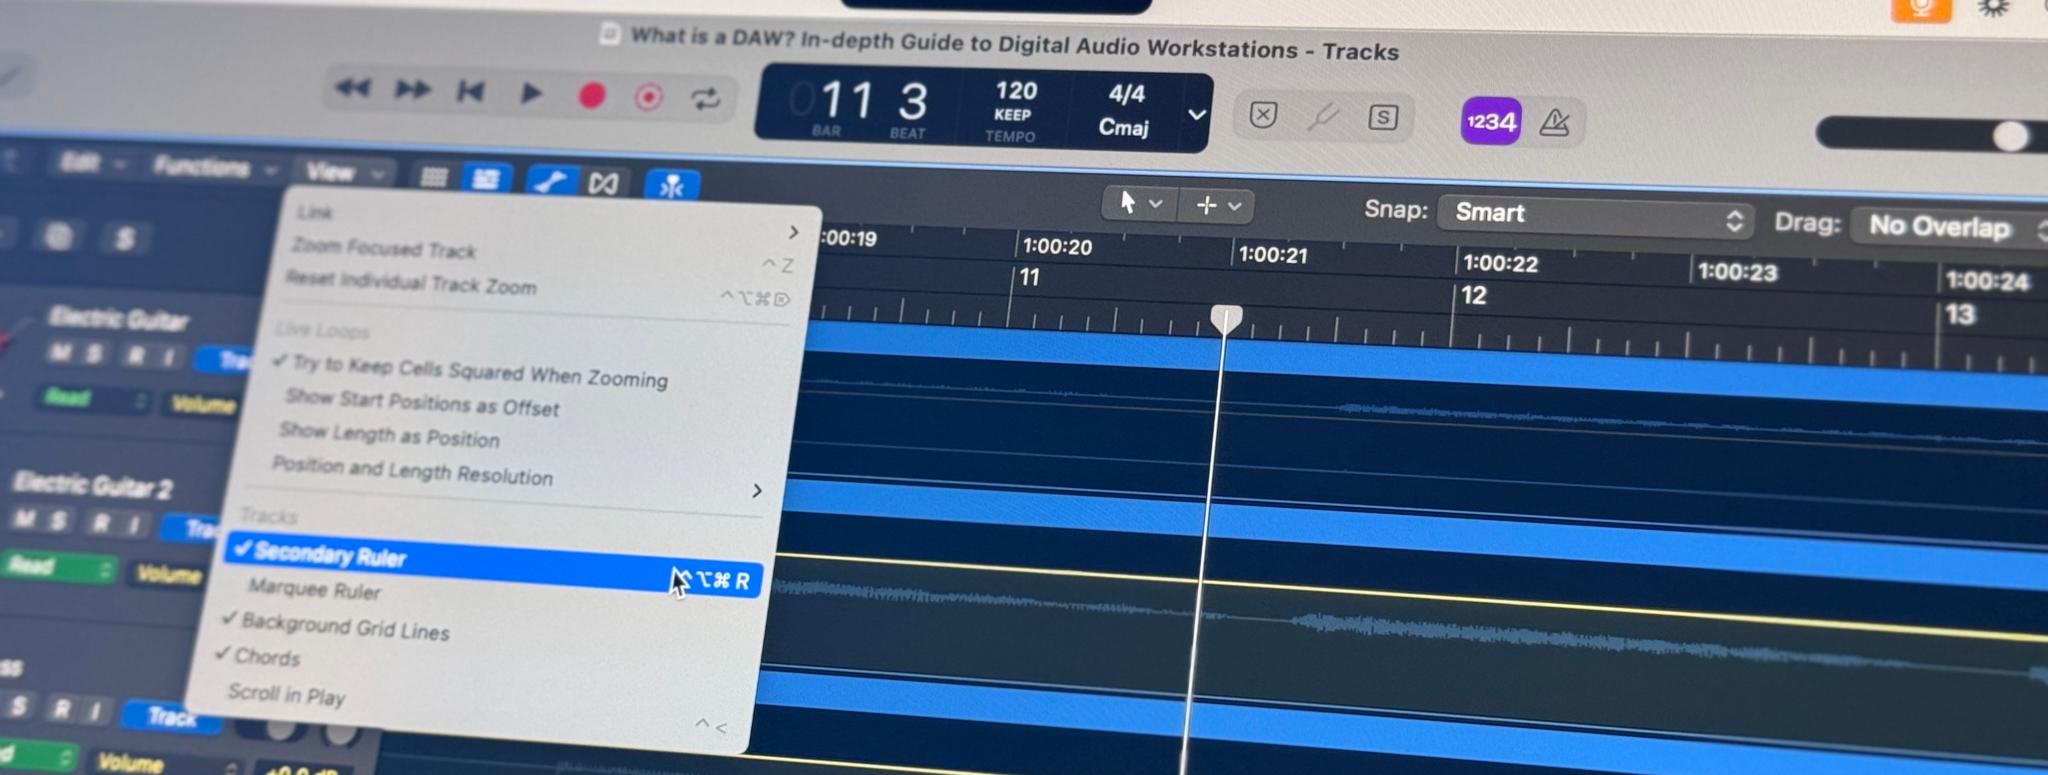
As you get more comfortable, you’ll learn to cut, copy, paste, and stretch clips, enabling you to refine your performance down to the smallest detail. This non-linear editing approach is one of the most powerful aspects of working in a DAW, as it gives you total control over the arrangement and structure of your music.
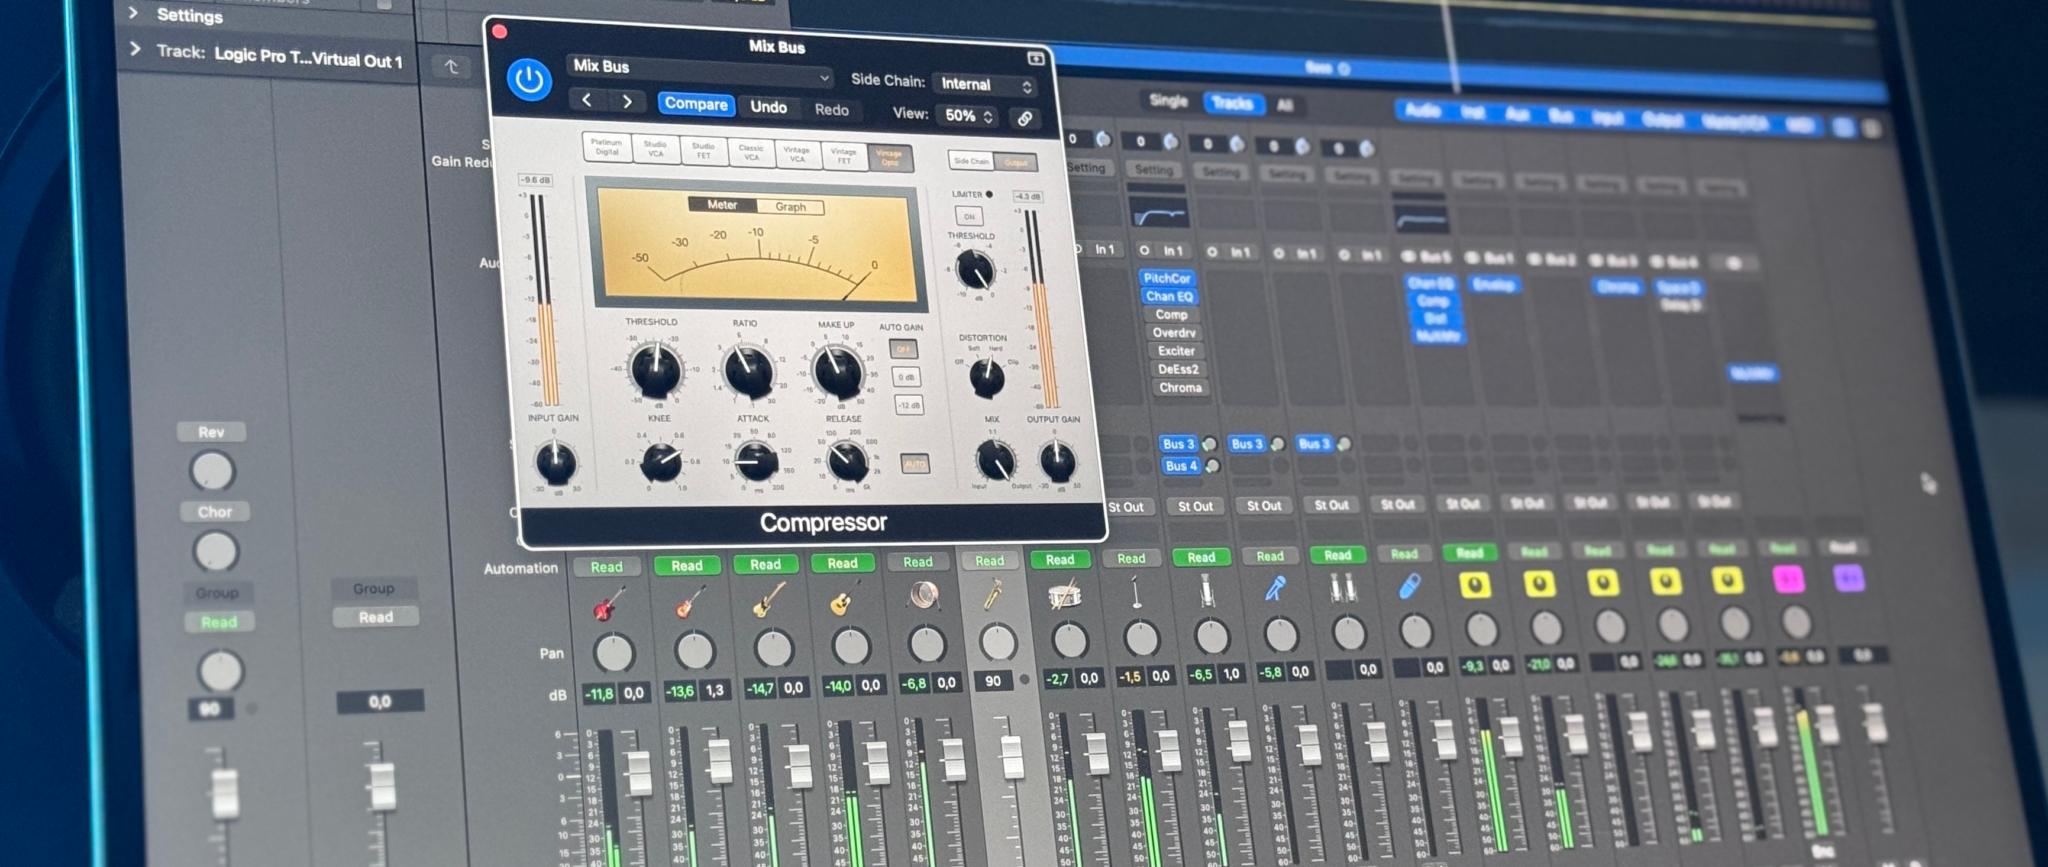
The Mixer and Channel Strips
Another cornerstone of any DAW is the mixer. Each track in your project is assigned a channel strip that lets you adjust volume, pan (left/right balance), and add effects like EQ (equalization), compression, and reverb. Think of the mixer as your command center where you balance every element of your track to ensure nothing overshadows another.
For example, when mixing a song, you might reduce the low frequencies of a vocal track to avoid clashing with the bass, or add a touch of reverb to create a sense of space. These adjustments can be subtle but make a huge difference in the overall clarity and impact of your final mix.
Technical Aspects of a DAW
Once you’re familiar with the basic components, the deeper technical aspects of a DAW start to come into play. Here are some advanced concepts that will help you get the most out of your digital studio:
Non-Destructive Editing
One of the major advantages of DAWs is non-destructive editing. This means that any changes you make to a clip or track are applied as layers on top of the original data. If you decide you don’t like a particular edit, you can simply revert to the original recording without any loss of quality. This flexibility is crucial when you’re experimenting with different arrangements or effects.
Plugin Integration and Formats
Plugins extend the functionality of your DAW far beyond its built-in tools. There are several types of plugins:
- Effects Plugins: These include reverb, delay, distortion, and more, which help shape the sound of your recordings.
- Virtual Instruments: Software synthesizers, samplers, and other instruments that generate sound based on MIDI data.
- Analyzing and Metering Plugins: Tools that give you visual feedback on your audio’s frequency content, phase, and overall dynamics.
Plugin formats such as VST, AU, AAX, and others ensure compatibility with different DAWs and operating systems. For instance, VST (developed by Steinberg) is widely used across both Windows and macOS, while AU is more common in Apple’s ecosystem. Understanding these formats can be key, especially when integrating third-party tools into your workflow.
Automation and Routing
Another powerful feature in advanced DAW use is automation. Automation allows you to control virtually any parameter—be it volume, panning, or effect parameters—over time. Instead of manually adjusting knobs and faders during playback, you can program these changes to occur automatically. This is incredibly useful for creating dynamic mixes where certain elements evolve or fade in and out.
Routing, on the other hand, refers to how audio signals travel through your DAW. This could involve sending a track’s output to an auxiliary bus for additional processing, or even routing multiple signals to a single channel for a specific effect. Understanding signal flow is essential when you start incorporating external hardware or complex plugin chains into your setup.
Sample Rate and Bit Depth
For those diving deeper into the technical realm, sample rate and bit depth are crucial parameters that determine the quality of your recordings. The sample rate refers to how many times per second the audio is sampled, while bit depth indicates the resolution of each sample. Higher sample rates and bit depths result in better sound quality but require more processing power and stor
Working With Audio: Recording and Editing
Before we dive deeper, let’s put ourselves in the shoes of a singer-songwriter who’s just opened a DAW for the first time. Let’s say you’ve got an acoustic guitar and a simple USB audio interface. You’ve written a verse and chorus you love, and you want to capture it.
Recording Basics
You open your DAW of choice—maybe it’s GarageBand, maybe it’s FL Studio. You create a new session, add an audio track, and choose your interface input (where your mic is plugged in). You’ll see your meters respond when you strum your guitar. You press record, and your DAW captures every second of your performance as an audio file in real time. Boom. You’re now a recording artist.
Editing That Take
In a typical DAW, your recording appears as a waveform on the timeline. You can zoom in, slice out mistakes, move sections around, or copy and paste the best chord strum if you want to loop it. If your rhythm is slightly off in one bar, you can nudge that part in time or use time-stretching features to correct the timing. Mistakes that used to require a second (or third, or tenth) take can now be repaired or combined from multiple takes. This method is sometimes referred to as comping, where you piece together the best moments from various recordings.

Using MIDI: Creating Beats and Triggering Instruments
Not every musician wants to plug in a guitar or record vocals. Some people just want to program beats, make electronica, or compose orchestral film scores using virtual libraries. This is where MIDI comes into play.
MIDI 101
MIDI doesn’t record sound. Instead, it records instructions like “play C3 at velocity 100, from 1:02 to 1:03.” When the DAW plays back those instructions, a MIDI-compatible instrument (software or hardware) reads the data and generates the corresponding note. If you’re using a virtual piano plugin, that data triggers the sound of, say, a Steinway grand. If you’re controlling a hardware synth, those same instructions might produce lush pads, screaming leads, or evolving soundscapes.
Editing MIDI
One of the biggest perks of working with MIDI is how easy it is to edit. You can open a piano roll editor in your DAW and literally move notes around as if they were blocks on graph paper. Shift them up or down to change pitch, stretch them out for a longer duration, or quantize them to the grid for perfect timing. It’s a dream for composers who prefer to tweak their compositions without having to re-record audio.
Virtual Instruments
In all major DAWs, you can load virtual instruments (like Native Instruments’ Kontakt libraries, or a built-in sampler). These instruments can be anything: an ultra-realistic acoustic drum kit, a gritty analog synthesizer, an orchestral string section, or even an experimental noise generator. Playing them with a MIDI controller (like a keyboard) can feel like you’ve got thousands of instruments right there in your bedroom. The variety is mind-blowing, and it’s one of the reasons DAWs are so transformative for music creation. You’re no longer limited by the physical instruments you own.

Effects and Plugins: Sound Shaping Power
With your guitar parts recorded or your beats sequenced, you’re going to want to shape and refine the sound. This is where a DAW’s ability to load audio effects plugins really shines.
Common Plugin Types
- EQ (Equalization): Allows you to boost or cut specific frequency ranges of your track.
- Compression: Controls the dynamic range, leveling out loud and quiet parts.
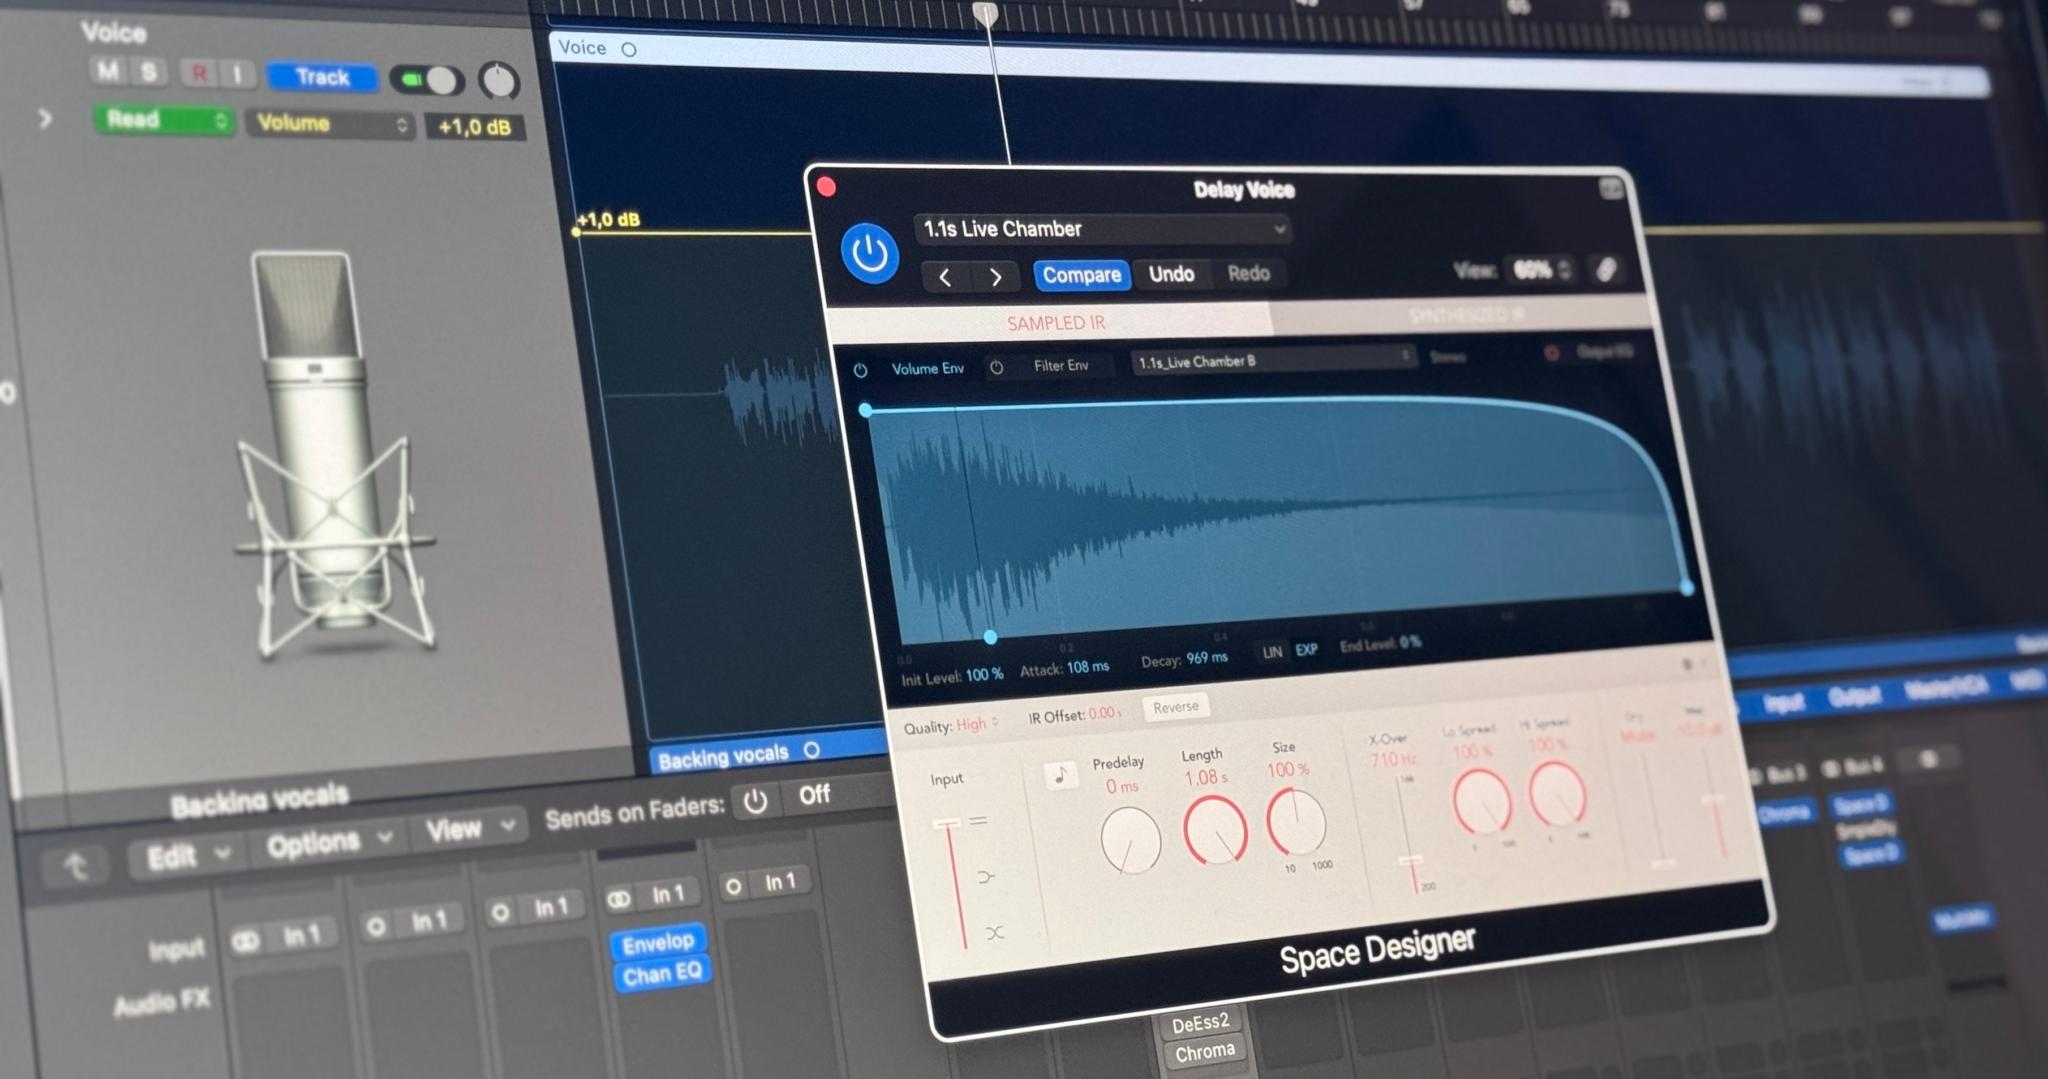
- Reverb: Simulates acoustic spaces, adding depth and a sense of space.
- Delay: Produces echoes or repeats that can make your track more rhythmic or ambient.
- Distortion / Saturation: Adds warmth, grit, or full-on fuzz to your audio.
- Chorus / Flanger / Phaser: Modulation effects that create swirling, layered textures.
- Limiters & Maximizers: Used in mastering to increase overall perceived loudness without distorting.
You can apply these effects to individual tracks, groups/buses, or even the master channel. By chaining multiple plugins in series, you can sculpt a unique tone that’s all your own.
Guitar and Bass Amp Simulators
If you’re a guitarist or bassist, DAWs open up yet another world: amp simulator plugins that emulate real amplifiers, cabinets, and pedals. Companies like Neural DSP, Line 6, and many others produce these. Instead of miking up a roaring half-stack in your living room, you can simply plug your guitar into an audio interface, load an amp sim plugin in your DAW, and get convincingly realistic, high-quality guitar tones—even at midnight when your neighbors are sleeping.
Mixing in the DAW
After all your parts are recorded or programmed, you typically want them to sound like a coherent song rather than a bunch of separate instruments playing at the same time. Mixing is the process of balancing levels, panning instruments in the stereo field, applying EQ and compression to make sure everything fits nicely, and adding effects like reverb to create a sense of space. The DAW’s mixer section is where you’ll spend a lot of time on this.
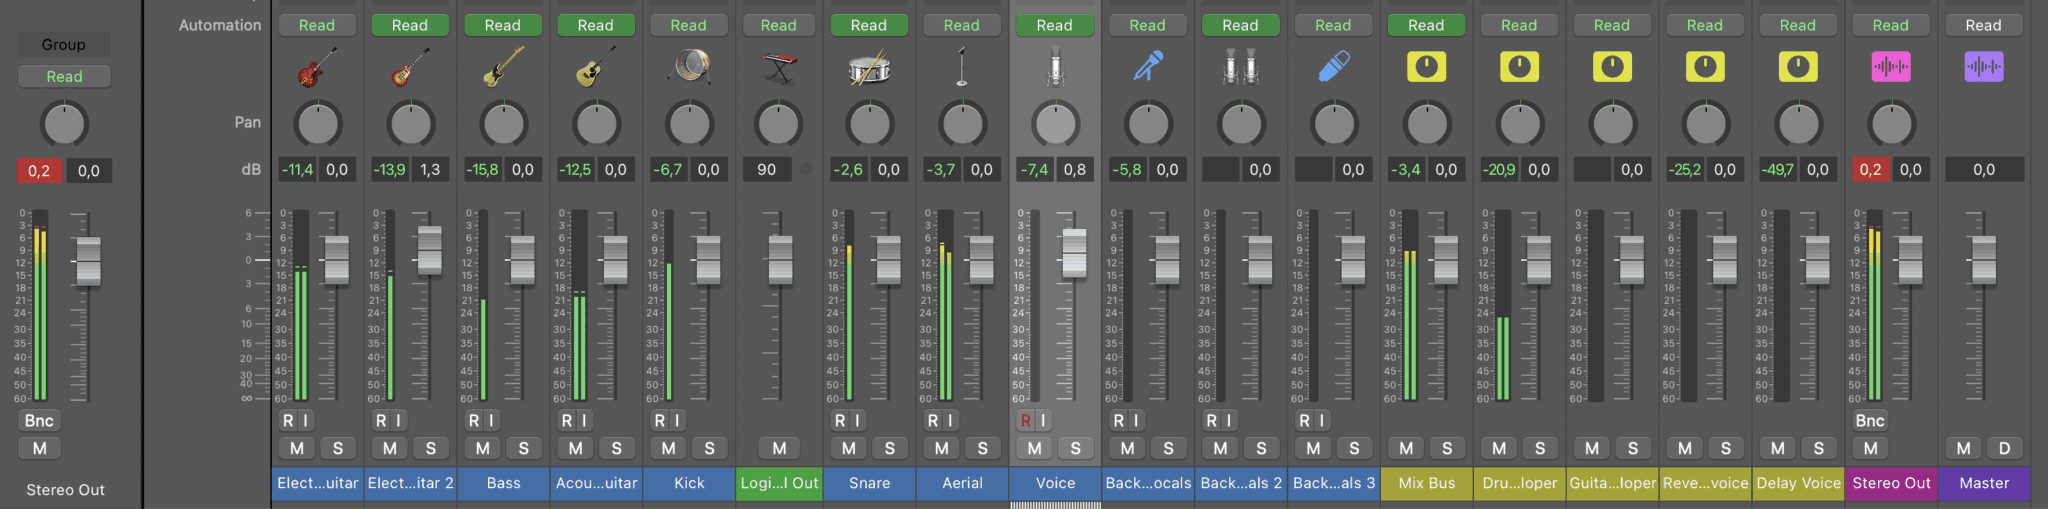
An important concept for beginners is that each track in the DAW has its own channel strip in the mixer. That channel strip might have slots for insert effects (like compression or EQ), as well as send levels for reverb or delay buses. A “bus” can be thought of as a group channel or an auxiliary path that multiple instruments can share—like sending all your vocal tracks to the same reverb plugin so they sound like they’re in the same space.
Submixes and Grouping
Many DAWs allow you to group tracks (like grouping all your background vocals or your drum mics) into a bus or submix channel. You can then apply processing to that entire group. Maybe you have 10 different drum tracks: kick in, kick out, snare top, snare bottom, overheads, etc. Instead of adjusting each channel separately, you might route them all to a “drums” bus, apply a bus compressor, and adjust one fader to change the volume of the entire drum kit. This approach simplifies mixing and keeps the project organized.
Automation
Automation is a powerful DAW feature that allows you to change parameters over time, automatically. For instance, if you want the lead vocal to get gradually louder in the chorus, or the reverb to get more intense in the bridge, you can draw or record these changes on an automation lane. That way, when you hit play, the software automatically adjusts the volume or plugin settings exactly how you programmed it. This was historically done by physically moving faders on a mixing console, but nowadays, you can do it all with a mouse or a hardware control surface linked to the DAW.

Which DAW Is Right for You
This question is probably one of the biggest debates in any music production community. Which DAW is best? Honestly, there is no single correct answer. The best DAW is the one you feel comfortable using, the one that fits your workflow, and the one that meets your budget.
- Pro Tools has a legacy in pro studios, especially for multitrack audio recording and post-production. Many recording studios swear by Pro Tools for its industry-standard approach and advanced audio editing.
- Ableton Live is beloved by electronic producers and performers for its Session View, which allows loop-based composition and on-the-fly arrangement. It has powerful built-in instruments and effects, making it a go-to for beatmakers, DJs, and live performers.
- Logic Pro is Apple’s flagship DAW, loaded with a vast library of virtual instruments and loops. It’s known for being user-friendly, yet still robust enough for pro-level scoring and production. It’s Mac-only, so that’s a consideration.
- Cubase is a powerhouse for all sorts of production tasks, with excellent MIDI sequencing, scoring features, and advanced audio editing. Steinberg (the developer) basically invented the VST format, so they’ve got decades of experience.
- FL Studio (formerly known as FruityLoops) is popular among hip-hop and EDM producers who love its pattern-based workflow and a fast, easy approach to building beats. It’s also known for lifetime free updates.
- REAPER stands out for being lightweight, highly customizable, and very affordable compared to many commercial DAWs. Despite the low price, it offers extremely deep functionality—some advanced users consider it the most flexible DAW around.
Try Before You Buy
Most DAWs offer free trials or demo versions. This is a fantastic way to see which interface resonates with you. Some folks love the linear arrangement and classical approach of Cubase, FL Studio or Logic Pro, while others prefer the vertical clip-based approach in Ableton. Personal preference is key.

Cross-Compatibility
Keep in mind that if you collaborate with others, you might want to choose a DAW that’s widely used in your circles. If all your bandmates or co-producers use Logic Pro, for example, collaborating might be smoother if you use it too. That said, it’s entirely possible to bounce stems or export consolidated tracks from any DAW and import them into another.
Gear Up: What You Need to Get Started
Even though DAWs reduce the need for bulky hardware, there are still some essentials you’ll need for an optimal recording experience.
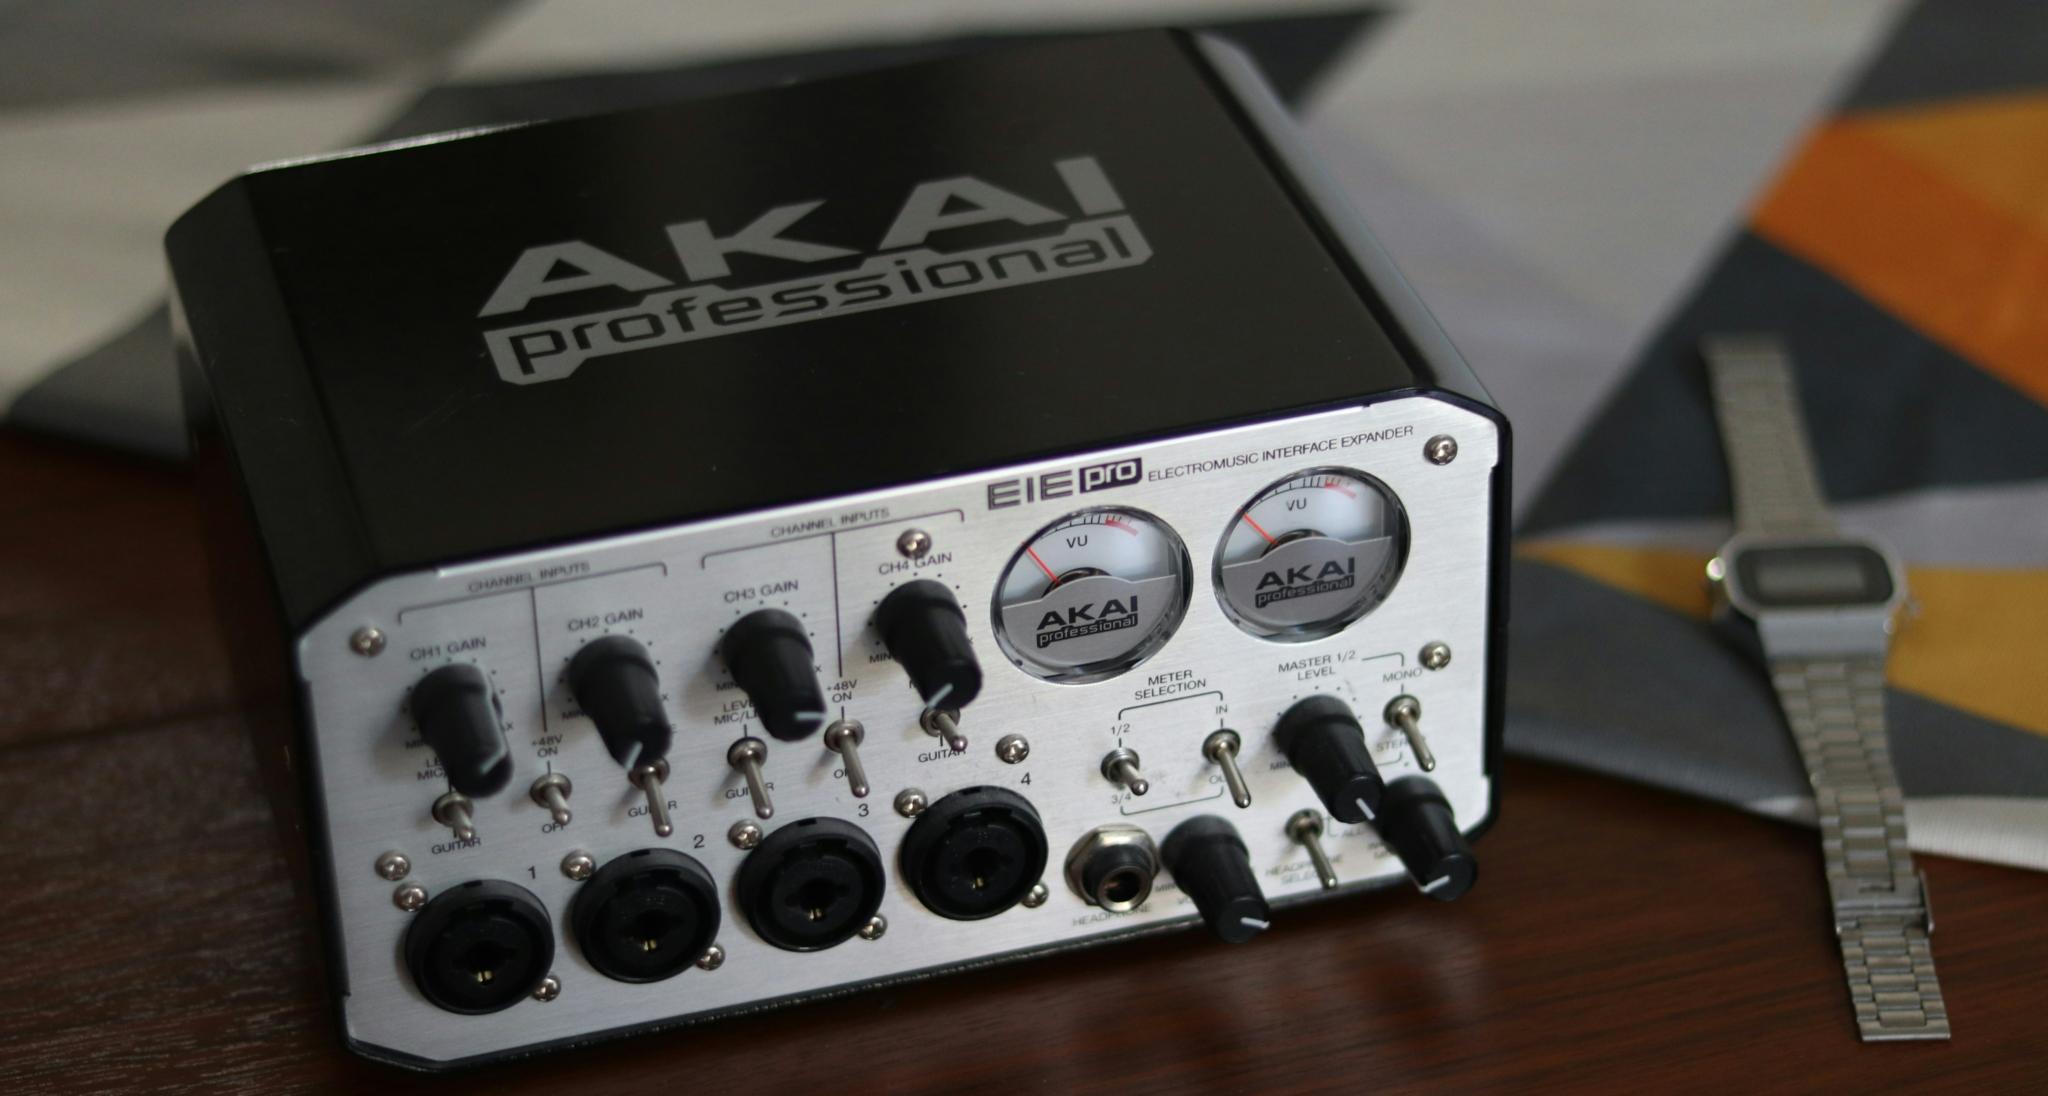
Audio Interface
An audio interface is a small box you plug into your computer that features instrument inputs, mic inputs, and line inputs, as well as outputs for your monitors or headphones. This is how you get high-quality audio in and out of your DAW. If you’re a guitarist, you’ll typically plug your guitar into the instrument input. If you’re a singer, you’ll plug your mic in via an XLR cable. This interface then connects to your computer via USB, Thunderbolt, etc.
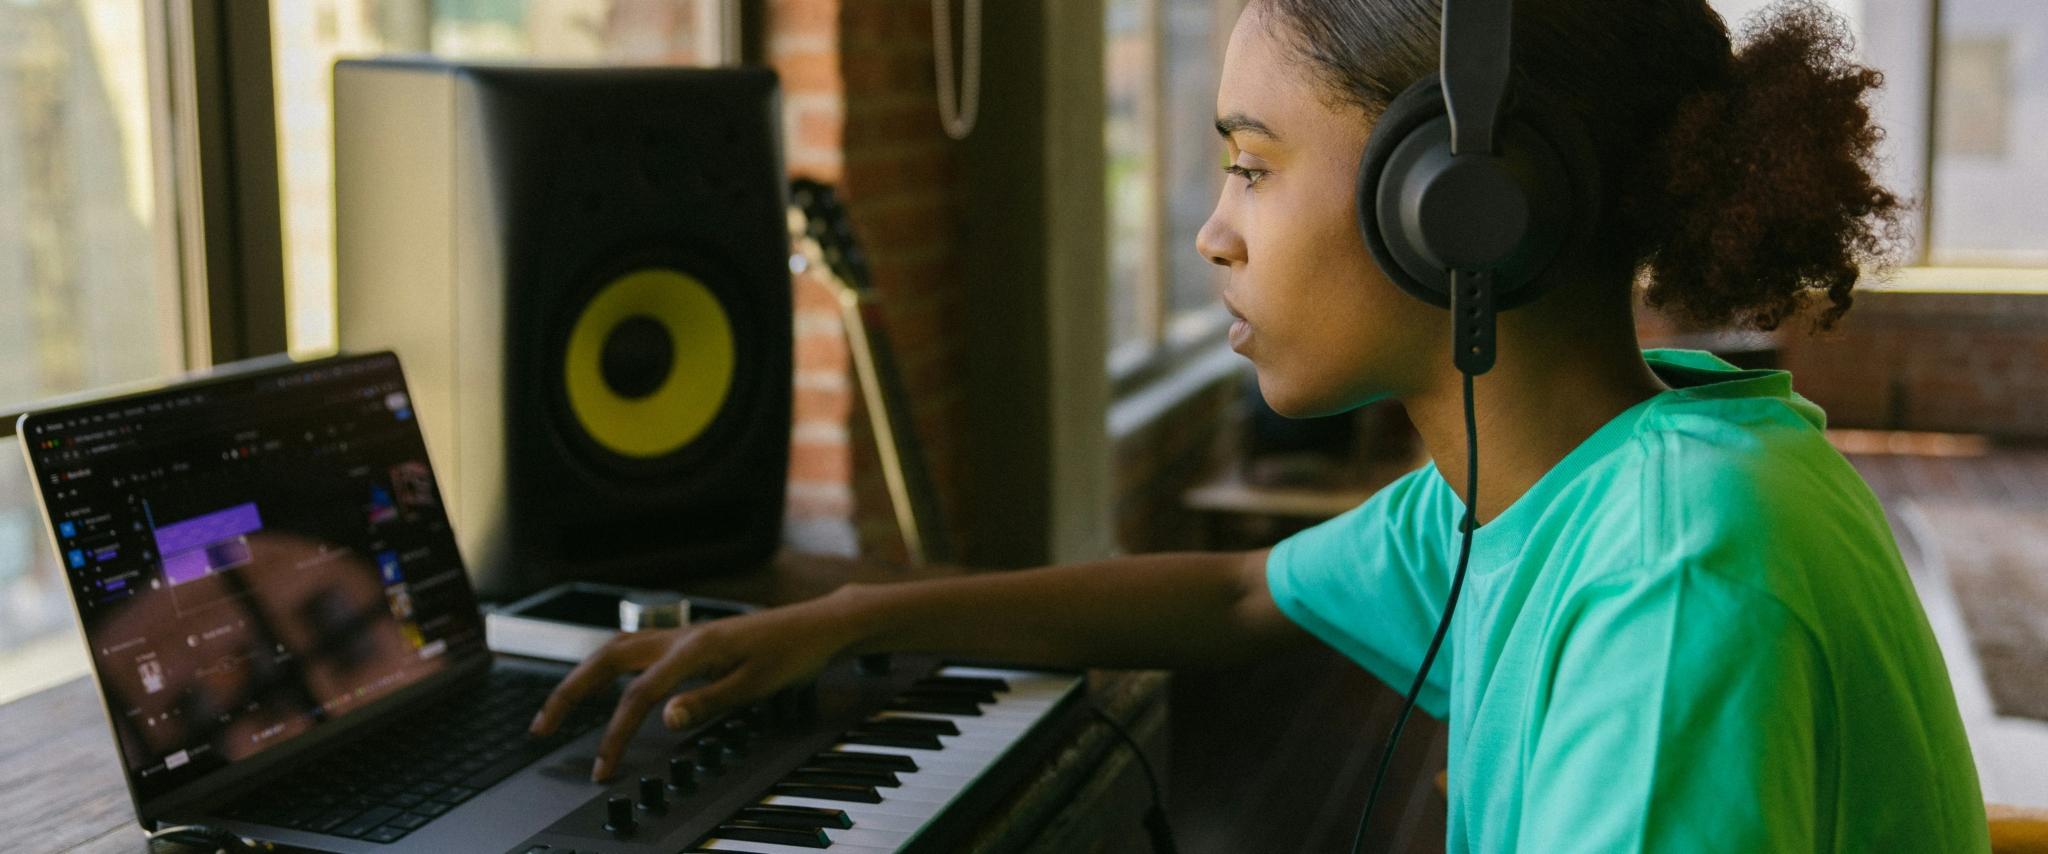
Monitors or Headphones
While laptop speakers or consumer headphones might be fine for casual listening, producing or mixing requires more accurate, unbiased sound. Studio monitors (those unassuming, powered speakers found in studios) give you a more “flat” frequency response, letting you hear details you might miss on typical speakers. If you can’t have loudspeakers in your space, a decent pair of studio headphones can still reveal a lot more detail than standard consumer earbuds.
MIDI Controller
If you plan to compose or program virtual instruments, a MIDI keyboard or pad controller can be a huge advantage. It’s not strictly required—DAWs let you “draw” notes in with a mouse—but a physical controller often feels more musical and intuitive.
Top Tips for Getting Started (and Going Pro)
- Keep It Simple at First: When you’re starting out, it’s easy to get overwhelmed by all the plugins and features. Focus on learning basic recording, editing, and mixing. Gradually add complexity as you understand the workflow.
- Explore Presets, But Tweak: DAWs often ship with preset tracks, channel strips, or plugin settings. Use them! They’re a great learning tool. But don’t be afraid to experiment. Tweak them to understand how each parameter changes the sound.
- Learn Key Commands: Keyboard shortcuts can massively speed up your workflow. Spend a little time memorizing the main ones: record, cut, copy, paste, split clip, zoom in/out, toggle mixer, etc. Once you start using shortcuts instinctively, your creativity can flow uninterrupted.
- Experiment with Templates: Many DAWs let you create or load templates—pre-configured sessions with tracks, buses, and effect chains you often use. If you frequently record guitar + vocals, create a template with your guitar input track, vocal track, and a reverb bus all set up. You’ll save time and stay in the creative zone.
- Take Advantage of Free Trials: Not sure if Ableton or FL Studio is your jam? Download the trials. Try them out with your own material. It’s the best way to see if a DAW clicks with you.
- Watch Tutorials & Seek Community: The internet is bursting with free DAW tutorials, producer communities, and specialized forums. If you’re stuck or curious how to do something, odds are good someone out there has a YouTube tutorial explaining it step by step.
- Keep a Sense of Play: It’s easy to get bogged down in technical details—sample rates, plugin formats, oh my! But at heart, a DAW is a creative tool. Have fun. Don’t be afraid to create “weird stuff,” bounce random audio around, or attempt new genres. The best way to learn is by doing—and messing up.

Beyond the DAW: Mastering Your Workflow
As you delve deeper into music production, mastering your workflow becomes essential for maximizing creativity and efficiency. It involves understanding how to effectively manage your projects, optimize system performance, and streamline your creative process.
CPU and Performance Considerations
As you add more plugins and virtual instruments, your CPU will start to sweat—particularly with resource-hungry synths or large sample libraries. Most DAWs include a CPU usage meter and let you freeze or bounce tracks to free up processing power. Freezing essentially renders a track with all its plugins into audio so your CPU doesn’t have to recalculate them in real time. If you need to make changes, you can unfreeze the track, tweak your settings, and refreeze.
File Management and Organization
A big frustration for many new producers is losing track of audio files, sample libraries, or plugin data. As your projects pile up, your DAW can get cluttered. Best practice: keep each project in its own dedicated folder, with an organized subfolder for audio files, bounces, or exports. Label your tracks clearly (“Vocal Verse,” “Guitar Solo,” “Kick Drum,” etc.). It makes your life so much easier when you revisit a track months (or years) later.
The Future of DAWs
It’s hard to overstate how essential DAWs are to the modern music-making process. They level the playing field so that someone in a tiny bedroom can produce tracks that rival those made in million-dollar studios. That democratization of production has created massive diversity in modern music—a wild mix of genres, styles, and artists all coming out of laptops across the world.
We’re also seeing DAWs continue to evolve with features that push boundaries: advanced time stretching, AI-driven mixing aids, built-in mastering assistants, support for immersive audio formats (like Dolby Atmos), and so on. Whether you’re just capturing a simple acoustic guitar and vocal or designing futuristic electronica, your DAW is ready for you to push the limits of your imagination.
A DAW is not just a piece of software—it’s a creative partner. It’s a blank canvas, a musical sandbox, and a toolkit all rolled into one. If you’re just starting out, don’t worry about mastering everything at once. Take it one track at a time, one plugin at a time, and keep the sense of curiosity and fun alive. Over time, you’ll discover your own workflow, your own sound, and the specific features in your DAW that make your ideas come to life.
Conclusion
So, what is a DAW? It’s your studio-in-a-box, your sketchpad for musical ideas, and a final production environment where you can bring those ideas to life. At the beginner level, it simplifies the daunting process of recording music and provides tools you can learn at your own pace. At intermediate and advanced levels, it becomes a platform for deep experimentation, advanced mixing techniques, and professional-grade final products.
If there’s one thing to remember, it’s this: DAWs are powerful because they consolidate every step of the music-making process into a single software environment. You can record, edit, design sounds, mix, and even master, all without leaving your computer. That’s a far cry from the days of manual tape splicing and expensive outboard hardware.
You’ve likely seen how features overlap between different DAWs: they all record and edit audio, sequence MIDI, host virtual instruments, and run plugins. Their differing philosophies, feature sets, and user interfaces cater to different workflows. That might lead you to shop around a bit—try out demos, watch some online tutorials—and then settle on the one that resonates with you. Remember: the “best” DAW is the one that feels right under your fingertips and makes you excited to create.
Now it’s your turn. Whether you’re recording your next single, messing around with synthesizers, or writing music for film and TV, a DAW will guide you from a blank slate to a polished piece of art. So fire up that software, plug in a mic or load a virtual instrument, and give it a go. DAWs aren’t just tools; they’re the modern musician’s playground—and the only real limit is your imagination.
Informazioni sull'autore

Dídac
CEO e fondatore di MasteringBOXDídac è un ingegnere audio professionista, produttore musicale e ingegnere software. È il fondatore di MasteringBOX e l'autore di molti degli articoli del blog.
Lascia un commento
Log in per commentare