


Podcast Mastering is the final step that turns an edited episode into something that feels finished. It balances loudness, controls peaks, improves tonal consistency, and helps every speaker remain clear across headphones, phones, cars, and smart speakers.
You do not need a huge studio or a complicated plugin chain to get good results. However, you do need a sensible workflow. In this guide, we will start with the basics, then move into compression, EQ, loudness, limiting, export settings, and advanced problem-solving.
Table of Contents
- What Is Podcast Mastering?
- Why Podcast Mastering is Important
- Prepare the Episode Before Mastering
- Set the Right Loudness Target
- A Beginner Podcast Mastering Chain
- Advanced Podcast Mastering Techniques
- Mastering Remote Interviews
- Mono or Stereo for Podcasts?
- Export Settings for a Mastered Podcast
- Common Podcast
- How to Keep Every Episode Consistent
- Mastering Podcasts With MasteringBOX
- Podcast Mastering Checklist
- Final Thoughts on Podcast Mastering
What Is Podcast Mastering?
Podcast mastering is the final quality-control stage after editing and mixing. During this stage, you shape the complete episode rather than fixing every word or clip individually.
A good master should sound balanced from beginning to end. It should also match the loudness and tone of your previous episodes. Most importantly, listeners should not need to adjust the volume whenever another host, guest, advert, or music section appears.
Podcast mastering usually includes:
- Final tonal adjustments with EQ
- Dynamic control with compression
- Sibilance control when needed
- Peak protection with a limiter
- Loudness measurement in LUFS
- True-peak checking
- Final export and codec conversion
Think of it this way: editing removes mistakes, mixing balances the ingredients, and mastering checks the whole meal before it leaves the kitchen.
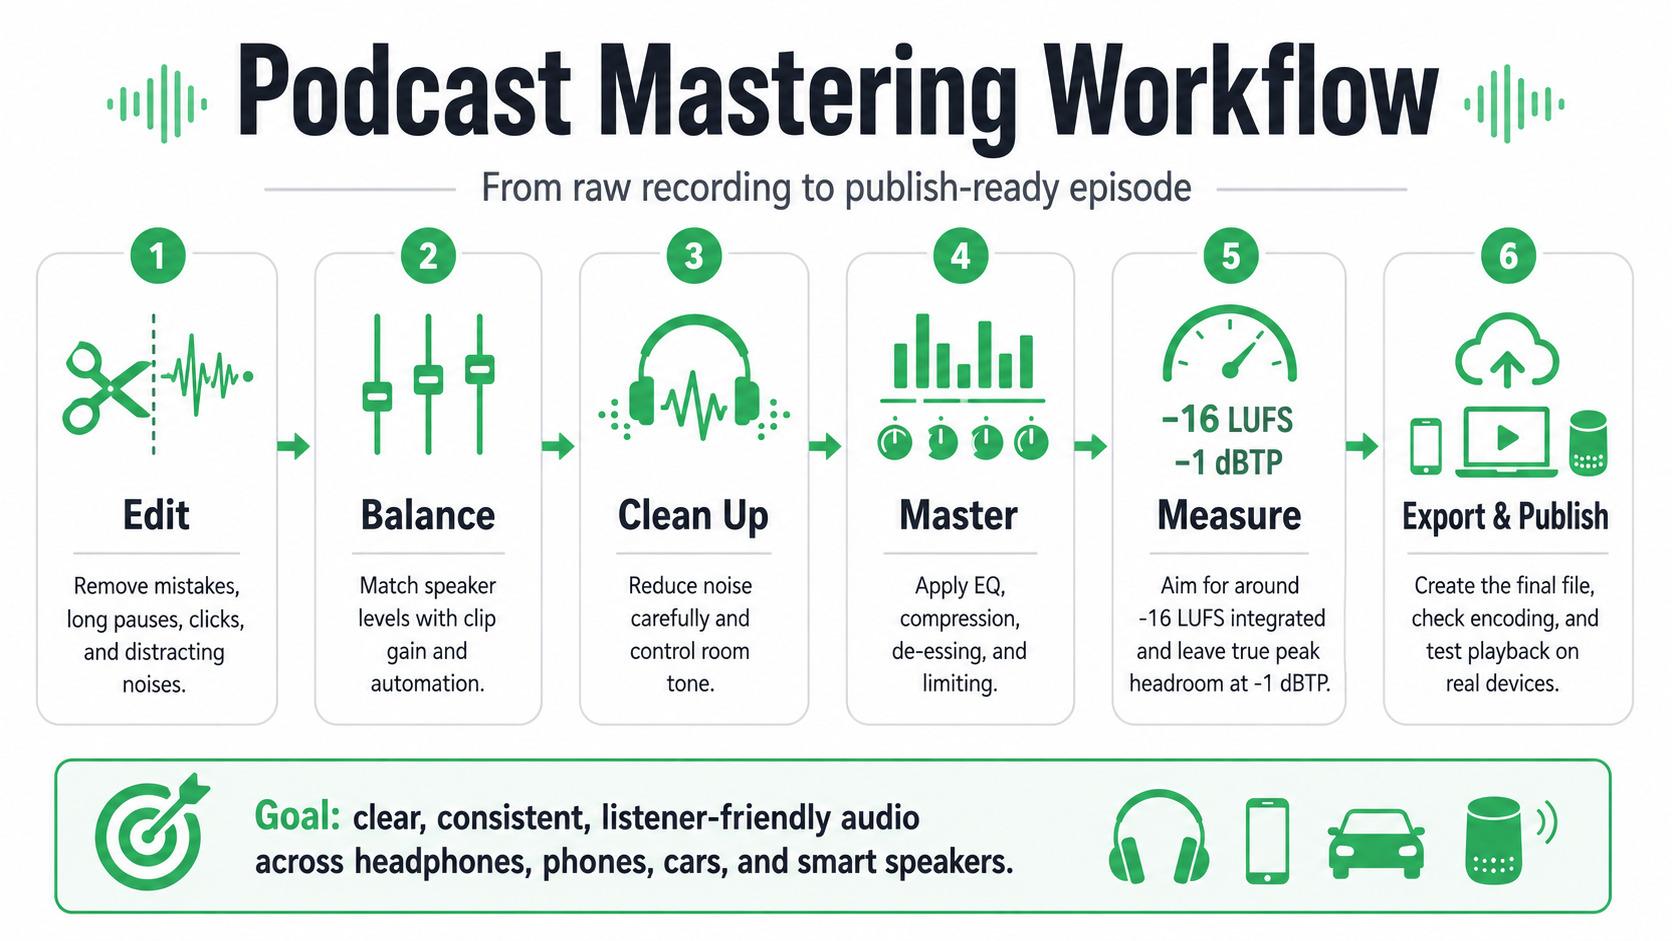
Editing, Mixing and Mastering Are Different
These three stages overlap, but they solve different problems. Understanding that difference prevents you from asking one processor to do far too much.
Editing handles the timeline. You remove false starts, long pauses, coughs, repeated sentences, and unwanted sections. You may also reduce obvious clicks or background noises.
Mixing handles relationships between tracks. You balance the host, guest, music, sound effects, and advertisements. You also automate volume and process individual voices.
Mastering handles the finished stereo or mono program. It gives the episode its final loudness, tone, peak level, and overall consistency.
Mastering can polish a good mix, but it cannot fully rescue a badly balanced conversation.
For example, imagine that one speaker is 10 dB quieter than another. You should fix that before the mastering stage. Otherwise, the final compressor will react to the louder voice while the quiet speaker still disappears.
Why Podcast Mastering is Important
Listeners rarely complain that a podcast needs 1 dB less energy at 300 Hz. They simply say it sounds muffled, harsh, quiet, tiring, or amateur.
That is why podcast mastering matters. It translates technical decisions into a smoother listening experience. People may listen while driving, exercising, cooking, or travelling. In those situations, inconsistent dialogue becomes annoying very quickly.
A mastered episode keeps voices understandable, controls sudden jumps, and makes music and adverts feel connected to the conversation. It also helps episodes maintain a familiar tone and volume across the whole series.
Mastering Is Not About Making Everything Loud
Loudness matters, but maximum loudness is not the goal. Speech needs movement, emphasis, and natural pauses. If you flatten every sentence, the voice may become tiring even though every word is technically audible.
Heavy compression can also exaggerate room noise, breaths, lip sounds, headphone bleed, and air-conditioning. Therefore, the best master is usually controlled rather than crushed.
A useful rule is simple:
Make the podcast loud enough to feel stable, but dynamic enough to feel human.
Prepare the Episode Before Mastering
The fastest way to improve your master is to improve the material you feed into it. Before you touch the master bus, listen through the episode and fix the largest problems at track level.
Start with the basics. Remove accidental bumps, digital clicks, extreme breaths, and distracting pauses. Then balance every speaker by ear. Loudness meters help later, but a natural conversation begins with sensible clip gain and automation.
Clean Up Noise Carefully
Noise reduction is useful, but too much creates metallic or watery artifacts. Those artifacts often become more obvious after compression.
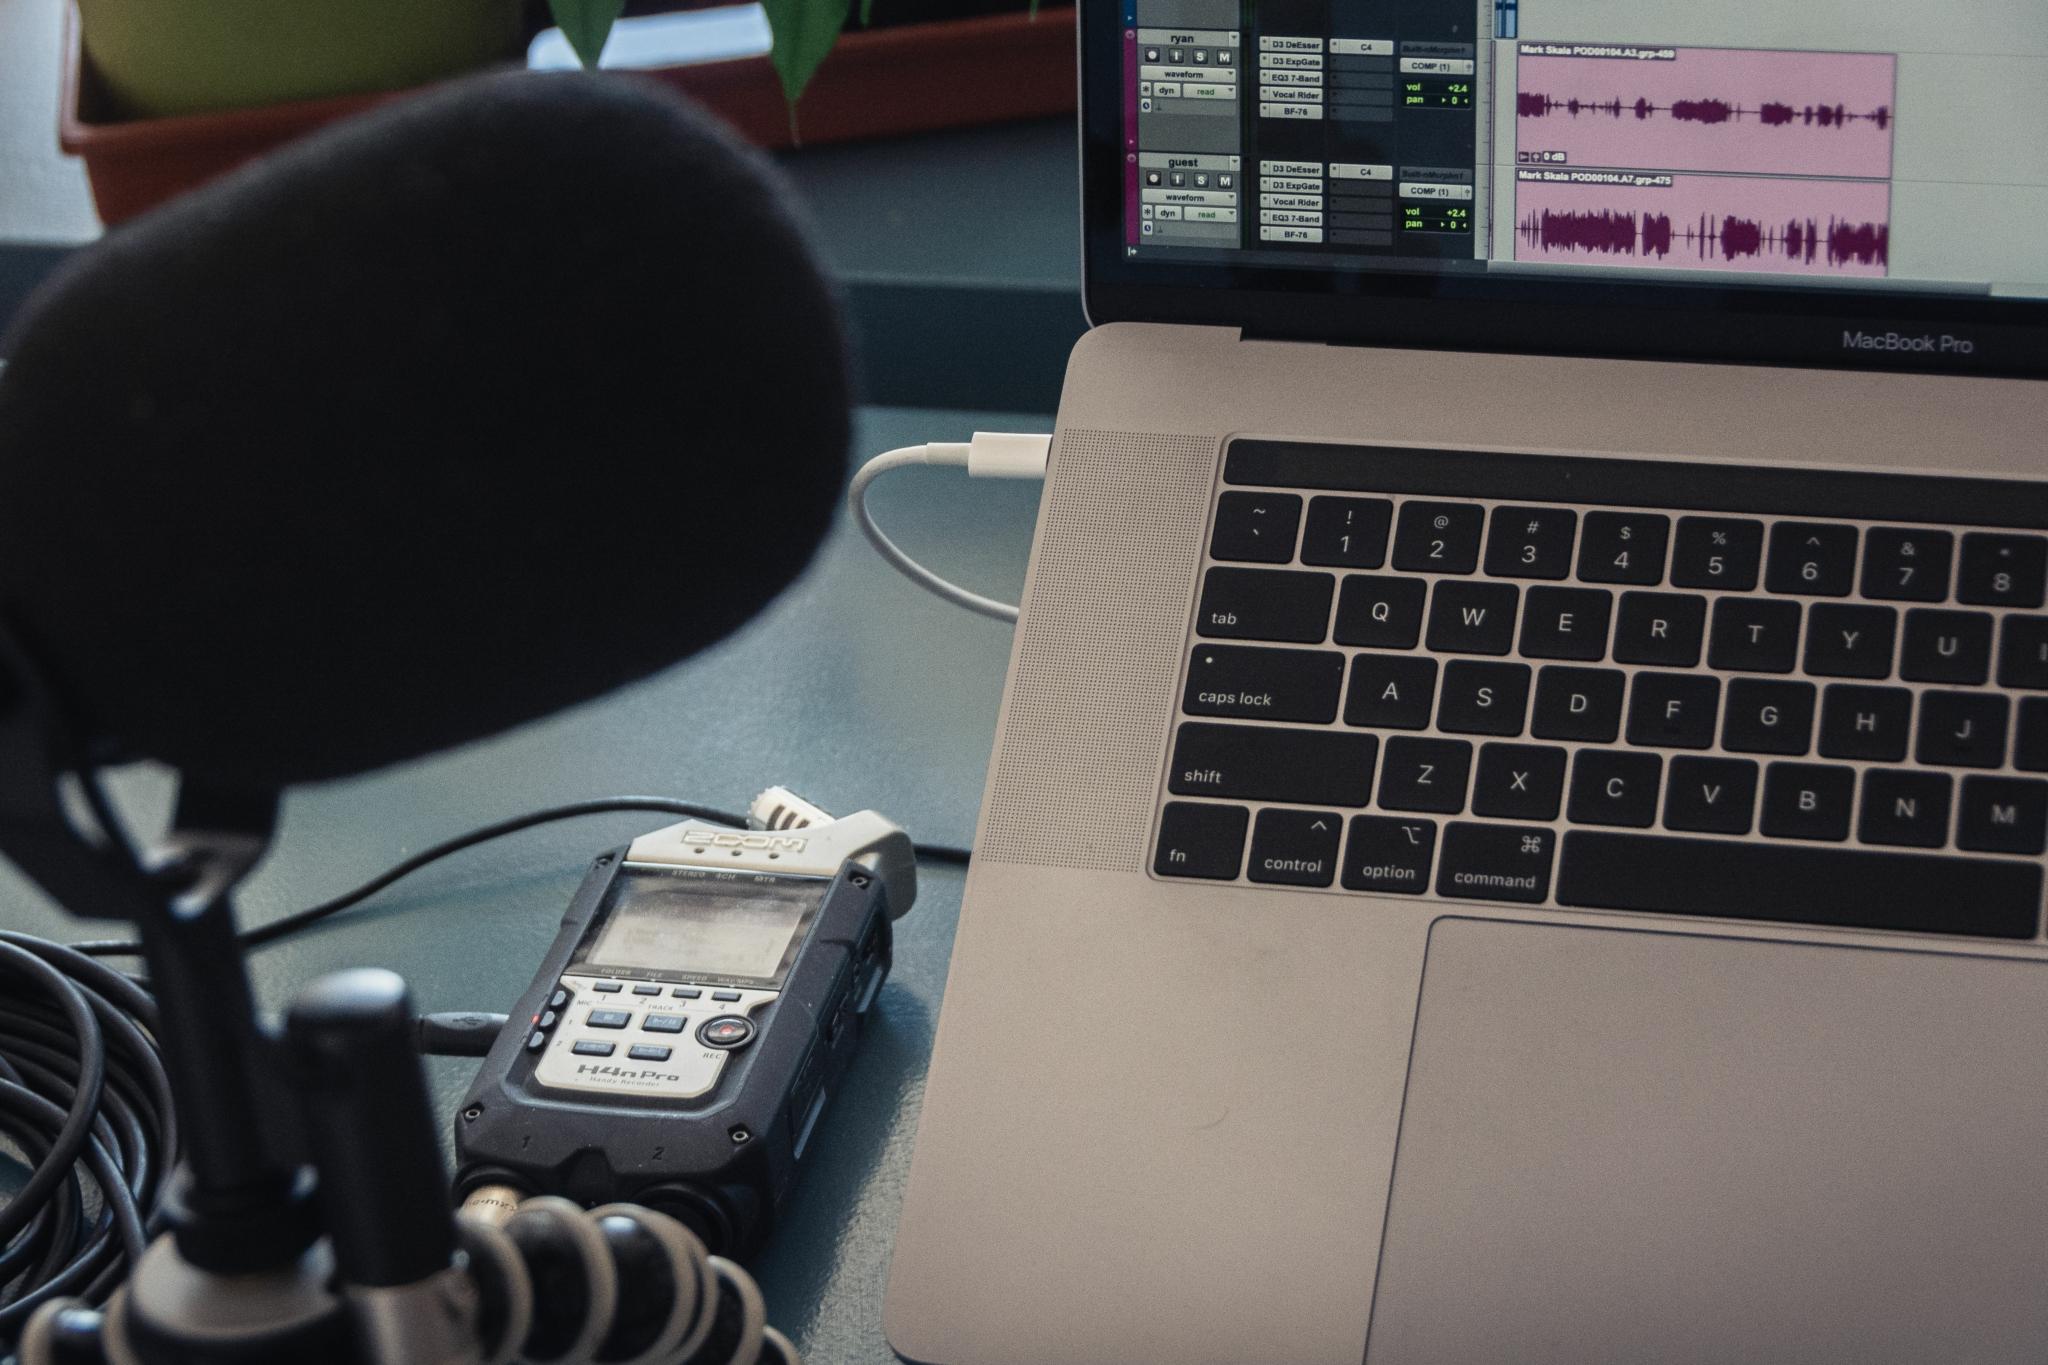
Capture a clean noise profile when your software supports it. Next, apply the minimum reduction that makes the noise less distracting. In many cases, reducing noise by 4 to 8 dB sounds more natural than trying to remove it completely.
For changing noise, such as traffic or laptop fans, automation may work better. Lower the noisy sections manually instead of forcing one aggressive setting across the entire recording.
Use a Gate or Expander Conservatively
A hard gate can make room tone switch on and off between words. That effect sounds unnatural, especially through headphones.
A gentle downward expander is often safer. Try a low ratio, a slow release, and only a few decibels of reduction. The goal is to lower the background during pauses, not create complete digital silence.
Balance Speakers Before Processing the Master
Place each speaker at a similar perceived level before you combine the tracks. Do not rely only on waveform size because two voices with similar peaks can have very different loudness.
Use clip gain for broad corrections. Then use volume automation for sentences or words that still feel inconsistent. Compression should control normal movement, while automation should fix larger differences.
For example, imagine that your host averages around −20 LUFS on the raw track while a remote guest averages around −27 LUFS. Raise the guest before the final bus. If you leave that difference untouched, global compression will not create a natural balance.
Set the Right Loudness Target
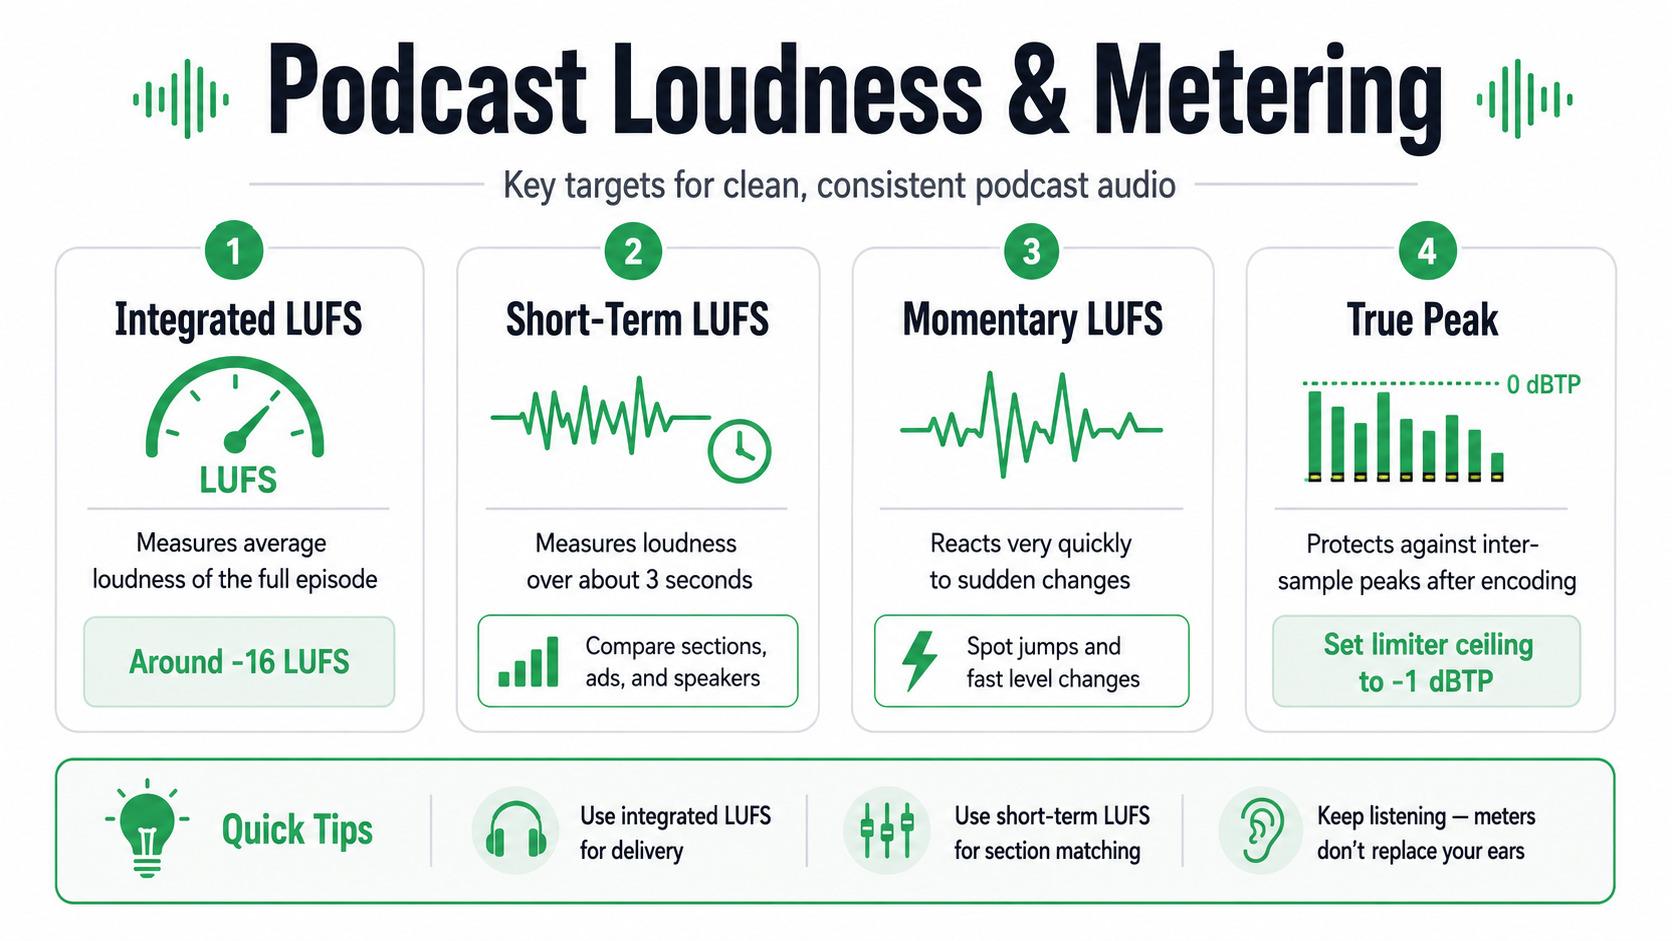
LUFS measures perceived loudness over time. For podcasts, integrated LUFS is the most useful number because it represents the average loudness of the complete episode.
A practical target for many modern podcasts is around −16 LUFS integrated. This works well for common streaming and listening environments. It also aligns with the current Apple Podcasts audio requirements, which recommend audio around −16 LKFS with controlled peak levels.
Some mono workflows use a quieter target around −19 LUFS. However, many creators now use the same −16 LUFS target for mono and stereo content. Whichever approach you choose, consistency across the show matters more than chasing an exact number.
Treat these values as delivery targets, not creative laws. A quiet documentary with wide dynamics may need a different approach from a dense comedy show recorded in a treated studio.
For a broader technical approach to programme loudness, loudness range, and true-peak measurement, you can also explore the EBU R 128 loudness recommendation. Its broadcast target differs from typical podcast targets, but its measurement principles remain useful.
Understand Integrated, Short-Term and Momentary LUFS
Integrated loudness measures the entire episode. However, that single value does not tell you where problems occur.
Short-term LUFS measures a window of roughly three seconds. It helps you compare speakers, advertisements, intros, and music sections.
Momentary LUFS reacts much faster. It helps reveal sudden changes, although it moves too quickly to use as your only guide.
Modern LUFS and true-peak meters are generally based on the ITU-R BS.1770 loudness measurement standard, which defines how perceived programme loudness should be calculated.
Use integrated LUFS for delivery, short-term LUFS for section matching, and momentary LUFS for sudden jumps. Most importantly, keep listening. Meters cannot tell you whether a voice feels intimate, harsh, dull, or tiring.
Leave True-Peak Headroom
Sample peaks do not always reveal what happens after MP3 or AAC encoding. A file can peak below 0 dBFS and still create inter-sample peaks after conversion.
For that reason, set the final limiter ceiling to −1 dBTP or slightly lower. If the episode will pass through several conversion stages, a ceiling around −1.5 dBTP can provide extra safety.
Do not solve loudness by pushing constantly into the limiter. If the limiter removes 5 or 6 dB from every sentence, return to the mix. Use clip gain, compression, or automation earlier in the chain.
A Beginner Podcast Mastering Chain
A simple chain can deliver professional results when the recording and mix are already solid. You do not need ten processors.
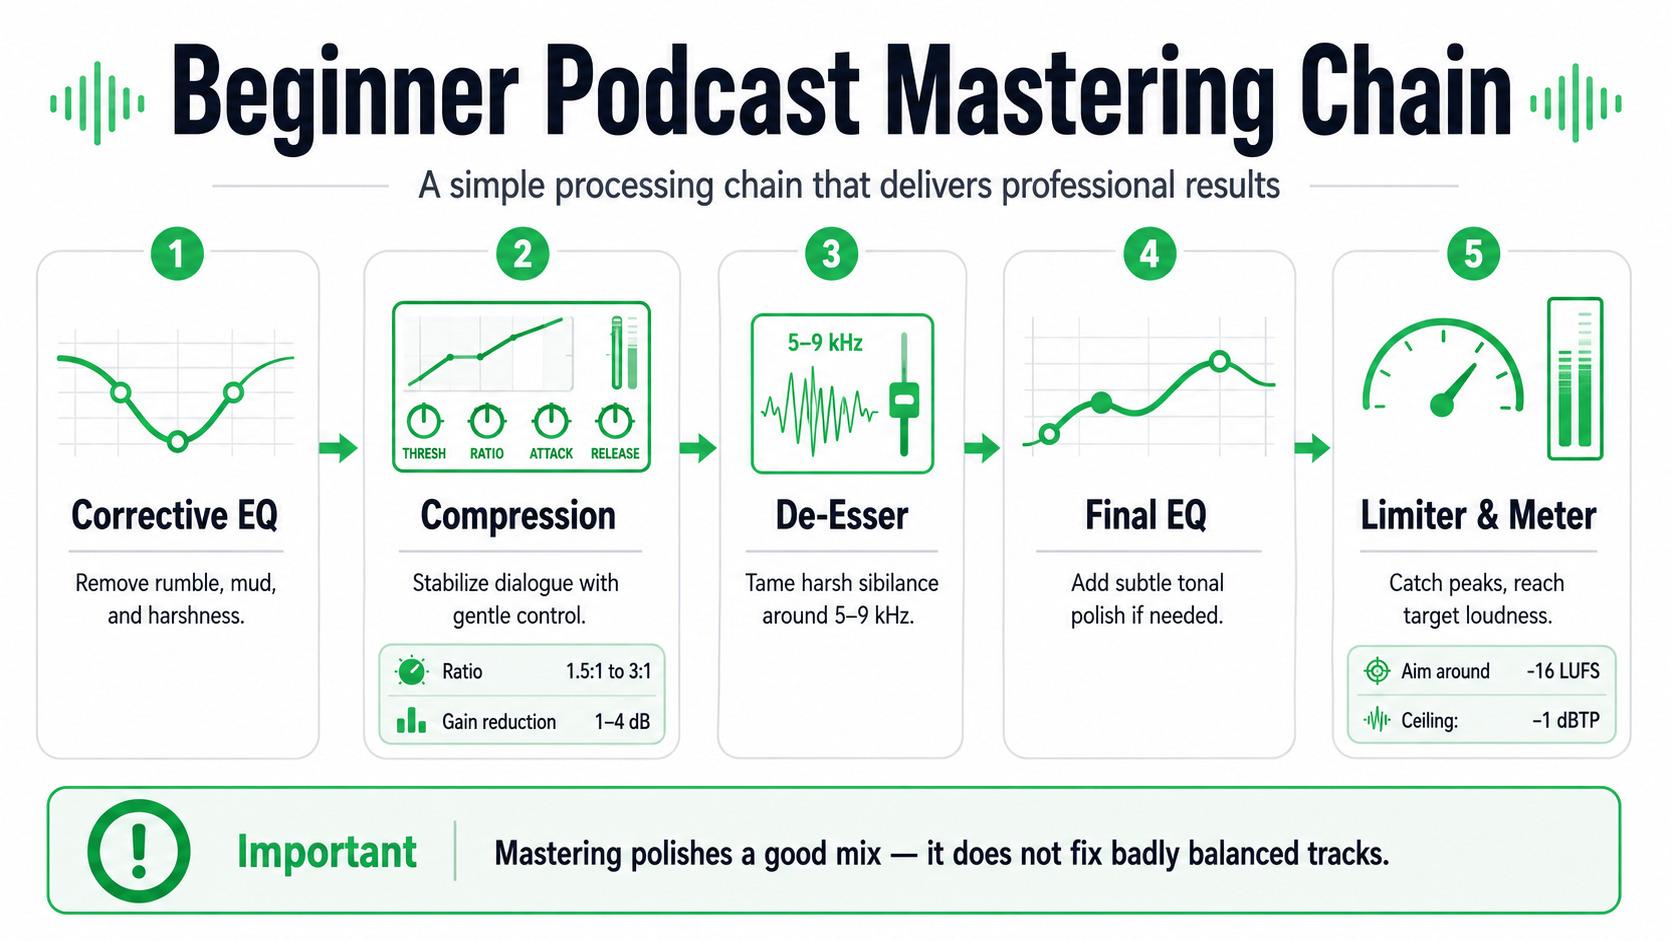
A practical starting chain is:
- Corrective EQ
- Gentle compression
- Optional de-essing or dynamic EQ
- Final tonal EQ
- Limiter
- Loudness and true-peak meter
The exact order can change. For example, de-essing may work better before compression when sibilance triggers the compressor. In another voice, it may sound smoother after compression.
Step 1: Use Corrective EQ
Corrective EQ removes distractions before dynamics processing. Start by listening for rumble, mud, boxiness, nasal tone, harshness, and excessive brightness.
A high-pass filter can remove low-frequency vibration that does not support the voice. For many adult voices, a starting point between 60 and 90 Hz works well. However, move it while listening. A deep voice may lose weight if you set the filter too high.
Common areas to inspect include 80–150 Hz for proximity buildup, 180–350 Hz for mud, 400–800 Hz for boxiness, 1–5 kHz for intelligibility or harshness, and 5–9 kHz for sibilance. Above 10 kHz, listen for air, hiss, and excessive brightness.
Avoid cutting a frequency just because a chart says it is problematic. Sweep gently, identify the actual issue, and then make a small correction.
Prefer Small Moves on the Master Bus
A 2 dB EQ move across the full episode can be significant. Start with broad adjustments of around 0.5 to 1.5 dB.
If one speaker needs a 6 dB cut at 250 Hz but the other sounds perfect, process that speaker separately. Master-bus EQ should improve the complete program, not compromise one voice to repair another.
Step 2: Apply Gentle Compression
Dynamic range compression reduces level differences and helps dialogue feel stable. For a finished podcast mix, start gently.
Try these initial settings:
- Ratio: 1.5:1 to 3:1
- Attack: 10 to 40 ms
- Release: 60 to 200 ms
- Gain reduction: Usually 1 to 4 dB on normal speech
- Knee: Soft or moderately soft
A fast attack catches consonants and peaks, but it can make speech dull. A slower attack keeps articulation and energy.
Meanwhile, the release should recover naturally between phrases without pumping. Listen closely to breaths and room tone. If they rush forward after every sentence, the release may be too fast or the compressor may be working too hard.
These settings are only starting points. A calm narrator may need slower control, while an energetic presenter may require faster peak management.
Step 3: Control Sibilance
Sibilance is the sharp energy in sounds such as s, sh, and t. It often sits between 5 and 9 kHz, although every voice is different.
A de-esser reduces that range only when it becomes excessive. Aim for subtle control. Removing 2 to 4 dB on strong syllables is often enough.
If the guest sounds harsh but the host does not, de-ess the guest track before mixing. A de-esser on the full master may also reduce cymbals, music, or brightness from every speaker.
Step 4: Add Final Tonal EQ
After compression, make a final broad adjustment if needed. You might add a small high shelf for clarity or reduce low-mid buildup created by several voices.
Keep comparing the processed and unprocessed versions at matched loudness. Louder audio often sounds better at first, even when the processing has made it harsher.
Step 5: Limit and Measure
The limiter catches peaks and helps you reach the final target. Set the output ceiling first. Then raise the input or lower the threshold until the integrated loudness approaches your goal.
Watch the gain-reduction meter. Occasional reduction of 1 to 3 dB is usually transparent. Constant heavy limiting can make speech clicky, dense, or fatiguing.
Finally, analyse the entire episode with a loudness meter. Offline analysis is faster, but a real-time pass can reveal transitions, edits, and strange peaks that numbers alone may miss.
Advanced Podcast Mastering Techniques
Once the basic workflow is reliable, advanced tools can solve more specific problems. Use them because you hear a need, not because they look impressive.
The best advanced chain is often simpler than expected. Precise automation and dynamic EQ can outperform stacks of compressors.
Use Dynamic EQ for Changing Problems
Static EQ affects every moment. Dynamic EQ acts only when a frequency range becomes too strong.
For example, a remote guest may sound normal most of the time but become boomy when moving close to the microphone. A dynamic band around 120 to 250 Hz can reduce that buildup only when it crosses a threshold.
Dynamic EQ also works well for:
- Intermittent harshness around 2.5 to 5 kHz
- Strong sibilance around 5 to 9 kHz
- Plosive energy below 120 Hz
- Resonant room tones
- Music that masks dialogue in a narrow range
Use moderate ratios and broad bands. Extremely narrow dynamic cuts can sound unnatural when the voice changes pitch.
Try Multiband Compression Only When Needed
Multiband compression divides the spectrum into sections. It can control low-frequency proximity effect without flattening the entire voice.
However, it also introduces more decisions and possible crossover artifacts. Before using it, ask whether clip gain, dynamic EQ, or track-level processing would solve the problem more cleanly.
A restrained setup may use a low band for proximity buildup, a middle band for speech density, and a high band for brightness. Keep gain reduction low. If every band moves constantly, the mix probably needs attention before mastering.
Automate Music, Intros and Advertisements
A single integrated loudness reading can hide large section differences. A loud intro and a quiet interview may average to the correct number while both sections feel wrong.
Measure sections separately. Then adjust them by ear and with short-term loudness readings.
Music under dialogue often needs both volume automation and EQ. Lowering it may not be enough if guitars, synths, or snare drums occupy the same midrange as the voice.
A broad cut around the dialogue presence range can create space without making the music disappear. For a more advanced setup, sidechain a dynamic EQ on the music from the dialogue. When someone speaks, the music gently reduces in the competing frequency range.
Mastering Remote Interviews
Remote interviews are difficult because each person may use a different microphone, room, and recording app. Make every voice believable on its own, then match them enough to feel like one conversation.
Do not force every microphone to sound identical. A polished result can still retain some natural differences between speakers.
Match Tone Before Loudness
One guest may sound dark and close, while another sounds thin and distant. Correct those tonal differences before matching loudness.
Add a little body to the thin voice, reduce mud from the close voice, and control harshness individually. Then compare their perceived level rather than relying only on peak meters.
Room ambience also changes perceived distance. A dry microphone feels closer than a reverberant one. Light de-reverb can help, but aggressive settings often damage speech.
Internet dropouts, robotic tones, and low-bitrate distortion cannot always be repaired. Spectral repair may improve short defects, while careful edits can remove damaged words or replace them with audio from a backup recording.
Be careful when brightening heavily compressed remote audio. High-frequency boosts often reveal codec artifacts. A slightly darker but smoother guest can sound more professional.
Mono or Stereo for Podcasts?
A voice-only podcast does not automatically need stereo. Mono can reduce file size and keeps centred dialogue simple. However, stereo makes sense when the show includes music, ambience, field recordings, or detailed sound design. The important point is to make an intentional choice.

Use mono for straightforward spoken-word episodes where every voice sits in the centre. Choose stereo when music, ambience, field recordings, or sound design adds useful width.
In either case, check mono compatibility. Phase problems can make stereo music and effects become weak when played through a phone or other single-speaker device.
Export Settings for a Mastered Podcast
Keep a lossless master before creating the delivery file. A WAV file at 24-bit and 44.1 or 48 kHz gives you a clean archive and makes future re-encoding easier.
Then create the format required by your podcast host. MP3 remains widely compatible, while AAC can deliver good quality at a lower bitrate.
Practical starting points include:
- Mono speech: 64 to 128 kbps
- Stereo speech and music: 128 to 192 kbps
- Sample rate: 44.1 or 48 kHz
- Final loudness: Around −16 LUFS integrated
- True-peak ceiling: −1 dBTP or lower
A 128 kbps mono file can provide very good speech quality. For stereo productions with music and ambience, 160 or 192 kbps gives the encoder more room.
Do not export to MP3, edit that MP3, and export it again. Every lossy generation can add artifacts. Return to the lossless session or master whenever you need a revision.
Also check the final uploaded file rather than assuming it matches your local export. Podcast platforms and hosting services may process or transcode the audio.
Common Podcast Mastering Mistakes
Most mastering problems come from doing too much, doing it too late, or trusting one meter without listening.
Chasing the Loudness Target at Any Cost
Reaching exactly −16.0 LUFS does not guarantee a good master. An episode at −16.5 LUFS with natural dialogue can sound better than one at −16.0 LUFS that has been crushed.
Use the target as a practical zone. Then protect clarity, tone, and listener comfort.
Fixing Individual Voices on the Master Bus
Global processing changes every speaker, music cue, and advert. Therefore, it is the wrong place for large voice-specific repairs.
Return to the individual tracks when one person needs strong EQ, de-essing, noise reduction, or level correction.
Overusing Noise Reduction
Perfect silence is not necessary. A stable, low-level room tone often sounds less distracting than swirling noise-reduction artifacts.
Reduce noise until it stops pulling attention away from the conversation. Then move on.
Ignoring Level-Matched Comparison
Processing usually adds volume. Since louder audio can seem clearer and more exciting, you may approve changes that are actually worse.
Match the bypassed and processed loudness before comparing them. If the processed version still sounds better at the same volume, the change is probably useful.
Checking Only on Studio Headphones
Your listeners use ordinary devices in noisy places. Test the episode on earbuds, a phone speaker, a laptop, a car system, and any small Bluetooth speaker you have nearby.
You are not trying to make every device sound identical. Instead, check that speech remains understandable and that no frequency range becomes painful.
How to Keep Every Episode Consistent
Consistency across episodes is one of the clearest signs of professional production. Create a repeatable template rather than rebuilding the chain every week.
Save track presets for recurring hosts. Keep separate starting points for remote guests, studio guests, music, and adverts. However, remember that microphone distance and vocal performance still change.
Record the integrated LUFS, maximum true peak, loudness range, limiter reduction, and export settings for each episode. Also keep one or two previous masters in the session. Level-match them and switch between them while working.
Create a Reference Episode
Choose an episode that represents the sound you want. It should have good recording quality, balanced speakers, comfortable dynamics, and sensible music levels.
Use that episode to answer practical questions:
- Is the new host voice too dark?
- Is the intro louder than usual?
- Does the guest feel farther away?
- Is the dialogue more compressed?
- Does the limiter work harder?
- Is the background music more distracting?
A reference speeds up decisions because you compare against a real target rather than a vague memory.
Mastering Podcasts With MasteringBOX
An automated mastering tool can speed up the final stage, especially when you need consistent loudness without building a complex chain manually.
With MasteringBOX, start by exporting a clean, well-balanced lossless mix. Leave enough peak headroom and avoid placing a hard limiter on the mix unless it creates a deliberate sound you want to preserve.
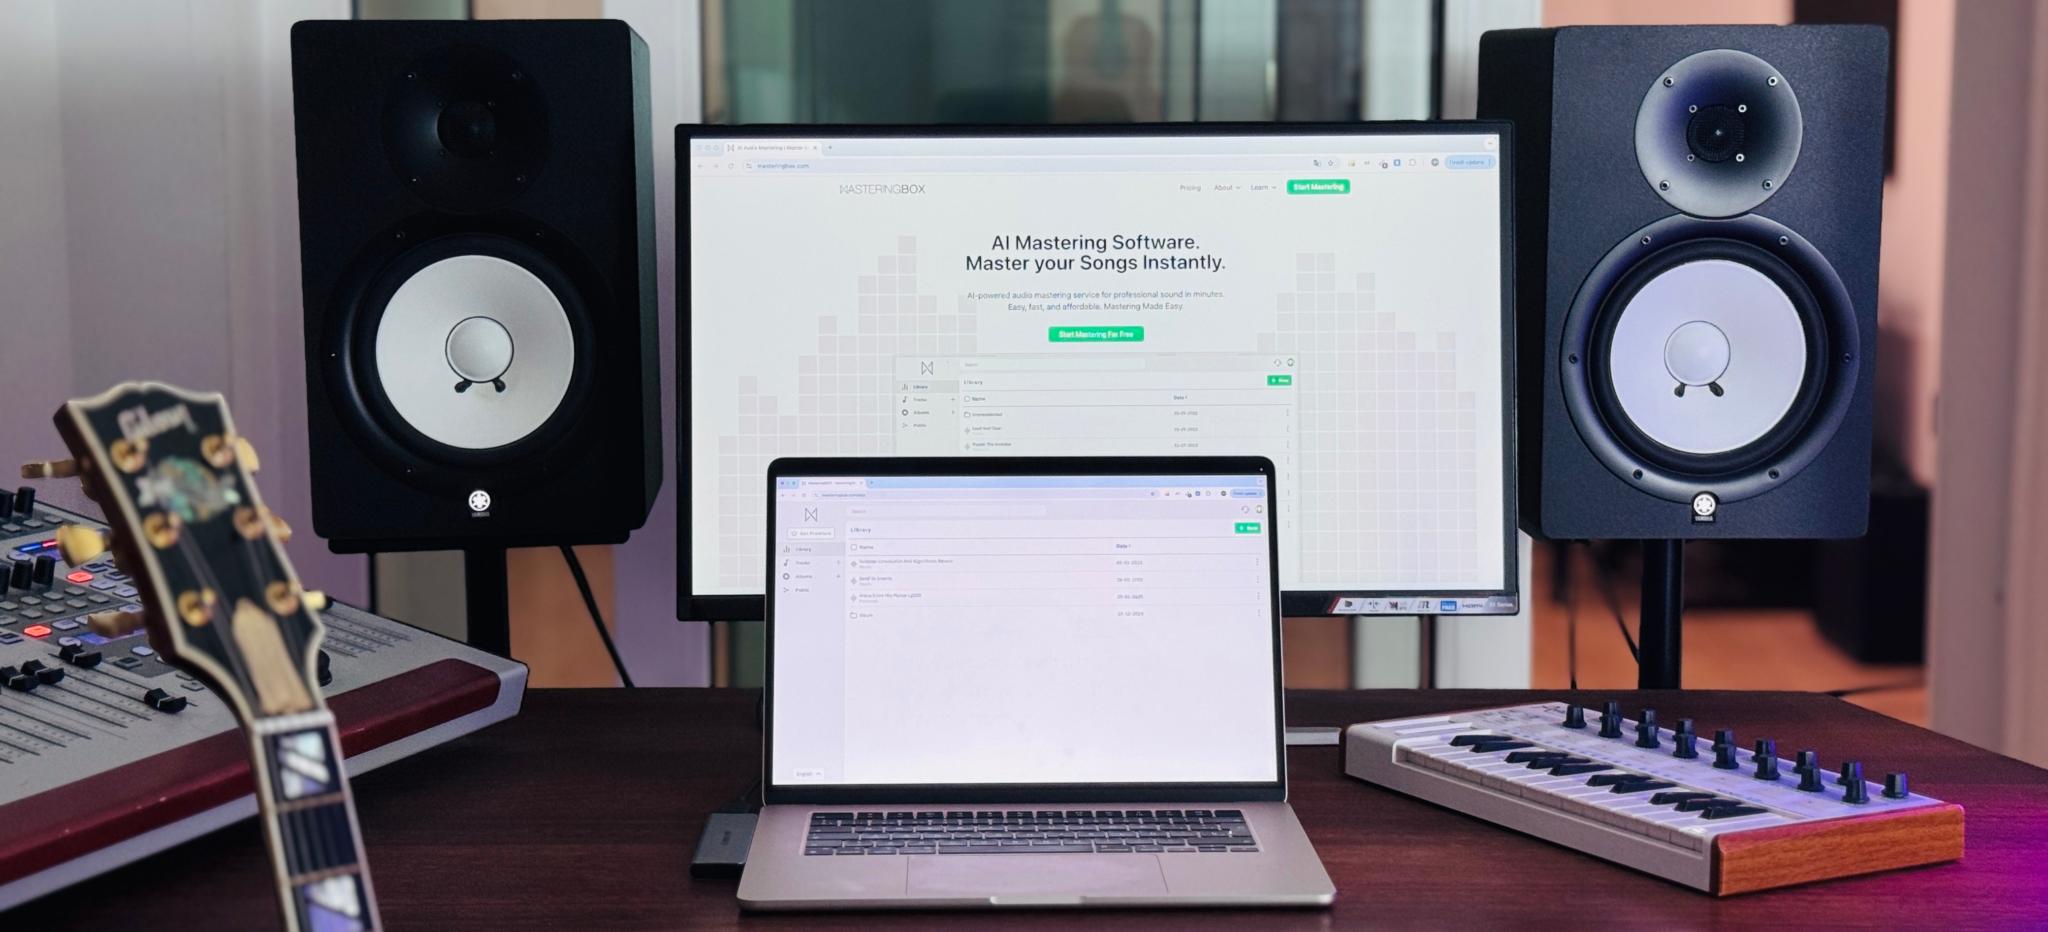
Upload the episode and generate a preview. Then listen to the processed and original versions. Adjust the loudness and tonal controls as needed.
Pay special attention to:
- Sibilance
- Low-mid buildup
- Differences between speakers
- Limiter distortion
- Background noise during pauses
Automated processing works best when the input is already organised. It can improve tone, dynamics, and final level, but track-specific problems should still be corrected during editing or mixing.
A simple workflow is:
- Edit and clean each voice
- Balance speakers with clip gain and automation
- Export a lossless mix with headroom
- Upload the episode to MasteringBOX
- Select the desired loudness
- Compare the preview with the original
- Fine-tune the available controls
- Download the final master
- Check the complete encoded file
- Publish and test the live episode
This workflow is useful for solo creators, regular interview shows, and teams that need a predictable turnaround.
Podcast Mastering Checklist
Before publishing, listen from beginning to end or run a complete quality-control pass. Small mistakes often hide at edit points and transitions. Check that:
- Every speaker is clear and similarly loud
- Intros, adverts, music, and dialogue feel connected
- Noise reduction and compression sound natural
- Sibilance is controlled without dulling speech
- Integrated loudness sits near your target
- True peaks remain below the ceiling
- The limiter is not working heavily throughout
- Mono playback remains stable
- The encoded file contains no clicks or glitches
- The published episode works on several devices
Final Thoughts on Podcast Mastering
Mastering podcasts is less about collecting plugins and more about making reliable decisions. Start with clean edits, balanced speakers, and sensible automation. Then use EQ, compression, de-essing, limiting, and loudness measurement to finish the episode.
As your skills improve, add dynamic EQ, multiband control, sidechain processing, and detailed section matching. However, keep the purpose clear: the listener should focus on the conversation, not the processing.
A strong master sounds clear, stable, and comfortable. It translates across devices, matches the rest of the series, and reaches a suitable loudness without destroying the natural energy of speech.
That is the real goal of podcast mastering. When the technical work disappears and the story comes forward, the master is doing its job.
Informazioni sull'autore

Dídac
CEO e fondatore di MasteringBOXDídac è un ingegnere audio professionista, produttore musicale e ingegnere software. È il fondatore di MasteringBOX e l'autore di molti degli articoli del blog.
Lascia un commento
Log in per commentare

 English
 Español
 Français
 Italiano
 Deutsch
 Português
 Nederlands
 Svenska
 Polski
 Čeština