Bus compression has for me, always been something that plays a huge part in any mix. Many experienced engineers use bus compression in their mixes and some even go as far as to use bus compression on the master channel. This is one of those topics where it’s really up to personal preference. Nonetheless, I’m here today to provide you with some information and clear up some misconceptions when it comes to bus compression.
Now before we go any further into this subject, there is one thing that I feel needs to be expressly addressed. When I talk about bus compression, I am referring to the concept of mixing through a compressor from the very start of a project. This must not be confused with simply slapping a compressor onto your buses at the end of completing a mixdown. We are aiming to make the compressor a part of our monitoring system. This means actively utilising the compressors tonal and dynamic effect as part of the sound we are aiming for. This helps to provide a certain level of glue within the mix. With that cleared up, let’s move on to some of the finer details of bus compression.
Full-band vs Multi-band for Source Material
The most important decision to make when it comes to bus compression is which compressor to use. Without a fundamental understanding of compression types, this can be tricky. However, I am here to provide you with some quick tips on how to be best decide what to use.

Full-band Compressors
Full-band compression refers to a compressor that affects the entire frequency spectrum simultaneously. These are most commonly applied to individual sound sources and allow you to sculpt the dynamics of a complete sound. Despite being commonly used for singular sources, full-band compressors are also great for sounds that are grouped together. With this, I’m referring to things like a drum group or a vocal harmony group. These are sounds that are being recorded in parts and compiled to give us a complete instrument. As you’re likely to want to treat the entire sound like one, a full-band compression is a good first option.
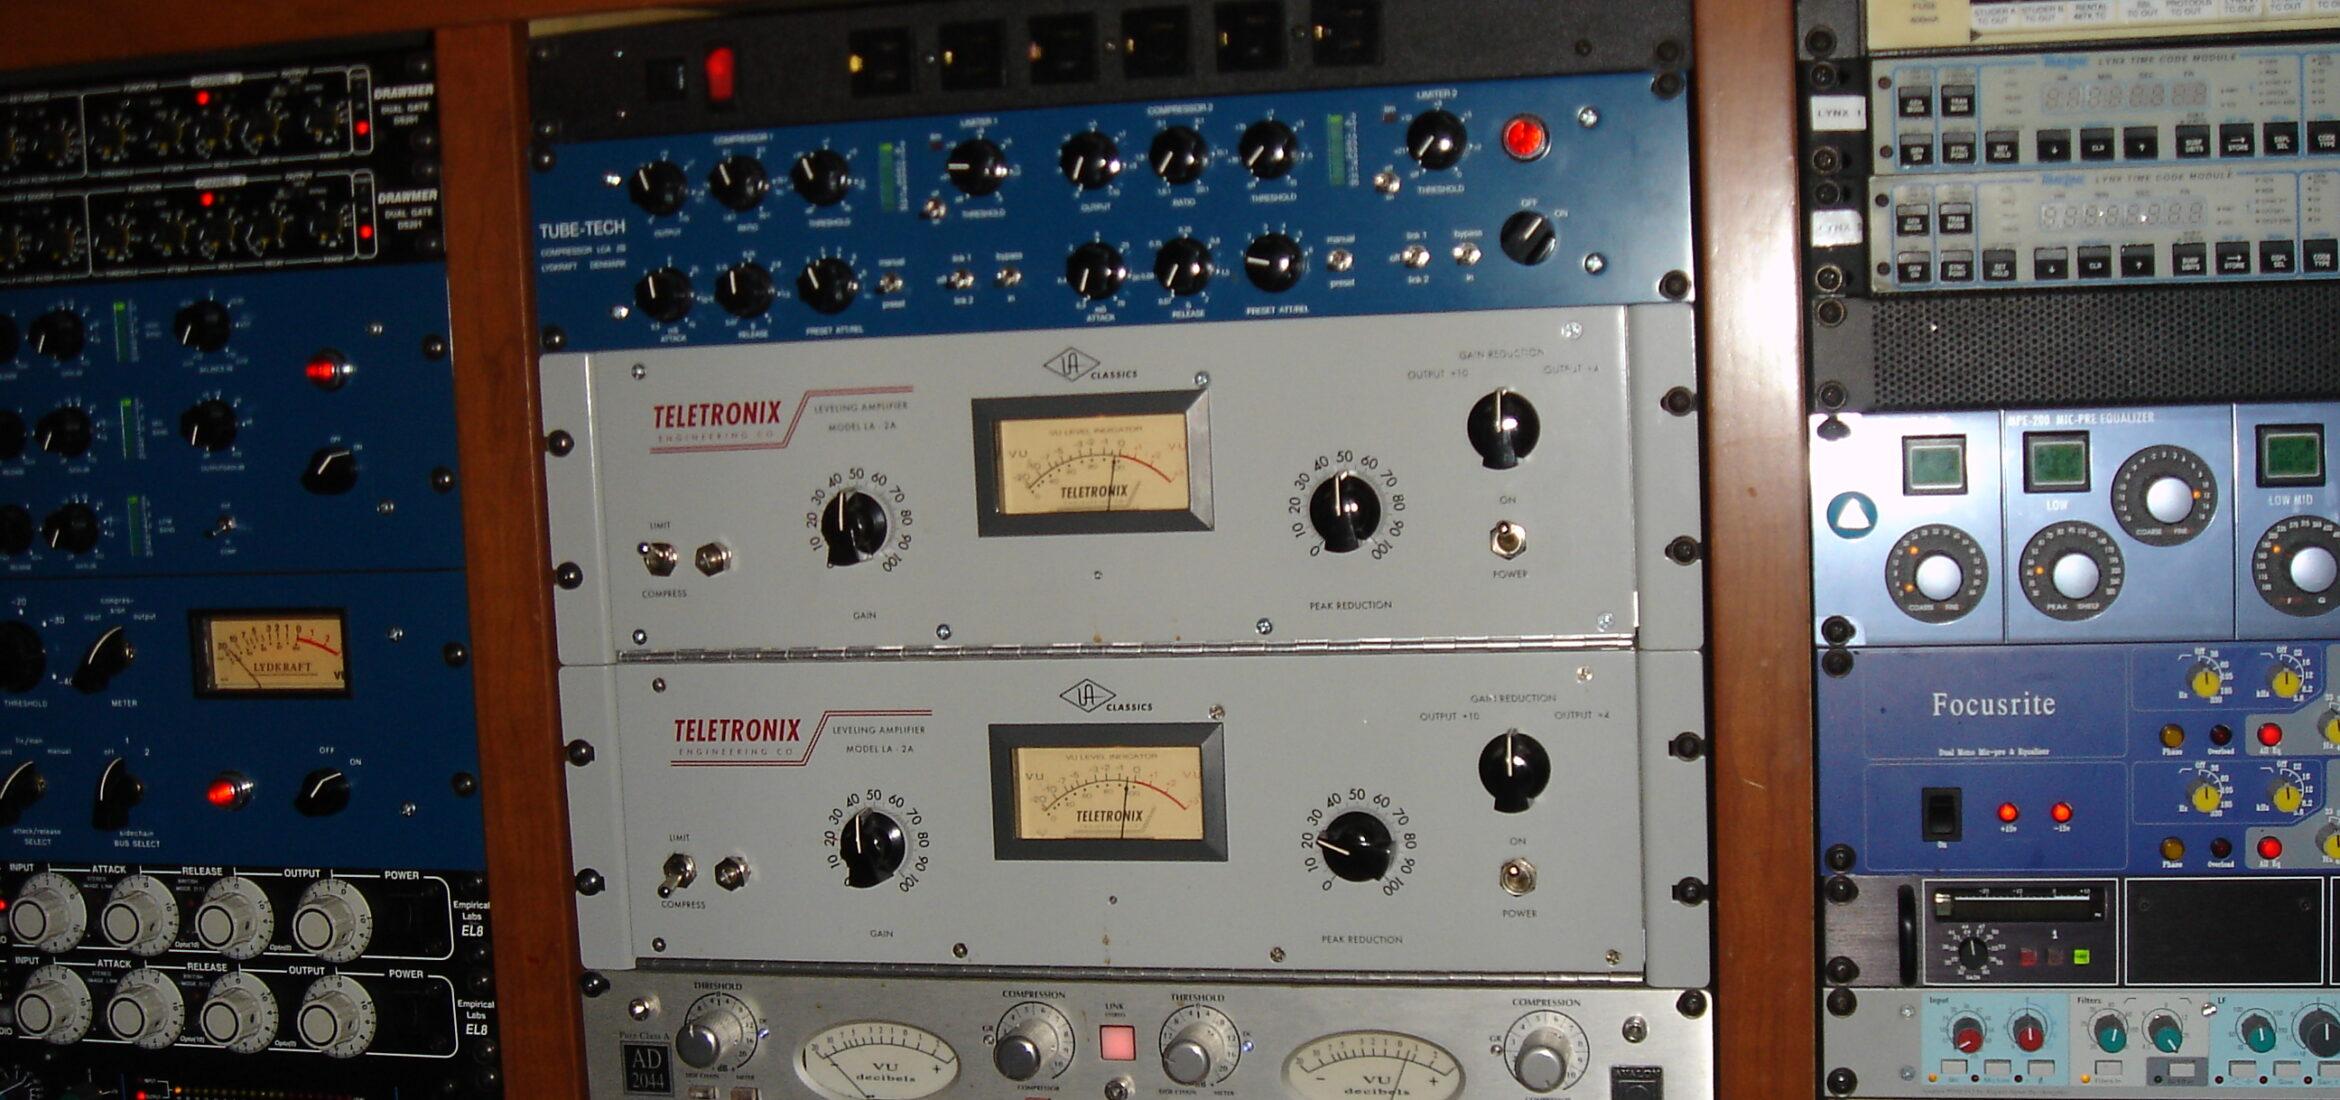
Thinking about circuit types, you can make a relatively sensible decision early on. If you’re looking for strong, fast compression with lots of transients, go with a VCA. This would be well suited to getting that 80s sounds. If you’re looking for something smooth, colourful and musical, an optical compressor is probably best. I often use these on my piano bus once I’ve combined all of the singular microphone sources into one stereo channel. Looking for raw power? Best to go with a FET to get some thrash and aggression. My favourite application for FET bus compression is when mixing drum overheads and room mics. If you want to go deeper on this subject, check my article about circuit types.
Finally, if you’re looking for something to glue your master channel during mixing, a vari-mu fits the job very well. Make sure to exercise caution here as you only want very minimal compression on the master channel during mixing. I’m talking 1-2dB maximum. This practice is mostly designed to give you an idea of what the track will sound like after mastering so it’s likely you might want to take it off before you send it to be mastered.
Multi-band Compressors
Multi-band compressors act in the same way as full-band compressors with the exception that they allow you to apply different levels of compression to certain frequency bands. This is really useful if you’re looking to even out certain groups of instruments and is commonly used in mastering. One of my common applications of multi-band is to group together certain sections of a band and even out excessive mids or highs. An example would be using a bus to group the rhythm section (bass, drums) and then using a multi-band compressor to gently ease back some of the low-mids which can be hugely prominent in these instruments.
Multi-band compressors also come in various circuit types and so utilising what I have talked about above will be helpful here as well. Some multi-band compressors also come with switchable circuit types (this would be in software form) which means more control and versatility from a single tool. You could also use a multi-band across your master bus as well but again, exercise caution in how much it is doing and think about mastering.
Setting up your Bus Compression
If you’re not familiar with the parameters of a compressor then you’re going to need to do a little reading first. Check out my article covering compression parameters and then come back here. Now that you’re all clued in, let’s take a look at some typical starting settings for a bus compressor.
Ratio
Starting with your threshold and ratio, settings of around 1.5/2:1 creating between 1-3dB of reduction is good. The aim here is just to glue the sounds together without severely altering the dynamics of the track. In order to work out these settings from the start simply chuck your stems into a session, bus them, and hit play. Before you get into mixing, we want to work out the reduction level. Try to keep the relative level of your bus consistent as you go and keep a regular eye on the bus compression to make sure it’s still doing what you wanted it to. These are by no means the exact settings for every bus you’ll ever set up. However, they give you a good idea of what to listen for if you’ve never done this before.
Attack and Release Settings
The biggest considerations when setting up your bus compressor are going to be the attack and release. We need to set these up to match the rhythm of the song. Attack times that are too fast will cause transients to stick out so try to avoid this.
Obviously, every bus is different so this is only a suggested starting point. We want to make sure the needle of your compressor is triggering and resetting with the instrument group. Dial-in your release time to make the needle bounce with the song. Compression that releases too quickly creates a pumping effect that can be unpleasant. Inversely, compression that releases too slowly will destroy the dynamics in a track and create a very flat, muddy, and squashed sound. It’s something that takes time to perfect but is definitely achievable by anyone.
My top tip here for those of you starting out with bus compression is to grab the Waves SSL G series. Featured in our Best Compressor Plugins article, this handy little plugin comes with simple, fixed settings and waves patented auto-release system. This means you can focus on hearing what bus compression has to offer before you get into the finer details of minute adjustments.
So Why Should I use Bus Compression?
The answer here is tricky to explain without sonic props. My suggestion to you is to give it a go and see how you get on with it. My experience shows that working with bus compression offers a higher level of mix management that faders just can’t offer. It’s especially handy with dense arrangements where everything is fighting each other just a little too much.

By having bus compressors in place, the key elements in a group dictate the balance of everything else. This will ensure presence and clarity throughout. Having this compressor in place from the start means we can mix into it and use its characteristics to achieve this clarity. Simply applying a compressor at the end of a mixing session in the hopes of helping a key element stick out is unlikely to work.
A Word on Mastering
It’s common fact that mastering typically involves final mix compression as one of its processes. So, If you’ve got a mix bus compressor in your mixdown and it’s become an integral part of the sound of your mix, the mastering engineer might ask you to remove it. If you liked what it was doing, you could always pass on your settings to the engineer. They may be able to use these as a starting point for their work. Either that or you could send off two versions. One with mix bus compression and one without. These people are highly experienced professionals. Giving them options is always a good move.
In general, all other bus compressions will be perfectly fine to leave applied. Taking it off changes the entire character of what you’ve worked so hard to achieve. As you’ll be sending off a stereo mixdown to the mastering engineer, they won’t be able to add it back in.
TL;DR
Bus compression can really help to improve the overall integrity and sound of your mixes. Applying it early on in the mixing stage and working into it can really help to pull your tracks together as they near completion. Make sure to think about your source material. Pair it up with a band type and circuit type that suits the genre. Once you’ve decided, implement your parameters ensuring quite a minimal reduction to start. This can be increased if necessary. After this, you can just go about mixing like normal. Try experimenting with bus compression and doing mixes with and without it to see if it suits your production style. It might just be that final element that your music was missing.
Feature image under Creative Commons 2.0 License, provided by Jon Gos.
Sobre el autor

Tim Dunphy
Ingeniero de sonido y redactor de contenidos especializadosMás de 10 años de experiencia trabajando en el sector del audio. De todo, desde enrollar XLR hasta masterizar álbumes. Soy un hombre hecho a sí mismo y mantengo mis activos en Bitcoin. ¿Qué más hay que saber?
Deja un comentario
Entrar para comentar