Graphic EQ is one of those tools you see everywhere in audio, from hi-fi stacks to large live rigs. It looks simple—just a row of sliders—but behind that panel, there is a lot going on. Understanding it well can help you fix problems faster and shape sound more confidently in both home and professional setups.
In this article, we will break down what a graphic equalizer is, how it works, where it shines, and how it compares to other EQ types. We will also cover some concrete techniques and provide examples of how to use graphic EQ inside a DAW like Logic Pro.
Table of Contents
- Basics of Equalization and Graphic EQ
- How a Graphic EQ Works
- Practical Applications of Graphic EQ
- Graphic EQ vs. Other EQ Types
- Tips for Using a Graphic EQ Effectively
- Using Graphic EQ in Logic Pro
- Conclusion
Basics of Equalization and Graphic EQ
Equalization is one of the most fundamental tools in audio. Before we delve into graphic EQ, it helps to place it within the broader EQ family.
What Is Equalization?
Equalization, or EQ, is the process of adjusting the balance of frequencies in an audio signal. Every sound contains low, mid, and high frequencies in varying amounts. EQ lets you boost or cut parts of that spectrum.
You might boost the low end to add weight to a kick drum, cut harsh upper mids on a vocal, or darken a bright guitar. All EQs perform this same basic function: they change frequency balance.
Where Graphic EQ Fits
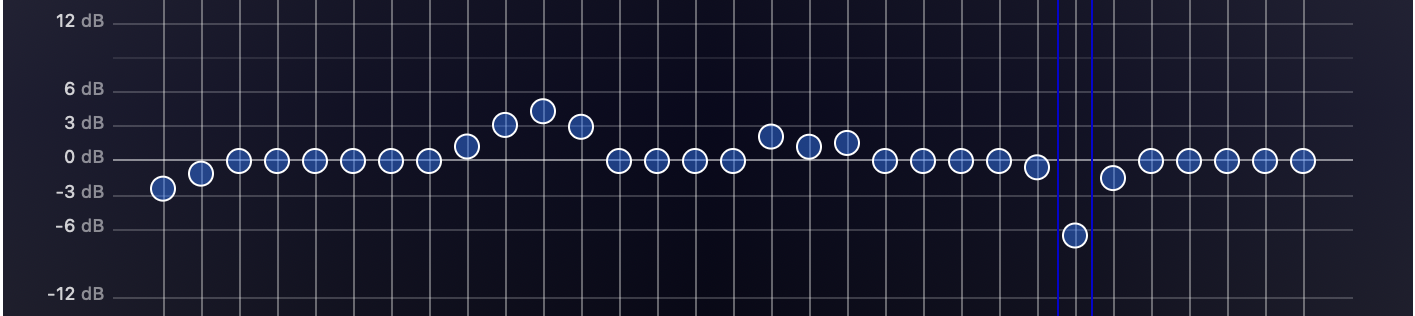
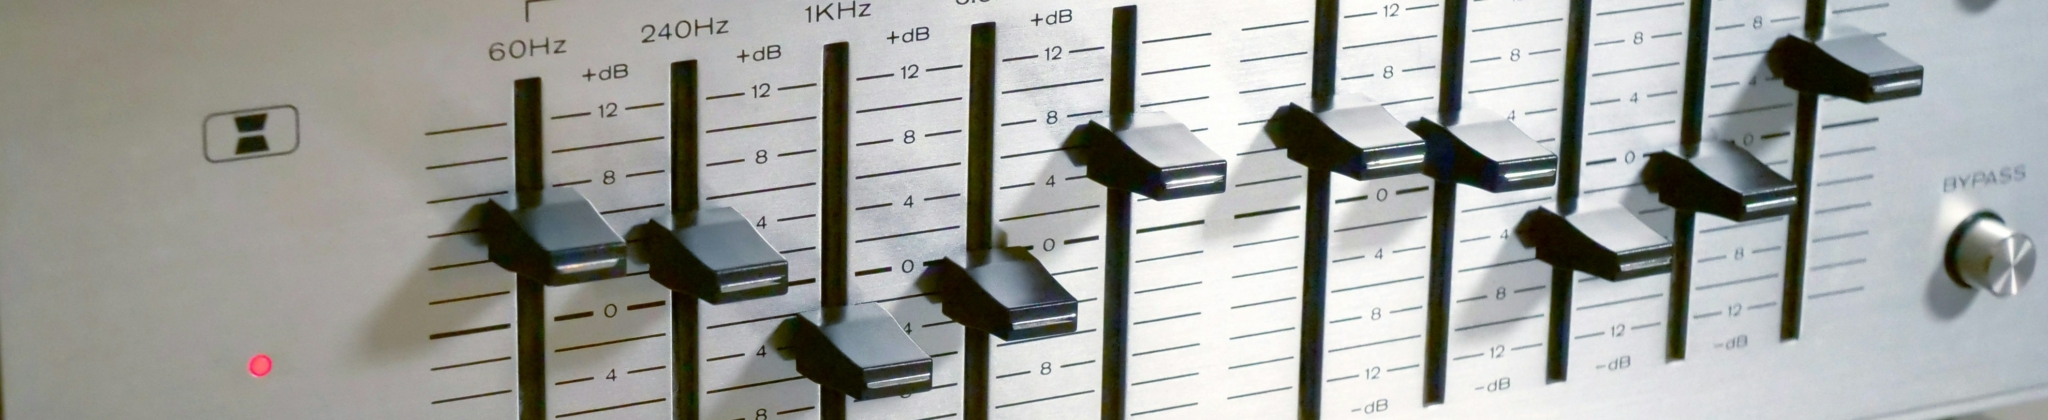
A graphic EQ is a specific type of EQ with many fixed bands, each controlled by its own slider. Every slider affects a narrow range of frequencies around a labeled center value.
Move a slider up, and you boost that band. Move it down, and you cut that band. The pattern of slider positions draws a visible “graph” of the EQ curve, which is why it is called graphic.
Graphic EQs are great when you want quick, visual control across the whole spectrum, especially in live sound and broad tone shaping.
How a Graphic EQ Works
Although the front panel looks simple, a graphic EQ contains a set of filter circuits working together. Each band is like a mini EQ with one job.
Frequency Bands and Sliders
The core idea behind a graphic EQ is a set of fixed frequency bands, each mapped to a slider. You do not choose the frequencies; the device designer has already done that.
When you move a slider, you change the gain of that band. The audio passes through many band filters in parallel, and the result is the sum of all these boosts and cuts.
Fixed Frequencies and Bandwidth
Each band has three key properties:
- A center frequency (for example, 31 Hz, 1 kHz, 8 kHz).
- A bandwidth or Q (how wide the band is).
- A gain range (how many dB you can boost or cut).
On most hardware and many plugins, center frequencies follow standard ISO frequencies, spaced in octaves or fractions of an octave. Bandwidth is fixed; you cannot adjust Q on a graphic EQ band.
Gain Control and EQ Curve
Each slider usually offers a symmetric range, for example, ±12 dB. At the middle position, the band is at 0 dB, meaning it does nothing.
The combined result of all band gains is the EQ curve. If you map each slider’s position to frequency and gain, you see the same shape that the sliders suggest.
This is why graphic EQs feel intuitive. The visual curve reflects the sound shaping you are doing.
Types of Graphic EQ Configurations
Graphic EQs come in several common layouts, each with different resolutions and complexities.
31-Band (1/3 Octave) EQ
A 31-band EQ typically covers 20 Hz to 20 kHz in one-third-octave steps. Each band is quite narrow.
This configuration is standard in live sound and installed PA systems. It allows precise cuts to tame resonances and feedback without affecting too much neighboring content.
Engineers often place 31-band EQs on main left/right outputs and on monitor sends.
10-Band and Consumer Units
A 10-band graphic EQ is common in home audio, car stereos, pedals, and simpler rack units. Each band roughly covers one octave.
You get less precision but enough control for broad tone shaping. These units are perfect for quick tonal tweaks: more bass, less mid honk, a touch of air.
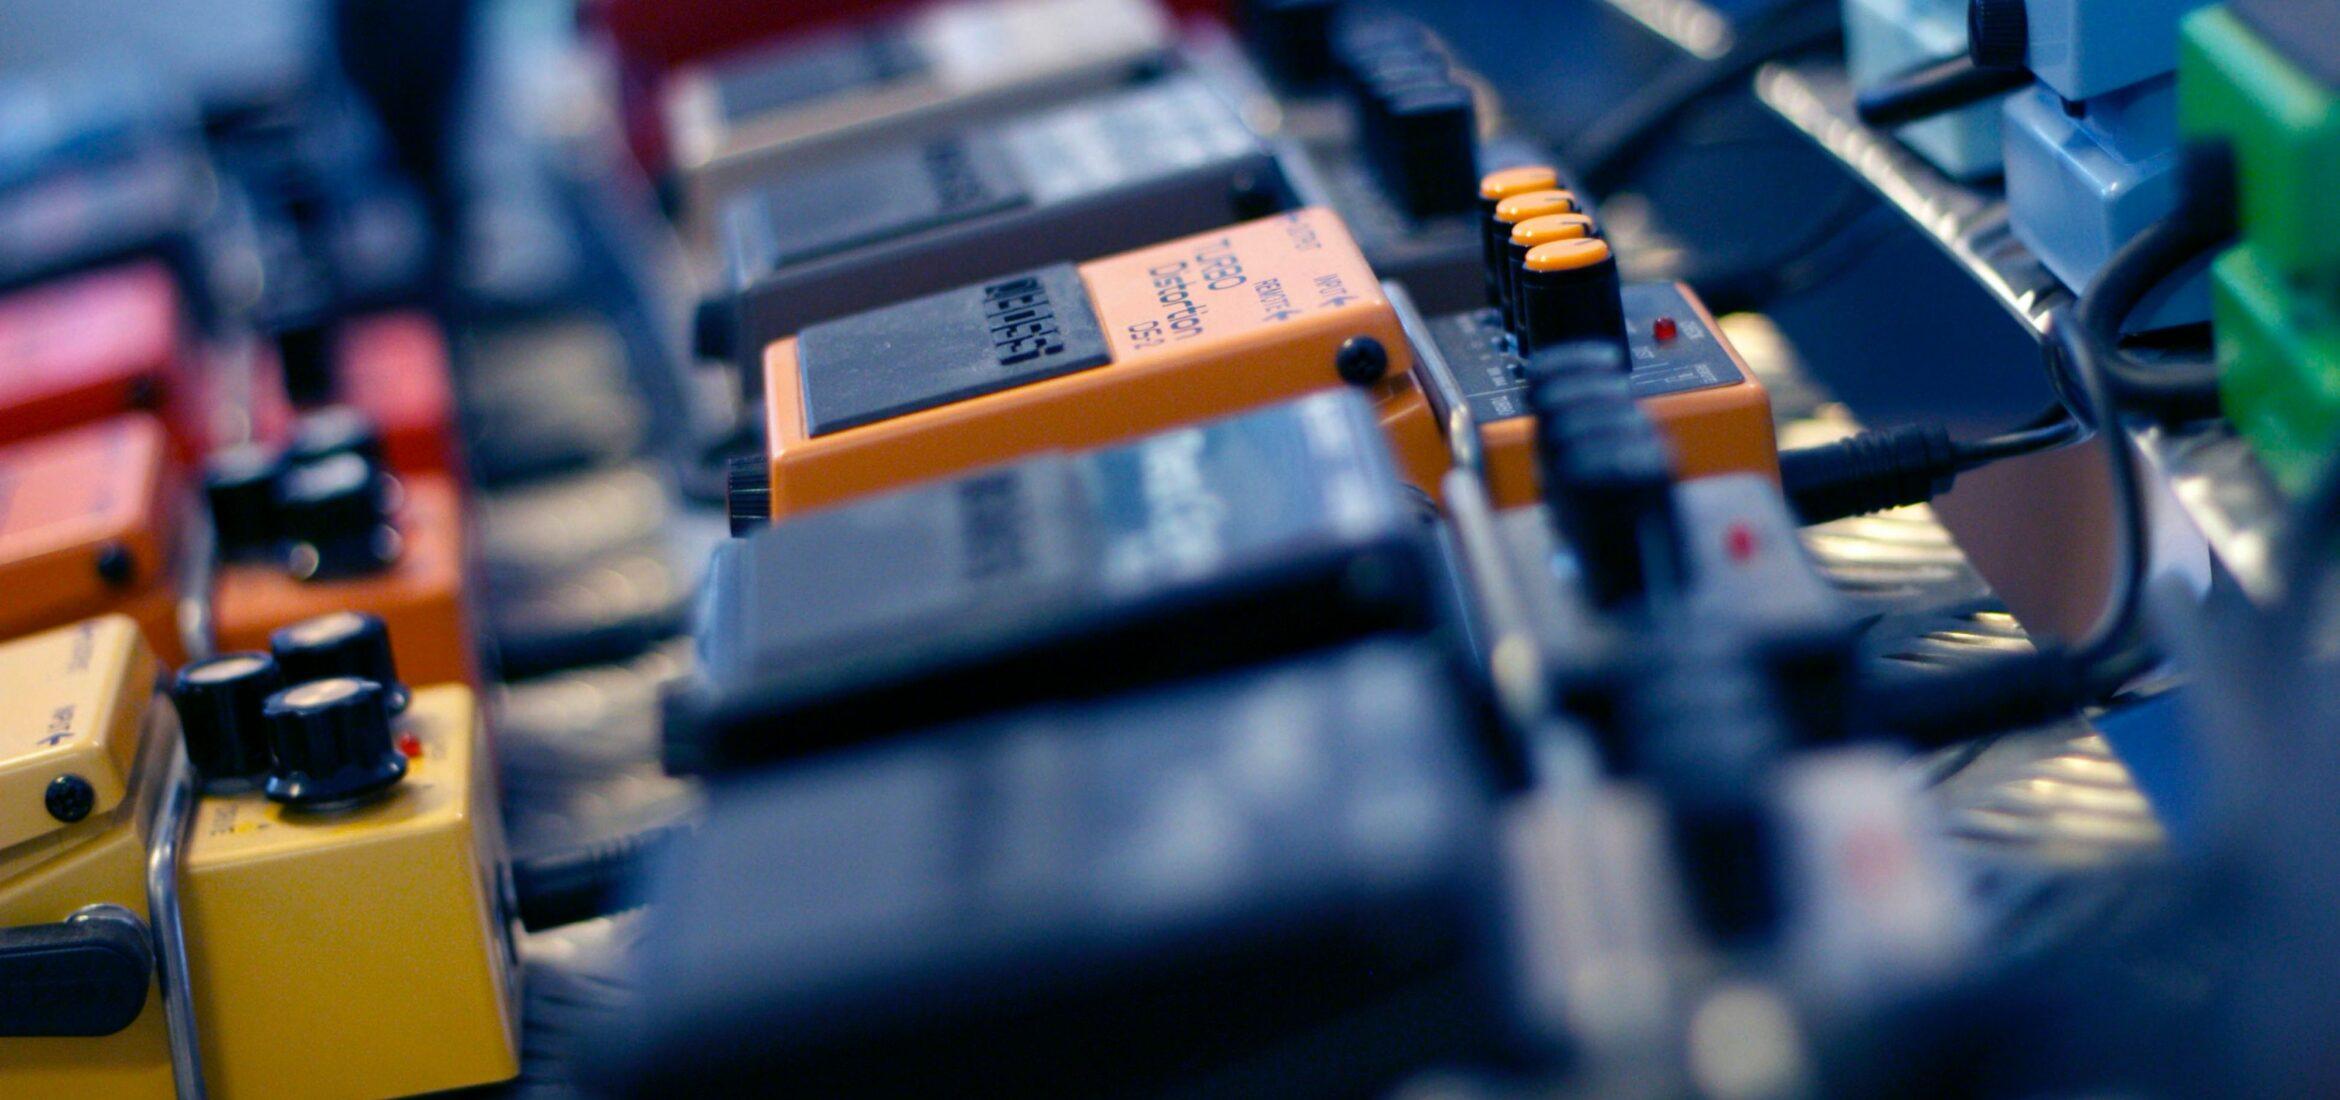
Many EQ pedals for guitar and bass use 6 to 10 bands and are essentially compact graphic EQs.
Proportional Q vs. Constant Q
Not all graphic EQs behave the same when you move a slider. The concept of Q Factor behavior is important here.
Why Proportional Q Feels Musical
In a constant Q design, the bandwidth of a band stays the same, no matter how much you boost or cut. The curve just gets taller or deeper.
In a proportional Q design, bandwidth changes with gain. Small boosts or cuts are wide and gentle. Large boosts or cuts are narrower and more focused.
This feels very musical in practice. Tiny moves subtly tilt larger areas of the spectrum. Deep cuts become notches that target a problem frequency with less collateral damage.
Some famous hardware EQs and their plugin emulations use proportional Q. That is a big reason they sound natural even with strong adjustments.
Practical Applications of Graphic EQ
Graphic EQs appear in many scenarios: live sound, studio work, and home systems. The core techniques are similar, but the goals differ.
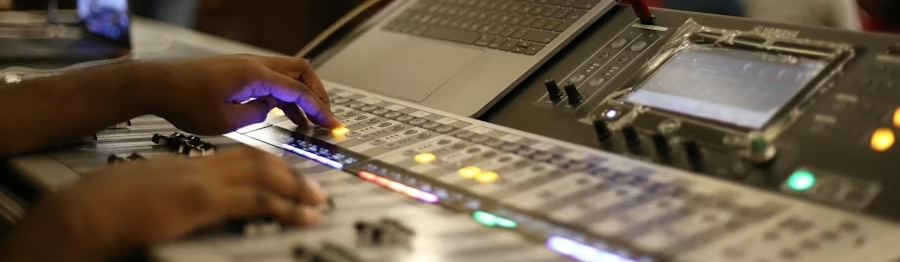
Live Sound and PA Systems
In live sound, graphic EQs are almost mandatory. The stage, room, mics, speakers, and volume all interact in complex ways.
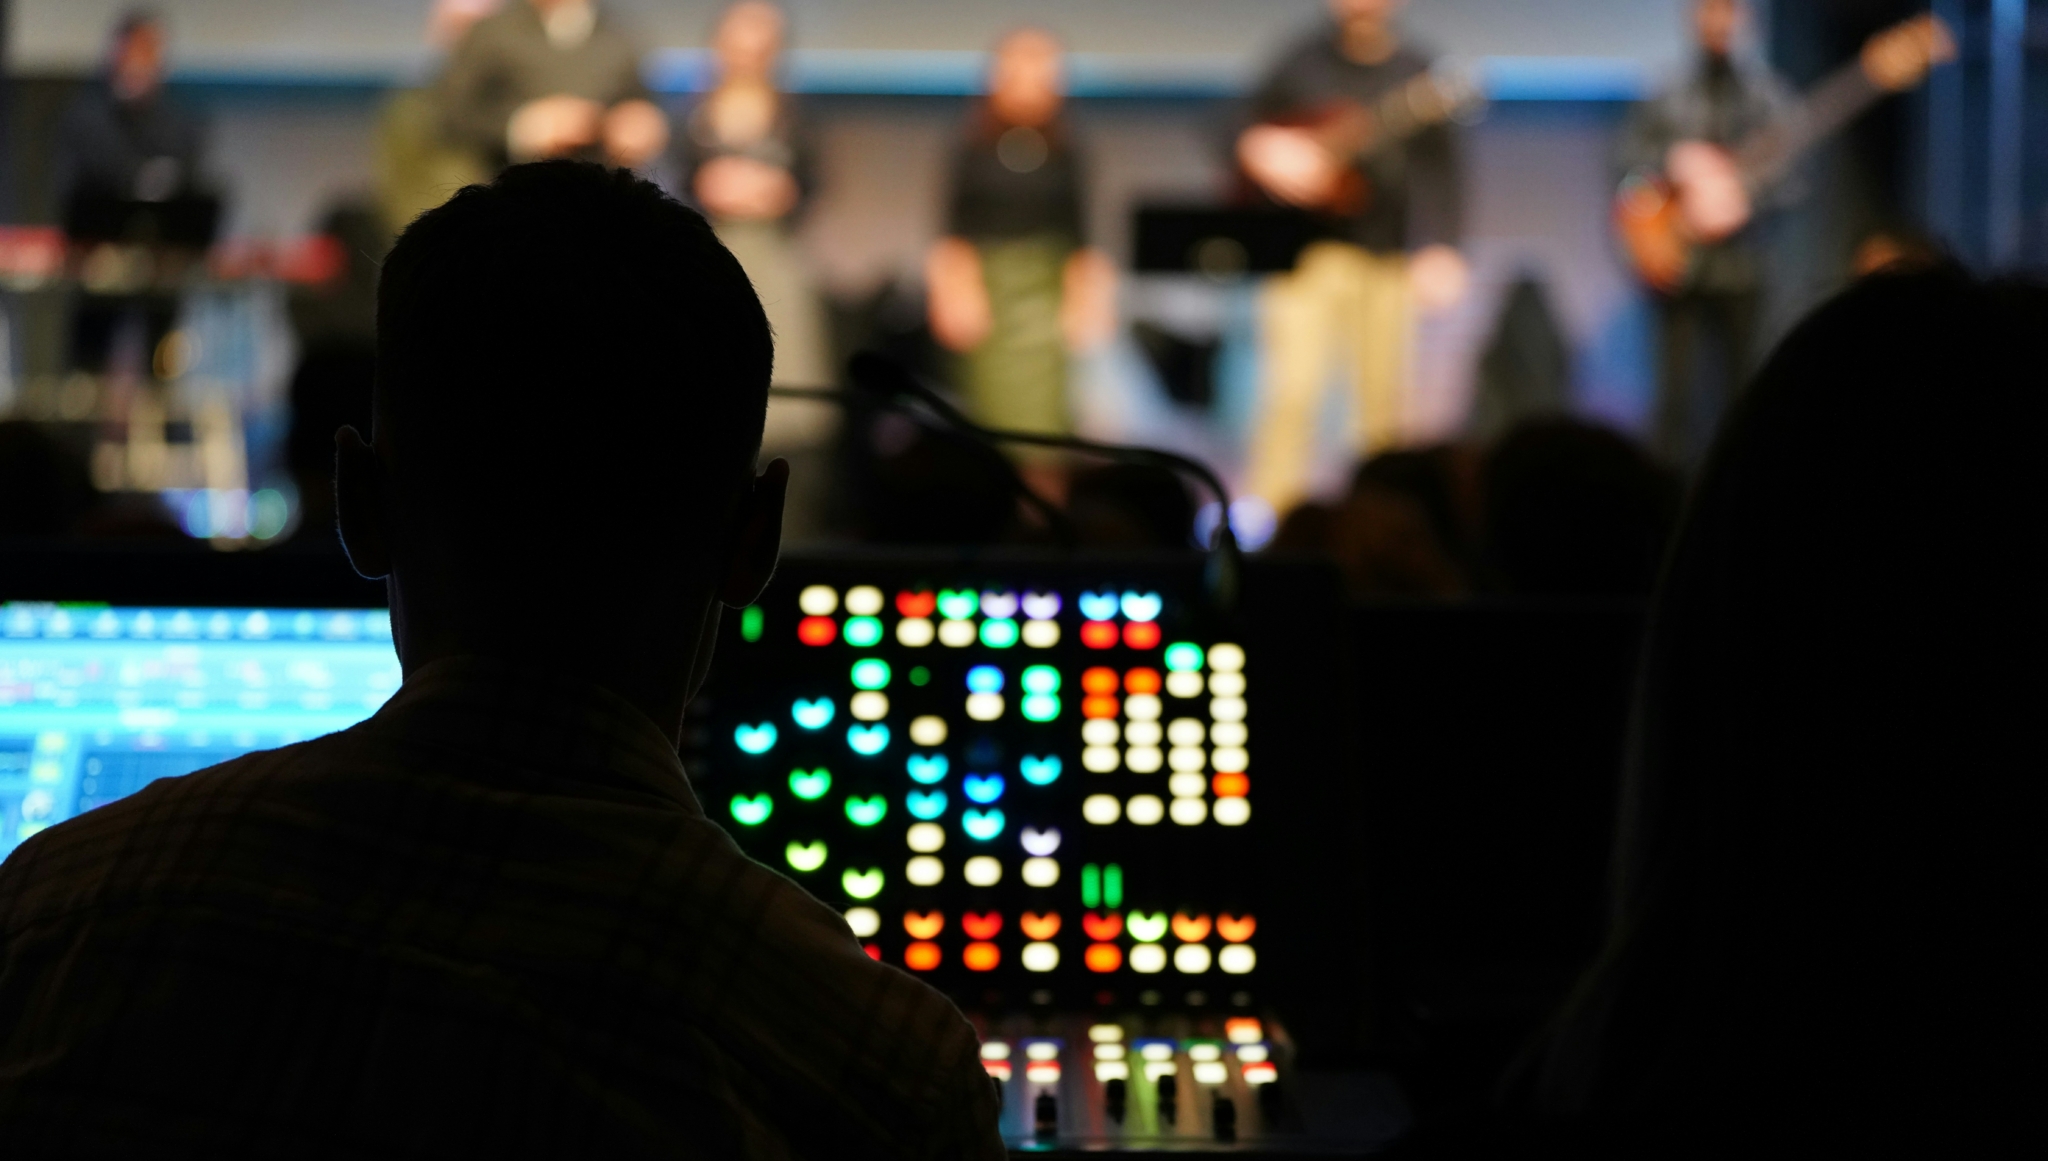
You need fast, reliable control over the entire spectrum to make the system stable and musical.
Feedback Control
One of the main uses of graphic EQ in live sound is feedback suppression. When a mic and speaker form a loop, a narrow band starts to ring and then squeal.
On a 31-band EQ, you can:
- Identify the offending frequency by ear (or with an analyzer).
- Pull down the corresponding slider a few dB.
If the squeal was around 4 kHz, you cut that band. If it shifts slightly, you may need to cut the neighboring band too.
This process, sometimes called “ringing out” the system, provides more gain before feedback and keeps the show under control.
System and Monitor Tuning
Rooms and speakers have their own tonal fingerprints. Some rooms are boomy, while some speakers are harsh in the high mids.
Engineers insert graphic EQs on:
- Main outputs to balance the room and system.
- Monitor sends to tailor wedges or in-ears for performers.
You might slightly cut 200–300 Hz to reduce muddiness or boost some presence for speech clarity. The idea is to correct broad problems while preserving the character of the mix.
Studio and Music Production
In the studio, parametric EQs dominate, but graphic EQs still have valuable roles. They can be fast, musical, and inspiring.
Instrument Amplifiers and Pedal Effects
Graphic EQs are also useful in a guitar effects chain or in amplifiers to shape the sound. Think of the famous “scooped mids” metal guitar tone, often created with a V-shaped graphic EQ curve.

You can draw dramatic shapes and then tame them if needed. Stacking a character graphic EQ with more precise tools can yield rich and unique tones.
Tone Shaping on Tracks and Buses
Classic studio modules like the API 560 are 10-band graphic EQs. Many engineers use them on drums, guitars, and buses.
They are great for:
- Scooping boxy mids on a drum bus.
- Adding attack and air to snares and overheads.
- Brightening guitars without overthinking the exact frequency.
The fixed bands encourage decisive moves: you grab 4 kHz for snap, 8 kHz for shimmer, and 250 Hz for muddiness, and you are done.
Home Audio and Consumer Use
Graphic EQs are very popular in home listening and casual setups. The goals there are comfort and taste rather than technical perfection.
Home Stereo and Headphones
Many old hi-fi receivers and modern apps feature a 5- to 10-band EQ. Users can adapt the sound to their room, speakers, and preferences.
A common pattern is boosting lows and highs slightly. This “smiley face” can sound exciting at low levels. The risk is overdoing it and hollowing out the midrange.
Small, gentle curves usually work better, especially if you care about vocal clarity.
Car Audio and Home Theater
Car interiors and living rooms both cause strong frequency coloration. Graphic EQs in head units or AV receivers help correct these issues.
You might cut a boomy 100 Hz peak in a car or soften a harsh 3–4 kHz range in a bright living room. Automatic room correction systems often do something similar behind the scenes, just with more bands and measurement tools.
Graphic EQ vs. Other EQ Types
Graphic EQ is one member of a larger EQ family. Knowing how it compares helps you choose the right tool.
Graphic vs. Parametric EQ
Graphic and parametric EQs solve the same problem in different ways. The trade-offs are usability and flexibility.
Strengths of Graphic EQ
Graphic EQs provide:
- Visual feedback: the curve is visible as slider positions.
- Speed: you can grab several bands at once.
- Consistency: fixed bands make recall simple.
They excel when you need many small, narrow moves across the spectrum. Live engineers love them for feedback control and system tuning. Guitarists use them as tonal “sculpting pedals.”
Strengths of Parametric EQ
Parametric EQ gives you full control of each band’s:
- Center frequency
- Gain
- Q (bandwidth)
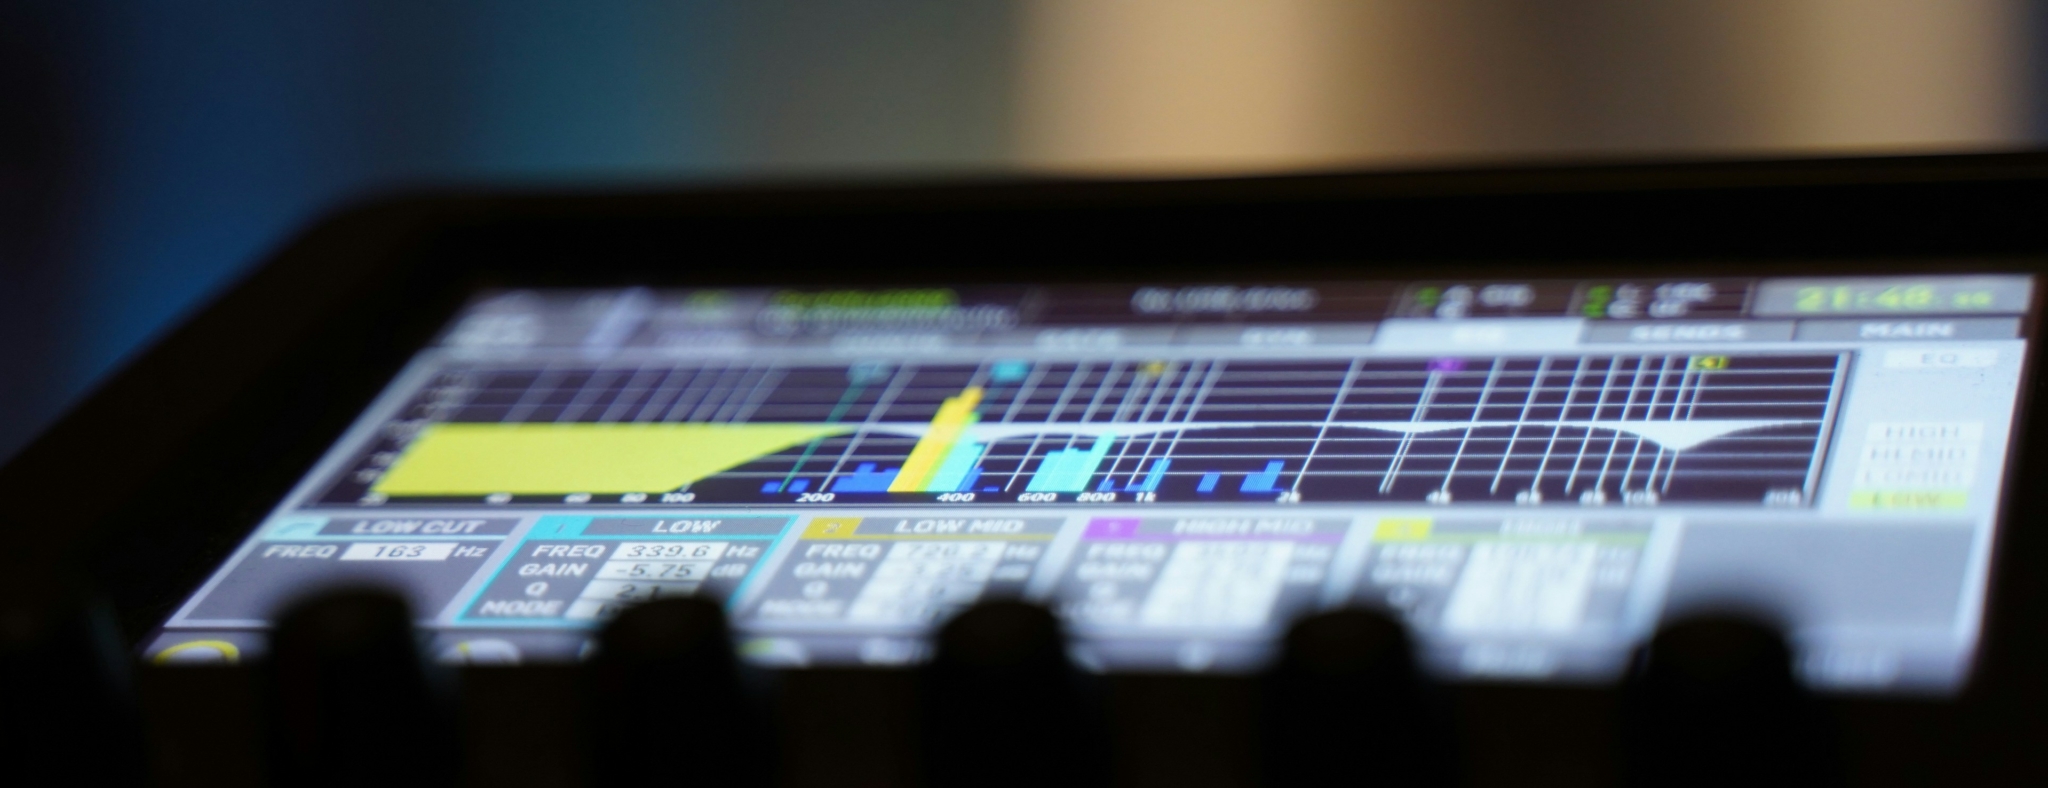
You can place bands exactly where needed and make them very narrow or very wide. This makes parametric EQ ideal for surgical work and detailed tone shaping.
In mixing and mastering, parametric EQ is often the main tool, with graphic EQ serving as a complement rather than a replacement.
Other EQ Types in Context
Graphic and parametric EQs share the stage with a few other types. These tools often appear together in a complete chain.
Shelving EQs and Filters
Shelving EQs boost or cut everything above or below a certain frequency. They are the classic bass and treble knobs.
Graphic EQs can imitate shelves by moving several high or low bands in a slope, but shelves are simpler for that job.
High-pass and low-pass filters remove extremes of the spectrum. They are essential for cleaning up rumble or hiss but are not full EQs by themselves.
Dynamic EQ and Multiband Tools
Dynamic EQs and multiband compressors change gain per band depending on signal level. They are great for taming boomy notes or harsh moments that come and go.
They do not replace graphic EQ but extend the concept into the time and dynamics domain. In many modern workflows, you will see graphic EQ, parametric EQ, and dynamic EQ used together.
Tips for Using a Graphic EQ Effectively
Knowing the theory is one thing. Using a graphic EQ musically and safely is another. A few habits can keep you out of trouble.
General Workflow
A clear workflow helps you avoid “EQ painting” and random curves that do more harm than good.
Start Flat and Move Gently
Begin with all sliders at 0 dB. Listen to the signal and identify what actually needs fixing or enhancing.
Make small moves first. A 2–3 dB change can be quite noticeable. If you feel the need to push many bands to extremes, stop and ask why.
Cut Narrow, Boost Wide
As a rule of thumb, cutting tends to sound more natural than boosting. Use the narrow nature of graphic bands to remove annoying peaks.
When you boost, spread the boost across neighboring bands for a smoother effect. Avoid stacking huge boosts in a single band unless you clearly need a sharp emphasis.
Identifying and Fixing Problems
Graphic EQs are excellent diagnostic tools. They can expose and fix issues quickly if used carefully.
Finding Problem Frequencies
One technique is to temporarily boost a band and listen. If the sound worsens in exactly the way you dislike, that band (or its neighbor) is the culprit.
Once you identify it, cut instead of boost. Reduce until the problem softens, but the overall tone remains natural.
This works well for resonances, nasalness, boxiness, or harshness.
Managing Overall Level
Many bands boosted together can raise the overall level and cause clipping. If your EQ has an output gain control, use it to compensate.
After EQ, level-match the processed and bypassed signals. This prevents louder sounds from seeming “better” just because they are louder.
Level matching also makes it easier to judge whether your EQ moves truly help.
Musical and Practical Considerations
EQ is powerful, so it is tempting to treat it as a universal fix. In practice, restraint pays off.
Avoid Over-Shaping
A very jagged EQ curve, with sliders jumping up and down, often indicates over-tweaking. Each drastic move introduces phase shifts and tonal side effects.
Aim for curves that make sense and reflect actual problems you can hear. If the graph looks wild, double-check by bypassing the EQ and comparing again.
Know When Not to EQ
Some problems cannot be fixed with EQ. Room nulls, mic placement issues, and bad source tones often require physical changes.
If you are struggling with the same issue using increasingly drastic EQ adjustments, consider changing mic position, instrument setup, or speaker placement instead. EQ is a tool, not a miracle.
Using Graphic EQ in Logic Pro
Most modern DAWs offer graphic EQ options alongside parametric EQs. Logic Pro includes both utility and character tools in this category.
AUGraphicEQ: 31-Band Tool
The AUGraphicEQ plugin in Logic is a classic digital 31-band graphic EQ. It mirrors the behavior of a hardware unit.
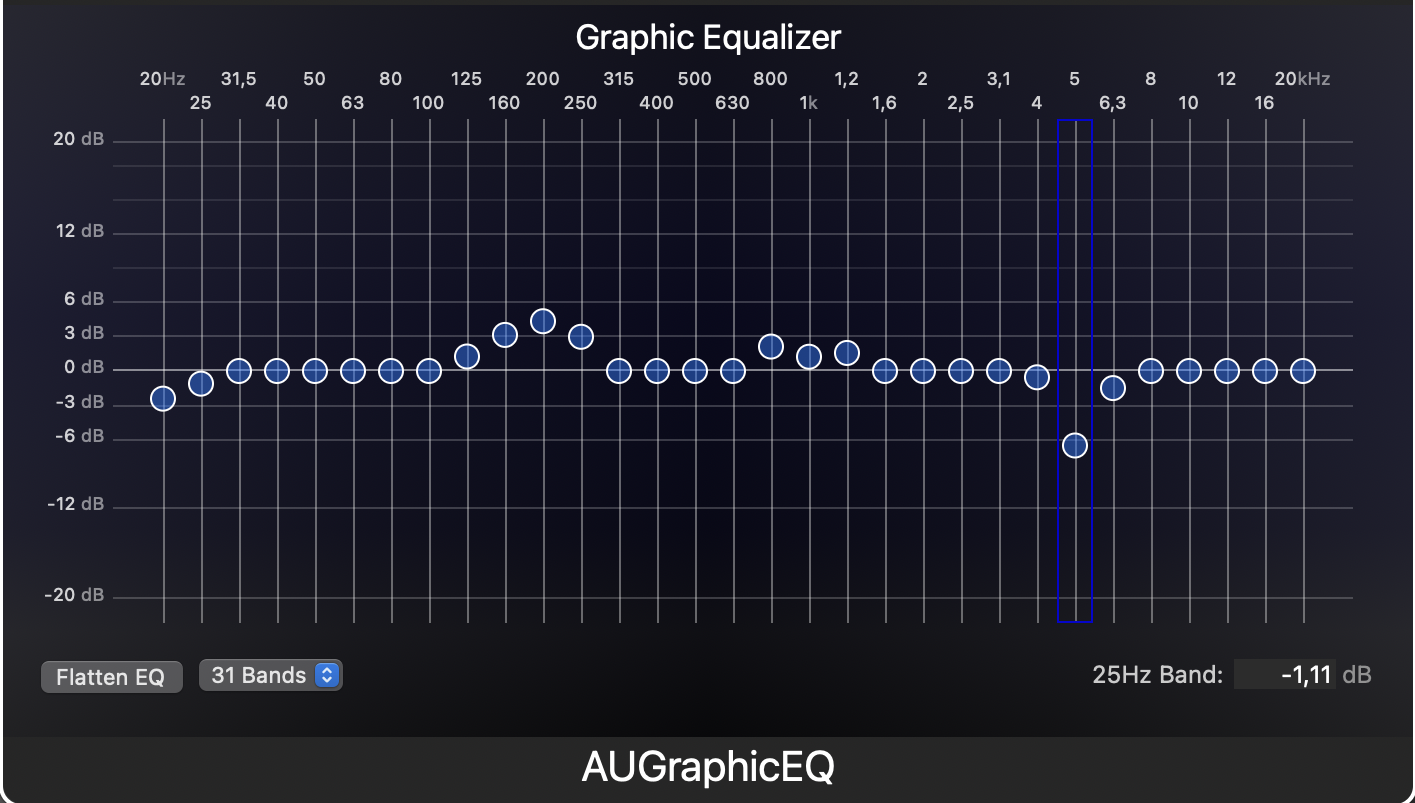
You insert it on a track or bus and see a panel of sliders covering the full range. It is ideal when you want that live-sound style workflow inside the DAW.
When to Reach for It
Use AUGraphicEQ when you need:
- Many small cuts across the spectrum.
- Fast feedback-like suppression on problem recordings.
- A familiar live-sound style interface.
It is also a good learning tool. You can experiment with shaping a signal using only fixed bands and then compare the result with a parametric EQ.
Vintage Graphic EQ: API Style
Logic’s Vintage Graphic EQ emulates a classic API-style 10-band EQ. It offers a more colored, analog-inspired sound.
The bands use proportional Q behavior. Small moves act broadly and smoothly; big moves act more focused.
Proportional Q and Tone
On drums, guitars, and buses, the Vintage Graphic EQ can add punch and presence quickly. You grab 60 Hz, 120 Hz, 250 Hz, 2 kHz, 5 kHz, and shape until the kit feels right.
The proportional Q design helps big cuts and boosts blend better into the signal. This is why many engineers like it for tone shaping, not just correction.
Combining Graphic and Parametric EQ
A strong approach in Logic is to combine tools:
- Use the Vintage Graphic EQ or AUGraphicEQ for broad tone and character.
- Use Channel EQ (parametric) for surgical notches and filters.
This stacked method leverages the strengths of each type. You get speed and vibe from the graphic EQ and precision and control from the parametric one.
Conclusion
Graphic EQs have been part of audio workflows for decades. Their rows of sliders appear in studios, venues, home stereos, cars, and plugins.
At heart, a graphic equalizer is a bank of fixed-frequency filters whose gains you control with sliders. That simple design gives you fast access to the entire spectrum and a clear visual map of your EQ curve.
In live sound, graphic EQs are core tools for feedback control and system tuning. In the studio, they bring character and speed to tone shaping on tracks and buses. At home, they let listeners adapt sound to their rooms and preferences.
Graphic EQs trade some flexibility for usability. Parametric and dynamic EQs offer greater precision and conditional processing. Yet graphic EQ remains uniquely intuitive and hands-on.
If you respect a few basic principles—start flat, move gently, cut more than boost, and listen more than you look—you can achieve a lot of clean, musical results from these simple sliders.
Whether you are tuning a PA, sweetening a stereo, or shaping a bus in Logic Pro, understanding graphic EQ will make your decisions faster, your mixes clearer, and your listening spaces more enjoyable.
Über die Autorin / den Autor

Dídac
CEO & Gründer von MasteringBOXDídac ist professioneller Audioingenieur, Musikproduzent und Softwareentwickler. Er ist der Gründer von MasteringBOX und Autor zahlreicher Artikel im Blog.
Hinterlasse einen Kommentar
Einloggen, um zu kommentieren