

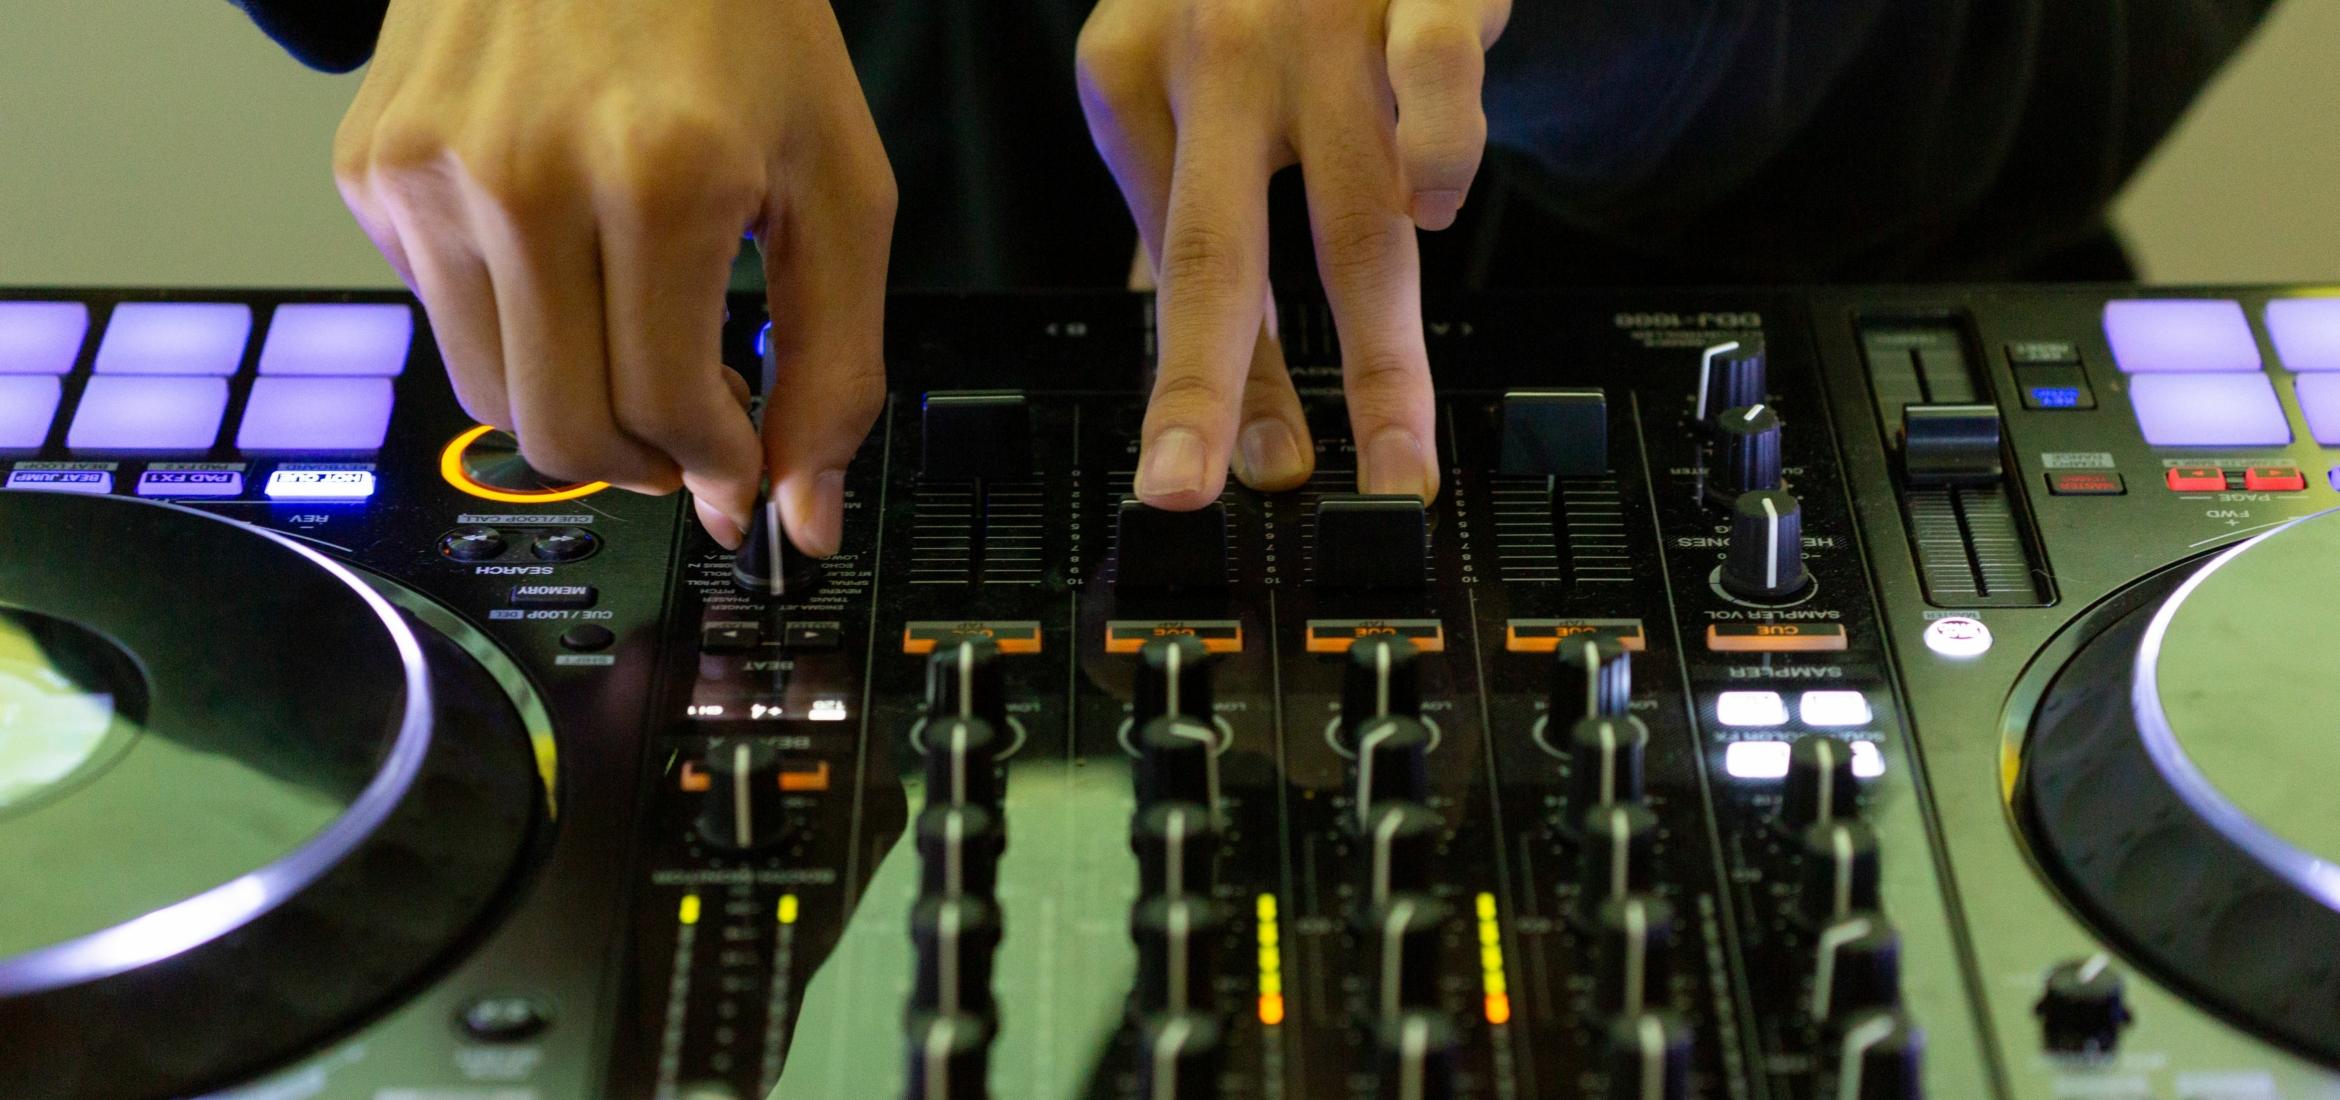
Building a DJ studio setup does not require a club-sized sound system or a room full of expensive decks. A computer, a suitable DJ controller, reliable headphones, and a pair of well-positioned speakers can give you everything you need to practice transitions, prepare sets, record mixes, and develop your own style.
However, buying equipment is only part of the job. Your room, speaker position, listening volume, cables, workflow, and even the height of your table can affect how enjoyable your setup feels.
This guide explains how to build a practical home DJ studio from the ground up. We will start with the essential equipment and gradually move into monitoring, acoustics, gain staging, recording, and future upgrades.
Table of Contents
- DJ Studio Setup Essentials
- Speakers and Monitors for Home DJs
- for Your Home DJ Studio
- Gain Staging, Recording, and Safe Listening
- Putting It All Together: Example Home DJ Studio
- Final Thoughts on Building a DJ Studio Setup
DJ Studio Setup Essentials
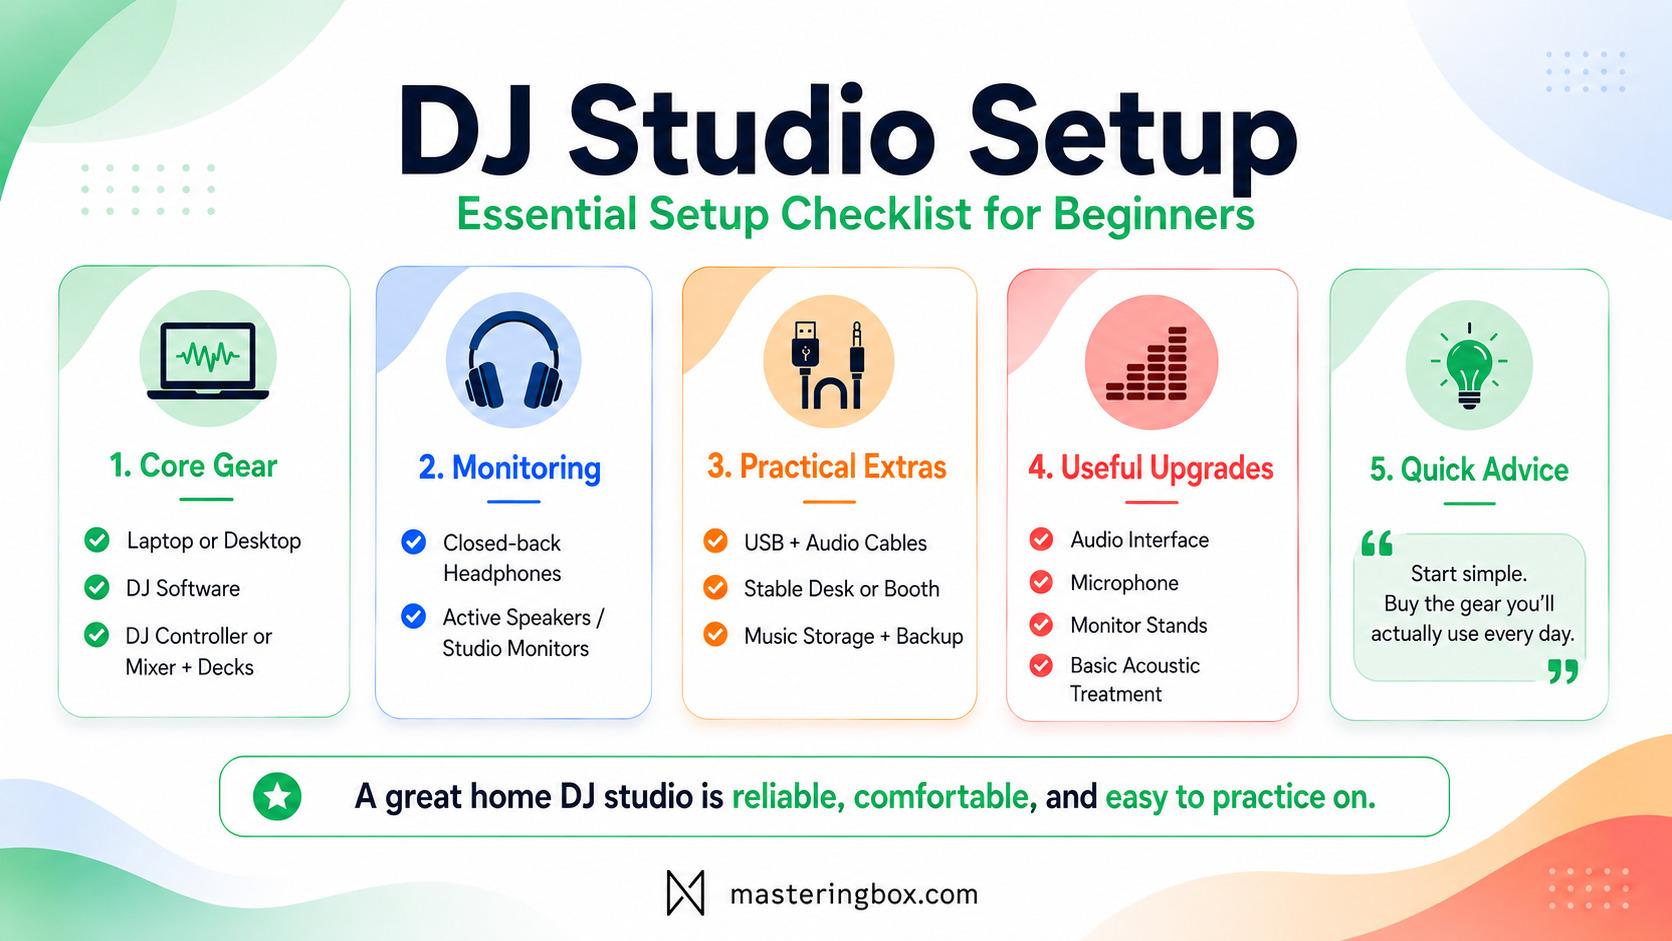
A good DJ studio setup should make it easy to start mixing. You should not need to reconnect six devices, troubleshoot drivers, or move furniture every time inspiration appears. At a minimum, most home DJs need:
- A laptop or desktop computer
- DJ software
- A DJ controller or a mixer with separate decks
- Closed-back headphones
- A pair of active speakers or studio monitors
- The correct audio and USB cables
- A stable table or DJ booth
- Enough storage for a growing music library
You may also want an audio interface, microphone, monitor stands, acoustic treatment, backup drives, and lighting. However, these are upgrades rather than essential starting points.
The best approach is to buy the equipment that directly improves your practice sessions. A more expensive setup will not automatically improve your transitions, track selection, phrasing, or ability to read a dance floor.
DJ Controller or Mixer and Decks
The controller, mixer, and decks form the physical center of your DJ studio setup. This is where you control playback, adjust tempo, cue tracks, use EQ, create loops, trigger effects, and blend one song into another.
For most beginners, a DJ controller is the simplest choice. It combines two or more deck controls with a mixer section in one device. Most controllers also include an integrated audio interface, allowing them to send separate signals to your headphones and speakers.
A traditional modular setup works differently. The mixer and playback devices are separate. You might connect two turntables, CDJs, media players, or another combination of audio sources to the mixer.
For a deeper comparison, read our guide to the differences between a DJ controller and DJ mixer.
When a DJ Controller Makes Sense
A controller is usually the best starting point when you want a compact, affordable, and straightforward system. Choose a controller when:
- You already own a suitable laptop.
- You want to practice in a bedroom or small office.
- You need something portable.
- You want access to loops, effects, performance pads, and stems.
- You do not need to connect several external players.
- You are still deciding which style of DJing interests you most.
Compact controllers can still teach the core skills used on professional equipment. Tempo control, cueing, EQ, gain adjustment, phrasing, and track preparation all transfer to larger systems.
The controls may feel smaller, but the musical decisions remain the same.
When a Modular Setup Makes Sense
A separate mixer and decks become more useful when you already know what equipment you want to use. A modular system may be better when:
- You want to mix vinyl.
- You want a layout closer to a professional DJ booth.
- You regularly switch between turntables and digital players.
- You want four or more physical channels.
- You prefer upgrading one component at a time.
- Other DJs will bring their own playback devices.
The downside is cost. A mixer may appear affordable on its own, but you still need players, cartridges, slipmats, cables, cases, and potentially additional storage furniture.
For a first DJ studio setup, I would invest in a solid controller and good monitoring before building a full club-style system. Hearing your mixes clearly will usually help you more than owning expensive media players.
Computer and DJ Software
Your computer stores your music library, analyzes tracks, runs the DJ application, and may also record or stream your performances.
You do not need the most powerful computer available. However, it should run your chosen software reliably without audio interruptions. Before buying a controller, check:
- Which operating systems it supports
- Which DJ applications can control it
- Whether a software license is included
- Whether advanced features require a subscription
- How many USB ports you need
- Whether your computer uses USB-A or USB-C
- Whether your computer can run stems and real-time effects smoothly
Software requirements change over time. Therefore, check the current Serato system requirements or the official requirements for your chosen application instead of relying on an old list of processor and memory recommendations.
For reliable sessions, close unnecessary applications and connect the laptop to power. Disable notifications, automatic backups, and system updates while recording or performing.
It is also worth organizing your tracks before buying more equipment. Clean metadata, consistent genres, cue points, beat grids, and playlists can improve a set more than another effects unit.
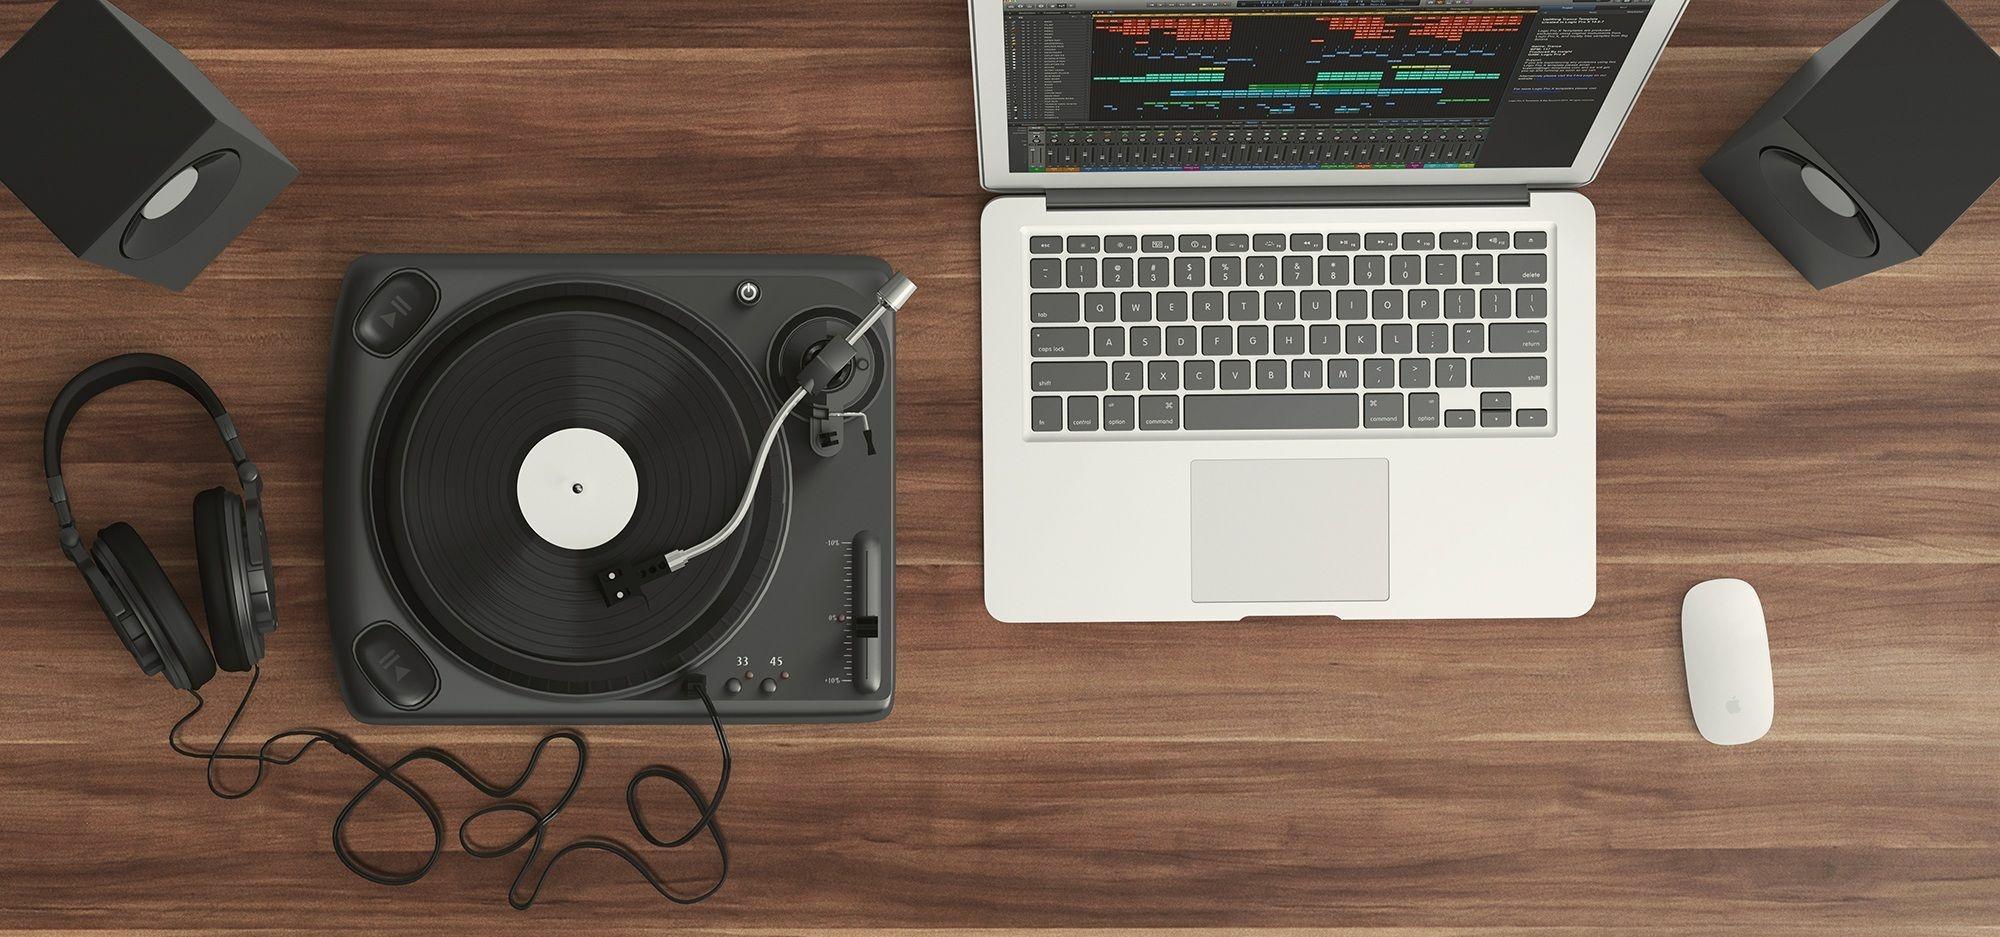
Headphones, Audio Interface, and Cables
Headphones and cables may seem less exciting than a new controller, but they have a direct effect on every practice session.
Your equipment needs to communicate reliably. A damaged headphone cable or noisy connection can quickly ruin an otherwise good setup.
DJ Headphones
DJ headphones should be comfortable, durable, and able to isolate your cue signal from the speakers.
Closed-back headphones are generally the most practical choice. They reduce outside sound and make it easier to hear the incoming track without turning the headphone level excessively high. Look for:
- Replaceable ear pads and cables
- Strong hinges
- Comfortable clamping pressure
- Good isolation
- Clear kick and snare transients
- A cable that suits your mixing position
- Swiveling ear cups if you mix with one ear uncovered
A perfectly neutral frequency response is less important for cueing than clear timing information. You need to hear whether two kicks are aligned and whether the incoming track is drifting.
For long practice sessions, comfort becomes extremely important. A headphone that sounds impressive for five minutes can become painful after an hour.
Do You Need an Audio Interface?
Many DJs buy an audio interface even though their controller already contains one.
In most controller-based setups, an additional interface is unnecessary. The controller can usually send the master output to the speakers while providing a separate headphone cue. An external audio interface becomes useful when you want to:
- Record microphones or instruments
- Connect studio equipment independently of the controller
- Route several audio sources into streaming software
- Use a mixer that has no USB recording connection
- Produce music in the same room
- Improve the input and output options of your computer
Choosing the Correct Cables
Your required cables depend on the outputs of your controller and the inputs of your speakers. Entry-level controllers often use RCA outputs. Larger controllers and mixers may include balanced XLR or TRS outputs.
Balanced connections are preferable over longer cable runs because they are less likely to pick up hum and interference. However, a short RCA connection can work perfectly well in a simple bedroom setup.
Keep audio cables away from large power supplies where possible. Label both ends and leave enough slack to move equipment without pulling on the sockets.
A small box containing spare USB, RCA, XLR, and headphone adapters can save a session when one cable fails.
Speakers and Monitors for Home DJs
Speakers are one of the most important parts of a DJ studio setup. You use them to judge timing, EQ balance, bass interaction, transitions, and overall energy.
The goal is not simply to make the room loud. The goal is to hear useful detail at a sensible listening level.
Nearfield studio monitors are often a good option because they are designed to be heard from a relatively short distance. Active monitors are especially convenient because their amplifiers are built in.
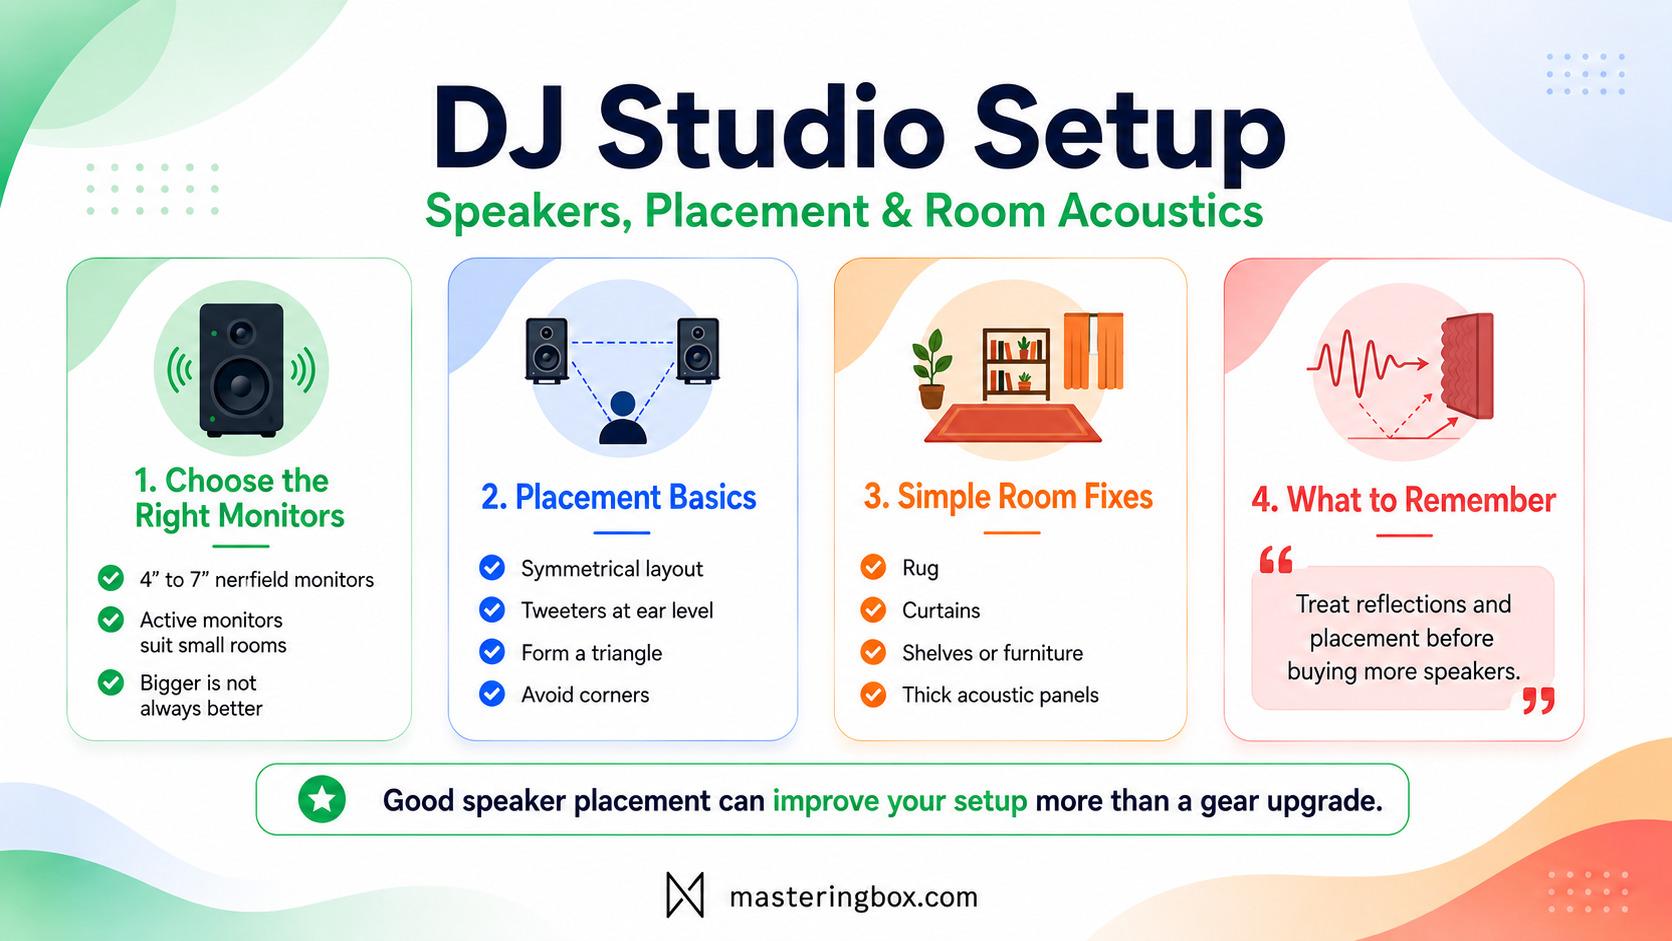
For most bedrooms and small offices, monitors with 4-inch to 7-inch woofers provide enough output. Larger speakers are not automatically better. In a small room, they may produce more low-frequency energy than the space can handle. Consider the following factors:
- Room size: Smaller rooms generally work better with smaller monitors.
- Listening distance: Nearfield monitors should be relatively close to you.
- Inputs: Confirm that the monitors accept your controller’s output.
- Volume controls: Rear controls can be inconvenient in tight setups.
- Room EQ: Low- and high-frequency trim controls can help with placement problems.
- Port position: Rear-ported monitors may react more strongly when placed close to a wall.
- Price per unit: Many professional monitors are sold individually rather than as pairs.
You do not need perfectly flat mastering monitors to practice DJing. However, heavily hyped consumer speakers can hide problems. Excessive bass may make every transition feel powerful while masking overlapping kick drums and low-frequency clashes.
Speaker Placement Tips
Correct placement can improve inexpensive speakers more than replacing them with a larger model.
Before buying acoustic panels or calibration software, spend time adjusting the physical setup. Monitor placement and calibration is crucial. Start with these steps:
- Create a symmetrical layout: Keep the left and right speakers an equal distance from your usual mixing position.
- Aim the tweeters toward your ears: High frequencies become less consistent when you listen far above or below the tweeter.
- Form a triangle: The distance between the speakers should be similar to the distance from each speaker to your head.
- Avoid placing one speaker in a corner: Corners can exaggerate bass and destroy stereo balance.
- Use stands or isolation pads: This reduces vibration through the table and helps position the speakers correctly.
- Test several wall distances: Moving a monitor by 10 or 20 centimeters can noticeably alter the bass.
- Keep both speakers at the same height: Uneven height can pull the stereo image to one side.
When DJs stand rather than sit, standard desktop monitor positions are often too low. Raise the speakers or tilt them carefully toward your standing position.
Avoid placing both monitors directly on the same hollow table as the controller. Vibrations can travel through the furniture, exaggerating the low end and potentially reaching turntables.
Quick Tip: Play a familiar mono track and stand in your normal position. The main vocal, snare, or lead should appear directly in the center. If it leans to one side, check the speaker distances, gain controls, cables, and room symmetry.
Recommended Monitors for a Home DJ Studio
The right monitor depends on room size, available space, preferred volume, and whether you also produce music. Common options include:
- Compact 3-inch or 4-inch monitors: Good for very small rooms, apartments, and low-volume practice.
- Five-inch monitors: A versatile choice for bedrooms and modest studios.
- Six- or seven-inch monitors: Useful when you want more bass extension and have enough distance from the walls.
- DJ-focused speakers: Often tuned for more excitement and output than neutral studio monitors.
- Production monitors: Better when the room is also used for mixing and mastering music.
Popular ranges from Yamaha, KRK, JBL, Adam Audio, Kali Audio, Genelec, Pioneer DJ, and M-Audio cover many budgets. When possible, listen before buying. Take music you know well and compare the speakers at similar loudness levels. Louder speakers often appear more impressive even when they are not more accurate.
Should You Add a Subwoofer?
A subwoofer can make a home DJ studio feel more like a club. It can also create more problems than it solves.
Small rooms already have uneven bass. Adding a subwoofer may make one position sound enormous while another position has almost no bass. A sub makes more sense when:
- The monitors lack the low-frequency range you need.
- The room has some acoustic treatment.
- You can adjust crossover frequency, phase, and output level.
- You can position the sub independently.
- Noise will not disturb neighbors.
For most beginners, better monitor placement and headphones are more useful than adding a subwoofer. Learn how your main speakers behave first.
Room Acoustics for Your Home DJ Studio
A room changes the sound produced by your speakers. Sound reflects from walls, floors, windows, ceilings, furniture, and the table holding your DJ equipment.
These reflections combine with the direct speaker signal. At some frequencies they reinforce it. At others they partially cancel it. This is why bass can sound powerful in one corner and weak a few steps away.
You do not need to turn your bedroom into a professional recording studio. However, a few thoughtful changes can make your DJ studio setup clearer and more comfortable.
Pioneer DJ’s guide to improving the sound of a home DJ space provides additional examples of practical room adjustments. Start with the room itself:
- Add a rug: A rug helps reduce strong reflections from tile, wood, or concrete floors.
- Use thick curtains: Curtains can soften reflections from large windows and bare walls.
- Move the speakers: Test different distances from the front wall before buying treatment.
- Add irregular surfaces: Shelves, records, books, and furniture can scatter reflections.
- Treat first-reflection points: Panels beside the listening position can improve stereo clarity.
- Use thick absorption: Bass problems require deeper material than thin decorative foam.
- Treat corners carefully: Thick corner traps can help control low-frequency buildup.
- Avoid perfect symmetry in furnishings: Some variation behind and around the listening area can reduce obvious echoes.
Thin foam mainly affects high frequencies. Covering every wall in it can make the room sound dull while leaving the bass almost unchanged.
For broadband absorption, thicker mineral wool, fiberglass, or purpose-built acoustic panels are more effective. Place them where they solve a measurable or clearly audible problem rather than decorating the walls randomly.
Acoustic Treatment Is Not Soundproofing
Acoustic treatment improves the sound inside the room. Soundproofing reduces the amount of sound entering or leaving it. They require different solutions.
Foam, rugs, curtains, and acoustic panels may reduce some high-frequency leakage, but they will not stop powerful bass from reaching the next room. Effective soundproofing requires mass, airtight construction, isolation, and control of structural vibration.
In an apartment, the most realistic approach is usually:
- Practice at moderate volume.
- Use headphones during quiet hours.
- Move speakers away from shared walls.
- Isolate monitors and subwoofers from furniture and floors.
- Avoid placing your booth directly against a neighbor’s bedroom wall.
- Agree on reasonable practice times.
This approach is far cheaper than attempting incomplete soundproofing that still allows bass to pass through the building.
Gain Staging, Recording, and Safe Listening
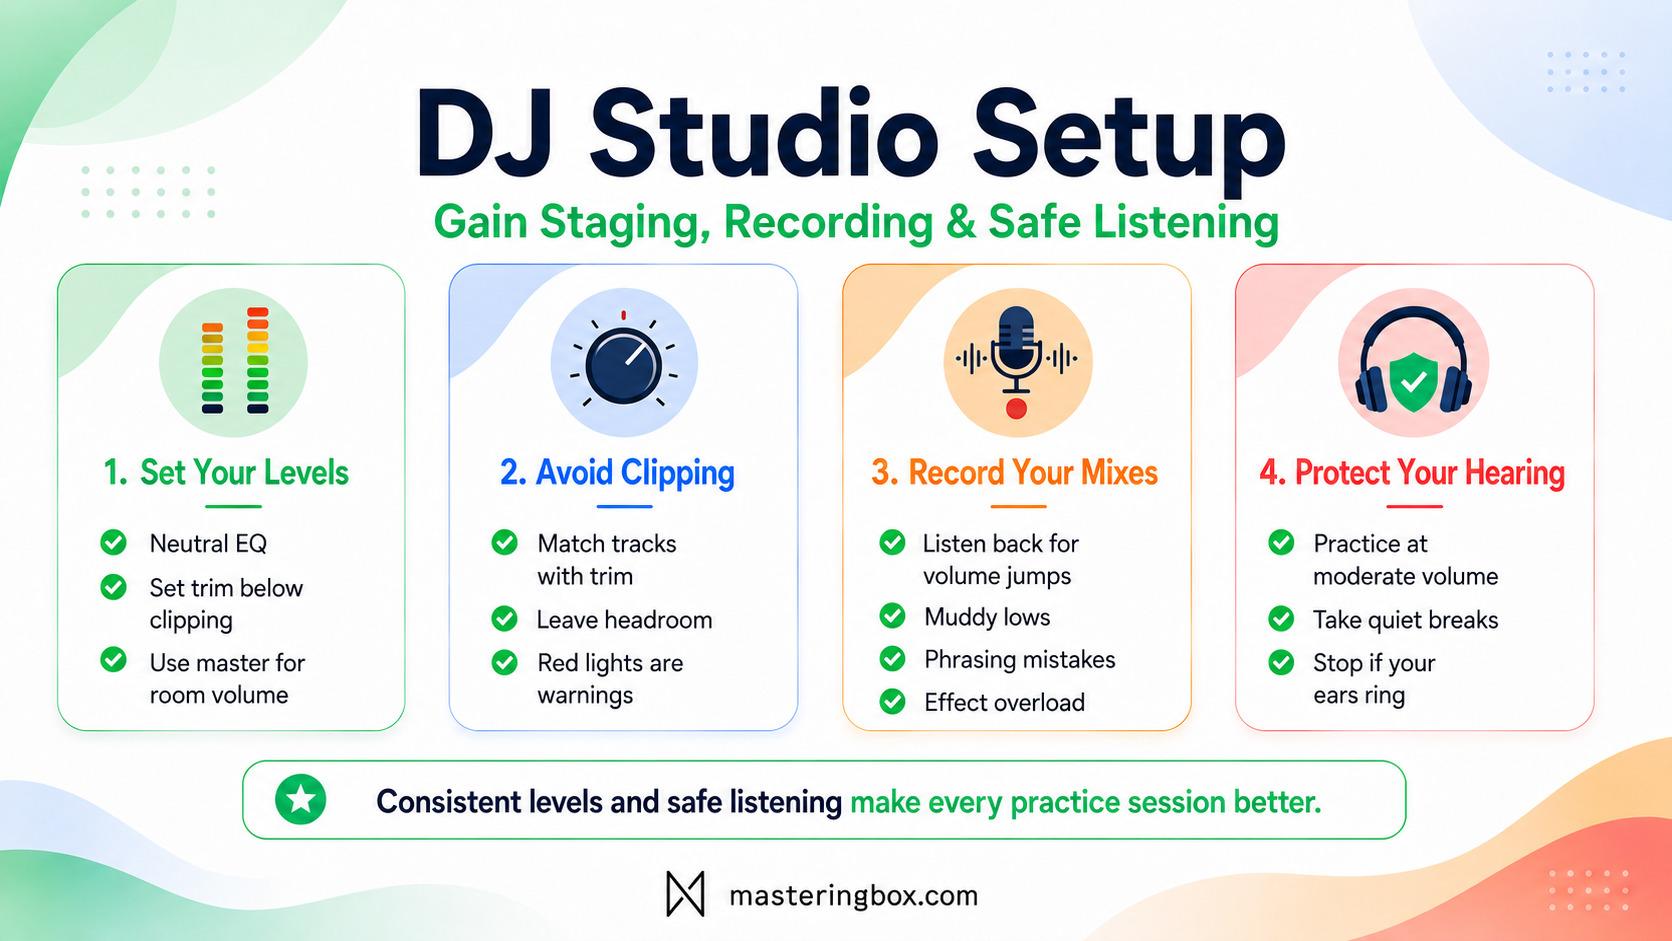
Once the equipment is connected, you need to control how the audio moves through the system. Correct gain staging gives you enough volume without clipping the controller, mixer, recording input, or speakers. It also makes your transitions more consistent.
A Simple DJ Gain-Staging Workflow
Gain staging can appear technical, but the basic process is straightforward. Use this workflow:
- Set the speaker input controls to a sensible fixed position.
- Load a normally mastered track.
- Set the channel EQ controls to their neutral positions.
- Adjust the channel trim so the loudest sections remain below clipping.
- Keep the channel fader near its normal working position.
- Use the master control to set the room volume.
- Match incoming tracks with the channel trims rather than pushing every meter into the red.
- Check the recording level separately if you are capturing the set.
Red lights are warnings, not targets. A louder channel may initially feel more energetic, but clipping reduces headroom and can make long sessions harsh.
Use your ears as well as the meters. Two tracks can show similar peak levels while feeling very different in loudness because of their dynamics and frequency balance.
Recording Your DJ Mixes
Recording yourself is one of the fastest ways to improve.
During a live mix, your attention is divided between track selection, timing, controls, and preparation. When you listen back later, problems become much easier to notice. Check for:
- Transitions that are too long
- Bass frequencies fighting each other
- Sudden volume changes
- Effects that dominate the mix
- Tracks entering at the wrong point in the phrase
- Overuse of filters
- Sections where the energy drops unintentionally
- Distortion caused by excessive gain
Some DJ applications record internally. Other systems can send audio through USB or into an external interface.
Record at a safe level with available headroom. You can increase the final playback level afterward, but you cannot properly repair a recording that clipped throughout the set.
Protect Your Hearing
Your DJ studio setup should be designed to be used at sustainable loudness levels, not encourage you to practice at club volume every evening.
Hearing risk depends on both level and exposure time. The louder you listen, the shorter the safe exposure period becomes. CDC and NIOSH guidance explains how noise exposure can cause permanent hearing damage. For safer sessions:
- Practice at moderate volume.
- Take quiet breaks.
- Do not increase headphone volume every time the speakers become louder.
- Use isolation to hear the cue signal more clearly.
- Keep speakers close enough that you do not need excessive output.
- Stop and rest if your ears ring or sound becomes muffled.
- Consider musician-style earplugs for clubs and events.
A useful test is to turn the system down for a few minutes. When you return to the previous level, it may suddenly seem much louder than it did before. Your hearing adapts during a session, which can tempt you to keep increasing the volume.
Putting It All Together: Example Home DJ Studio
A beginner setup should be simple enough to use every day while leaving room for future upgrades. Here is an example:
- Controller: A compact two-channel controller with an integrated audio interface
- Computer: A reliable laptop that meets the current requirements of your DJ software
- Software: The application supported by your controller and preferred workflow
- Monitors: A pair of active 4-inch to 6-inch nearfield monitors
- Headphones: Durable closed-back DJ headphones
- Furniture: A stable table at a comfortable standing height
- Speaker support: Two stands or isolation pads
- Cables: USB plus the appropriate RCA, TRS, or XLR connections
- Storage: A main music drive and a separate backup
- Room treatment: A rug, curtains, furnishings, and one or two thick acoustic panels
- Extras: Cable ties, adapters, a power strip, and a small light
Place the monitors symmetrically, aim them toward your ears, and keep the controller centered. Secure cables so they cannot be pulled out while you move.
Create a permanent charging and backup routine. The equipment should be ready when you are. A setup that requires 20 minutes of preparation will discourage short practice sessions.
The Best Upgrade Order
Upgrade the part of the system that limits you most. A sensible order is:
- Reliable headphones
- Better speaker placement
- Active monitors
- Stable furniture and monitor stands
- Music storage and backups
- Basic room treatment
- A more advanced controller or modular system
- Recording and streaming equipment
- A subwoofer, only when the room can support it
This order will not suit everyone. A vinyl DJ may prioritize turntables and cartridges. A streaming DJ may need a microphone and video equipment sooner.
However, many beginners spend too much on the controller and too little on the equipment that lets them hear it properly.
Remember: Your first home DJ studio does not need to imitate a festival booth. It needs to be reliable, comfortable, and easy to practice on.
Final Thoughts on Building a DJ Studio Setup
A successful DJ studio setup is not defined by how much equipment it contains. It is defined by how easily it lets you practice, experiment, record, and improve.
Start with a controller, headphones, suitable software, and the speakers you already own. Then improve the monitoring position, add proper speakers, organize your library, and treat the room gradually.
Spend money where it solves a genuine problem. Better placement may fix unclear monitoring. Better headphones may improve cueing. A backup drive may protect years of playlists and preparation.
Most importantly, use the studio. Record mixes, listen back, test transitions, build playlists, and learn how different tracks behave together.
A modest but well-designed home DJ studio can teach you the same fundamental skills you will use on a professional system. The gear provides the tools. Regular, focused practice turns those tools into a confident DJ performance.
Über die Autorin / den Autor

Dídac
CEO & Gründer von MasteringBOXDídac ist professioneller Audioingenieur, Musikproduzent und Softwareentwickler. Er ist der Gründer von MasteringBOX und Autor zahlreicher Artikel im Blog.
Hinterlasse einen Kommentar
Einloggen, um zu kommentieren

 English
 Español
 Français
 Italiano
 Deutsch
 Português
 Nederlands
 Svenska
 Polski
 Čeština